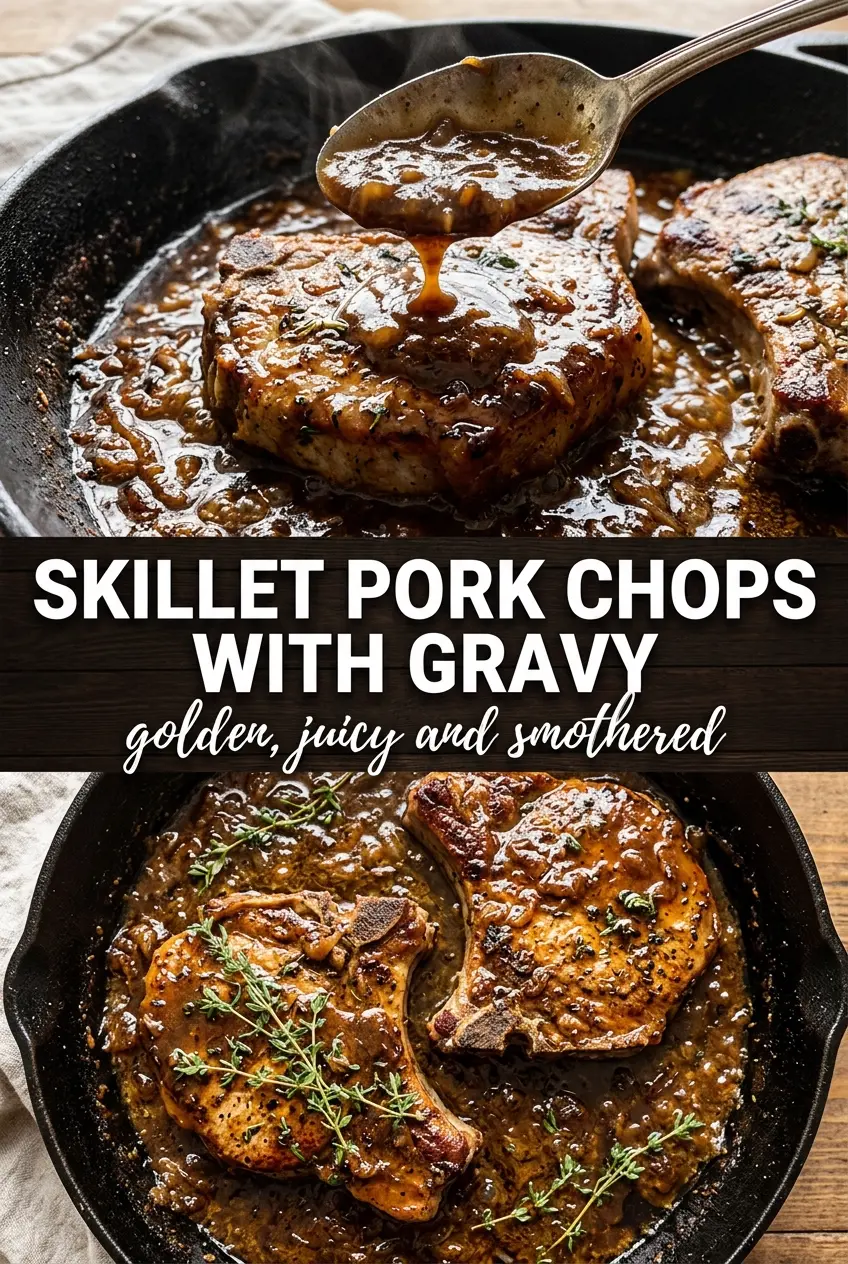
Pork chops with gravy land on the table with the kind of comfort that makes everyone quiet for a minute. The chops stay browned on the outside, tender in the middle, and the pan gravy picks up every bit of flavor left behind in the skillet. It’s the sort of dinner that tastes like it took all afternoon, even though it comes together fast enough for a regular weeknight.
The key is using the same pan for everything. Those browned bits from searing the pork turn into the backbone of the gravy, and the onion cooks long enough to sweeten without disappearing. A light flour dredge helps the chops brown and gives the gravy a little extra body, but the real difference comes from whisking the broth in slowly so the sauce stays smooth instead of turning lumpy.
Below, I’ll walk through the part that matters most: how to build a deep, savory gravy without burning the bottom of the pan, plus the swaps that still work if you need to stretch the recipe or change the cut of pork.
The gravy thickened up beautifully and the pork stayed juicy instead of drying out. I served it over mashed potatoes, and my husband went back for seconds just for the sauce.
Save these skillet pork chops for the night you want tender chops and rich homemade gravy without dirtying extra pans.
The Secret to Gravy That Stays Smooth After the Pork Comes Back In
The common mistake here is rushing the gravy base. If the flour doesn’t cook for at least a minute, the sauce can taste pasty; if the broth goes in all at once without whisking, you’ll get little lumps that never fully disappear. The pan needs enough heat to loosen the browned bits, but not so much that the flour scorches before the liquid hits the skillet.
Once the broth is in, the gravy should go from thin and cloudy to glossy and spoon-coating in a few minutes. That’s the moment to return the pork chops. If you add them too early, the sauce won’t have time to thicken properly, and if you boil them hard, the chops can tighten up and lose the juiciness you worked to keep.
What Each Ingredient Is Actually Doing in This Skillet Dinner

- Bone-in pork chops — Bone-in chops hold up better during the final simmer and stay a little juicier than thin boneless chops. If you only have boneless, cut the simmering time back a bit so they don’t dry out.
- Flour — The light dredge helps the pork brown and gives the gravy its body. Use a thin coating, not a heavy crust, or the pan drippings will turn gummy instead of savory.
- Onion and garlic — These build the sweet-savory base of the gravy. Onion matters more than garlic here; the garlic is there for depth, but it burns fast, so it only needs a few seconds in the pan.
- Chicken broth, Worcestershire, and thyme — Broth provides the liquid, Worcestershire adds a deep salty tang, and thyme keeps the gravy tasting like old-fashioned pan gravy instead of plain brown sauce. If your broth is low-sodium, season at the end after the gravy reduces.
- Butter and oil — Oil gives you the higher heat you need for searing, while butter adds flavor when you start the gravy. That combination keeps the pork browned without losing the richness that makes the sauce taste homemade.
Building the Sear Before the Gravy Takes Over
Seasoning and Dredging the Chops
Pat the pork chops dry before seasoning them. Moisture on the surface keeps them from browning, and brown is what you want here because it sets up the flavor for the gravy. The flour coating should look dusty, not thick and caked on; too much flour will slide off into the pan and make the drippings pasty.
Getting a Deep Brown Crust in the Skillet
Heat the oil until it shimmers, then lay the chops in without crowding the pan. You should hear an active sizzle right away. If the pan is packed, the chops steam instead of sear, and you lose the browned fond that makes the gravy taste like it came from a proper Sunday supper.
Turning Drippings Into Gravy
Once the chops come out, add the butter and onion to the same skillet and scrape up the browned bits as the onion softens. The flour needs a full minute to cook in the fat, and then the broth should go in slowly while you whisk. The gravy is ready when it coats the back of a spoon and the raw flour smell is gone.
Finishing the Chops in the Sauce
Return the pork chops to the gravy and cover the skillet. Keep the heat low enough that the liquid stays at a gentle simmer, not a hard boil. The pork should finish cooking in the sauce without the gravy breaking or reducing down too far; when the chops are cooked through, the meat should feel firm but still give a little when pressed.
How to Adjust These Pork Chops Without Losing the Gravy
Use boneless pork chops instead
Boneless chops work, but they cook faster and dry out more easily. Sear them the same way, then shorten the covered simmer so they finish just through the center. The gravy will still be rich, but you’ll want to watch the texture a little more closely.
Make it gluten-free without losing body
Swap the flour for a gluten-free all-purpose blend that can be used for dredging and thickening. The gravy may thicken a touch differently, but if you whisk it well and let it simmer for the full few minutes, it still turns smooth and spoonable.
Make it dairy-free
Skip the butter and use a little more oil to start the gravy. You’ll lose a bit of richness, but the onion, broth, and browned drippings still carry the dish. Taste at the end and add a little extra salt if needed, since butter usually softens the edges of the seasoning.
Stretch it for more people
You can increase the broth slightly and add another small onion if you want more gravy for mashed potatoes or rice. Just keep the pan hot enough for the sauce to reduce back down, or you’ll end up with a thin, brothy gravy instead of one that clings to the pork.
Storage and Reheating
- Refrigerator: Store the chops and gravy together for up to 3 days. The gravy will thicken as it chills.
- Freezer: It freezes fairly well in an airtight container for up to 2 months, though the gravy may need a good whisk after thawing.
- Reheating: Reheat gently on the stove over low heat with a splash of broth or water. High heat can tighten the pork and make the gravy separate, so keep it at a bare simmer until warmed through.
Answers to the Questions Worth Asking
Skillet Pork Chops with Gravy
Ingredients
Equipment
Method
- Season the bone-in pork chops with salt, pepper, and garlic powder to taste, then dredge lightly in the 2 tablespoons flour (for dredging). Aim for a thin coating so the crust stays golden.
- Heat the oil in a cast iron skillet over medium-high heat, then sear the chops for 4–5 minutes per side until golden. Remove the chops from the pan and keep any browned bits in the skillet.
- Melt the butter in the same pan, then cook the diced onion for 3 minutes. Scrape up any browned drippings as the onion softens.
- Add the minced garlic and cook for 30 seconds, stirring to avoid burning. The mixture should smell fragrant without browning too hard.
- Sprinkle in the 2 tablespoons flour (for gravy) and cook for 1 minute, stirring. The flour should look slightly nutty, not raw.
- Whisk in the chicken broth, Worcestershire sauce, and dried thyme until smooth. Keep whisking until no lumps remain.
- Simmer the gravy for 4–5 minutes until thickened. It should coat the back of a spoon.
- Return the pork chops to the gravy, cover, and simmer for 8–10 minutes until cooked through. Serve the chops with mashed potatoes and spoon the thick brown gravy over top.


