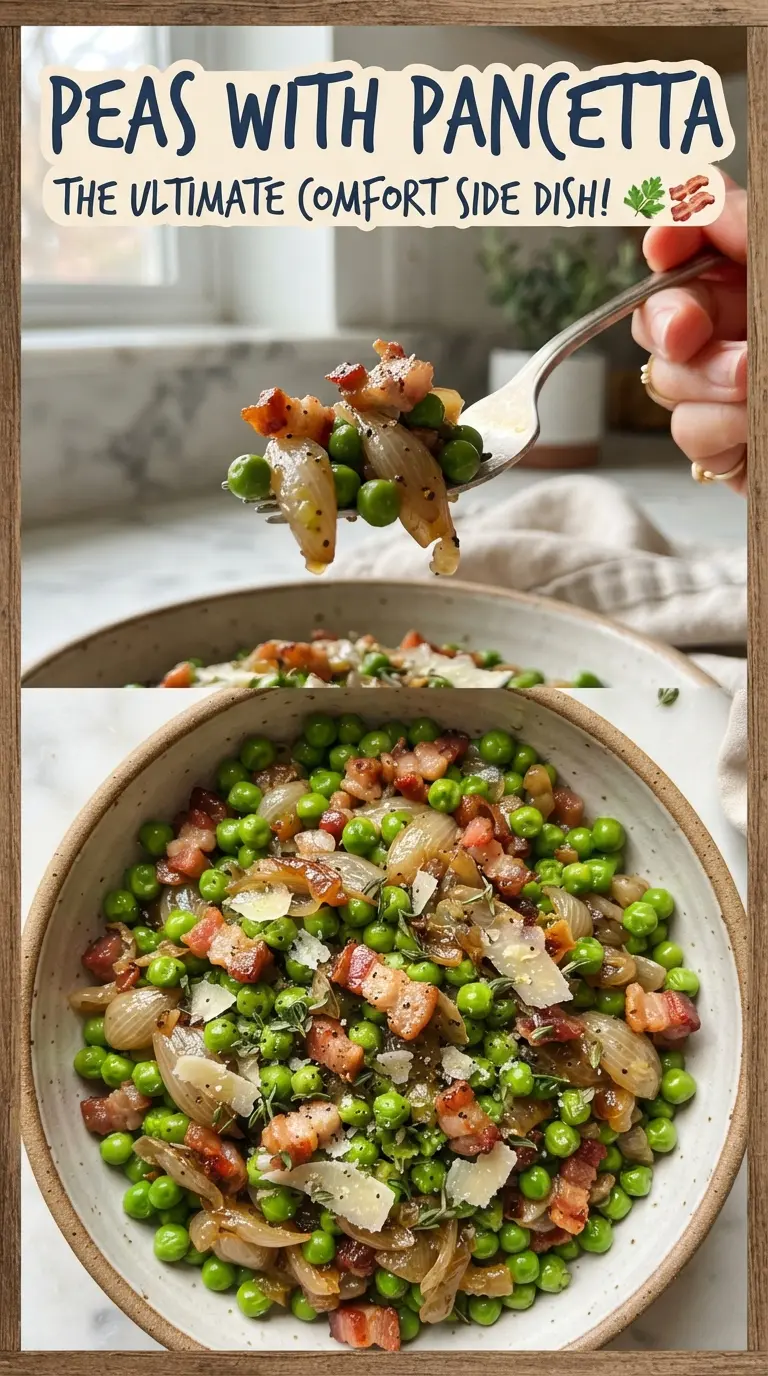
Bright sweet peas and crisp pancetta make the kind of side dish that disappears before the main course is finished. The peas stay tender and vivid green, the pancetta brings salt and crunch, and the little bit of butter at the end gives the pan juices just enough body to coat everything instead of leaving it watery. It tastes polished, but it comes together fast enough for a Tuesday night.
This version works because the pancetta gets its own time in the pan before anything else goes in. That rendered fat carries the shallot and garlic, so the flavor starts deep instead of flat. A splash of broth keeps the peas from drying out, and the lemon zest at the end keeps the whole dish from leaning too heavy. Use frozen peas straight from the freezer. They hold their color better than peas that sit around thawing on the counter, and they’re usually sweeter than most fresh peas you can find outside a short season.
Below, I’ve included the small details that matter most: when to pull the pancetta so it stays crisp, how to keep the peas bright, and a few smart swaps if you need to work with what’s in the fridge.
The peas stayed bright and the pancetta stayed crisp even after I stirred in the butter. I served it with roast chicken and my husband kept sneaking bites from the skillet.
Save these peas with pancetta for a fast side dish with crisp edges, lemony finish, and enough texture to stand up next to roast chicken or fish.
The Key to Keeping the Peas Sweet, Not Mushy
The biggest mistake with peas and pancetta is cooking the peas until the skillet runs dry and the color turns dull. Frozen peas only need enough heat to thaw through and pick up the salty fat in the pan. Once they go soft and lose that fresh pop, the dish starts tasting heavy instead of clean.
The broth is there to create a little steam and loosen the browned bits from the pancetta, not to turn this into a saucy side. Let it cook off mostly before you add the butter. That’s what keeps the final texture glossy instead of soupy.
- Pancetta — This is the backbone of the dish. It renders enough fat to season the peas without needing much else, and its texture stays better than bacon if you want cleaner, less smoky flavor.
- Frozen sweet peas — These are the right choice here. They cook evenly, stay bright, and don’t need thawing first. Fresh peas work too if they’re tender and in season, but frozen usually gives more consistent results.
- Chicken broth — Just a small splash keeps the pan from scorching and helps the peas heat through without overcooking. Vegetable broth works if that’s what you have, but the savory depth is a little lighter.
- Butter and lemon zest — The butter rounds out the salty pancetta, and the zest lifts the whole dish at the end. Don’t swap in lemon juice unless you want a sharper finish and a slightly thinner pan coating.
What Each Ingredient Is Actually Doing in This Recipe
- Primary ingredient (the star) — Quality matters most. Choose the best you can find.
- Cooking medium (oil, butter, or broth) — This carries flavors and prevents dryness.
- Seasonings (salt, pepper, spices, herbs) — Layer flavors so nothing overpowers. Build depth gradually.
- Aromatics (garlic, onion, herbs) — Cook with fat to bloom flavors. Become the foundation.
- Supporting ingredients — Complement the main ingredient without overpowering it.
- Sauce or liquid (if applicable) — Brings flavors together. Balance richness with acid.
- Acid (lemon, vinegar, wine, or other) — Brightens and prevents flat-tasting results.
- Final finish (garnish, glaze, or sauce) — Prevents one-dimensional taste and adds visual appeal.
Building the Pan So the Pancetta Stays Crisp
Rendering the Pancetta First
Start the pancetta in olive oil over medium heat and give it time to release its fat and brown properly. You want the cubes to turn crisp around the edges before anything else goes in; if they stay pale, the whole dish tastes greasy instead of savory. Pull out about half for topping before you add the shallot, because keeping every piece in the pan the whole time softens the texture.
Softening the Shallot and Garlic
Stir the shallot into the rendered fat and cook it until it turns translucent and sweet. Garlic only needs about 30 seconds; once it smells fragrant, move on. If the garlic browns, it turns bitter fast, and that bitterness will stand out in a dish this simple.
Heating the Peas Without Losing Their Color
Add the peas and broth together, then cook just until the peas are hot and bright green. The pan should still have a little movement, not boil itself dry right away. If the peas sit too long, they wrinkle and go olive-colored, which is the easiest way to lose the fresh taste this dish depends on.
Finishing With Butter and Herbs
Stir in the butter and lemon zest after the heat has done most of its work. The butter should melt into a light gloss, not separate into a pool at the bottom of the pan. Season at the end, then top with the reserved pancetta and fresh mint or parsley so the herbs stay lively and don’t disappear into the heat.
How to Adapt This for the Ingredients You Have
Make It Without Pancetta
Diced bacon works, but it will bring more smoke and a slightly heavier finish. For a pork-free version, use olive oil with a pinch of smoked paprika and a little extra salt. You won’t get the same richness, but the peas will still taste bright and savory.
Dairy-Free Version
Skip the butter and finish with an extra drizzle of olive oil instead. The dish will be a little less rounded, but the pancetta fat still carries plenty of flavor. Add the lemon zest at the end so the finish stays fresh.
If You’re Using Fresh Peas
Fresh peas need less time than frozen ones, so add them after the shallot and cook just until tender. They’ll taste a little sweeter and more delicate, but they can go from perfect to mealy quickly. Taste one before you finish the pan so you catch them at the right texture.
Storage and Reheating
- Refrigerator: Store leftovers in an airtight container for up to 3 days. The peas will soften a little, and the pancetta loses some crispness.
- Freezer: Freezing isn’t ideal. The peas turn a bit watery when thawed, and the pancetta won’t stay crisp.
- Reheating: Warm gently in a skillet over low heat with a tiny splash of broth or water. Microwaving works in a pinch, but it softens the pancetta and pushes the peas past their best texture.
Questions I Get Asked About This Recipe

Peas with Pancetta
Ingredients
Equipment
Method
- Heat a cast iron skillet with olive oil over medium heat and cook the pancetta for 6-8 minutes, stirring occasionally, until crisp and golden. Remove half of the pancetta to a small plate for topping.
- Add the minced shallot to the skillet and cook for 2 minutes, stirring, until softened. Stir in the minced garlic and cook for 30 seconds until fragrant.
- Add the frozen sweet peas and chicken broth to the skillet and cook for 4-5 minutes, stirring once or twice, until the peas are bright green and hot.
- Stir in the butter and lemon zest until the butter melts and coats the peas. Season with salt and pepper to taste.
- Top the peas with the reserved pancetta and chopped fresh mint or parsley, then serve immediately.