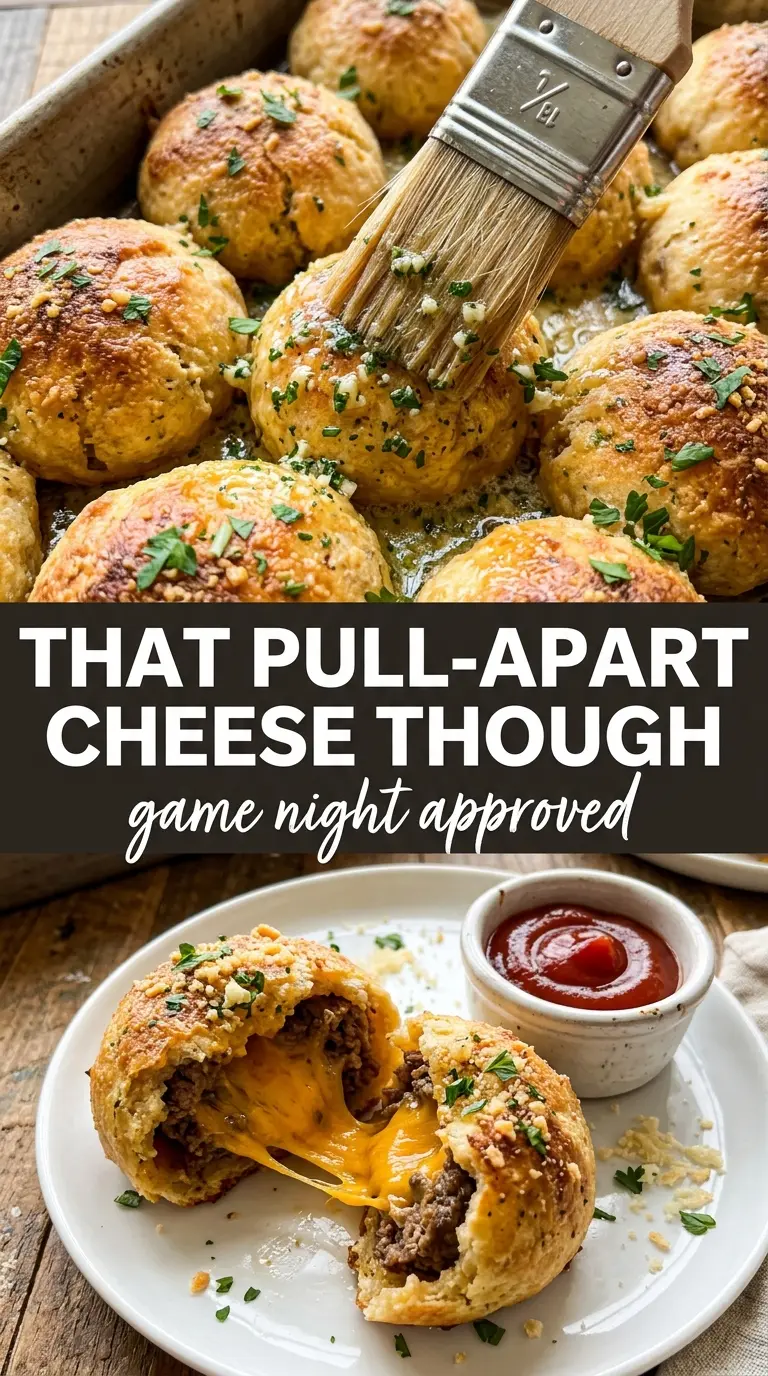
Garlic Parmesan Cheeseburger Bombs bake into a deep golden shell with a soft, pull-apart crumb and a center that hits all at once: savory beef, melted cheddar, and that garlicky parmesan butter on top. They disappear fast because they eat like a cross between a cheeseburger and a warm stuffed roll, which is exactly why they work so well for game day, parties, or any night when finger food needs to feel a little more special.
The trick is keeping the filling flavorful but not wet. The beef gets browned, drained, and cooled just enough so it doesn’t steam the biscuit dough from the inside. The cheese goes in as a cube or folded slice, which gives you a real melt instead of getting lost in the meat. Brushing the bombs before and after baking builds that glossy, savory finish that makes people reach for a second one before they’ve finished the first.
Below you’ll find the step that keeps these sealed, the ingredient choices that matter most, and a few ways to adapt them if you need to work with what you’ve got.
The filling stayed juicy, the biscuit sealed up without leaking, and that garlic parmesan butter on top took them over the top. I served them hot from the oven and there wasn’t a single one left.
Save these Garlic Parmesan Cheeseburger Bombs for the next time you need a hot, cheesy appetizer with a crisp golden crust and a buttery garlic finish.
The Part That Stops the Bombs From Bursting Open
These work because the filling is cooked before it goes into the dough, and that matters more than most people think. Raw onion and undercooked beef release moisture in the oven, and moisture is what turns a sealed biscuit into a split, soggy mess. Once the beef is browned and the pan is drained, the filling behaves like a proper stuffing instead of a steam engine.
The other piece that matters is the seal. Biscuit dough stretches, but it doesn’t forgive a sloppy fold. If the edges aren’t pinched tightly and the seam isn’t placed down on the sheet pan, the cheese will push its way out as it melts. A snug seal and a hot oven give you that puffed, intact exterior with the filling still trapped inside.
- Ground beef — An 80/20 blend gives enough flavor without flooding the filling with fat. If you use something leaner, the bombs still work, but the filling won’t taste as rich.
- Refrigerated biscuit dough — This is what makes the recipe fast and sturdy. Crescent dough is softer and flakier, but it tears more easily, so biscuit dough gives you a cleaner seal and a better pull-apart bite.
- Cheddar — A cube of cheddar creates the melty center that makes these feel like cheeseburger bombs instead of meat-filled rolls. Pre-shredded cheese won’t melt into one dramatic pocket the same way.
- Garlic parmesan butter — Brush it on before baking for color and again after baking for shine and extra flavor. Fresh garlic gives the best punch here; jarred garlic tastes dull once it’s baked into butter.
What Each Ingredient Is Actually Doing in This Recipe
- Primary ingredient (the star) — Quality matters most. Choose the best you can find.
- Cooking medium (oil, butter, or broth) — This carries flavors and prevents dryness.
- Seasonings (salt, pepper, spices, herbs) — Layer flavors so nothing overpowers. Build depth gradually.
- Aromatics (garlic, onion, herbs) — Cook with fat to bloom flavors. Become the foundation.
- Supporting ingredients — Complement the main ingredient without overpowering it.
- Sauce or liquid (if applicable) — Brings flavors together. Balance richness with acid.
- Acid (lemon, vinegar, wine, or other) — Brightens and prevents flat-tasting results.
- Final finish (garnish, glaze, or sauce) — Prevents one-dimensional taste and adds visual appeal.
Building the Filling and Sealing It So Nothing Leaks
Brown the Beef Until the Pan Is Dry
Cook the beef with the diced onion over medium heat until the meat is no longer pink and the onion has softened. Drain off the excess fat before adding the garlic and Worcestershire sauce, because too much grease is the fastest way to weaken the dough. Let the filling cool for a few minutes so it doesn’t start melting the biscuit before it even hits the oven.
Flatten, Fill, and Pinch Firmly
Press each biscuit into a 4-inch round with your fingers, working from the center outward so the edges stay a little thicker. Spoon the beef into the middle, set the cheese on top or nestle it into the meat, then pull the dough up around the filling and pinch every seam shut. If you see even a small opening, pinch it again; that tiny gap is where melted cheese escapes.
Brush, Bake, and Finish Hot
Set the bombs seam-side down on a parchment-lined baking sheet, then brush generously with the garlic parmesan butter. Bake at 375°F until the tops are deep golden brown and the dough feels set, usually 15 to 18 minutes. Brush on the remaining butter as soon as they come out, while the surface is still hot enough to soak it in.
What to Change When You Need a Different Version
Turkey Burger Bombs
Swap the ground beef for ground turkey and add a small extra pinch of salt plus a little more Worcestershire so the filling doesn’t taste flat. Turkey runs leaner, so the filling will be a touch drier, but the garlic butter on top helps bring it back.
Gluten-Free Version
Use a gluten-free biscuit dough that bakes up in roughly the same size rounds. The seal can be a little more delicate, so work gently and keep the seam tucked underneath. The filling itself is already gluten-free if your Worcestershire sauce is certified gluten-free.
Spicy Cheeseburger Bombs
Add a little diced pickled jalapeño or a pinch of cayenne to the beef mixture for more heat. That gives you a sharper, more pub-style bite without changing the structure of the recipe, and the cheddar still melts cleanly around it.
Storage and Reheating
- Refrigerator: Store leftovers in an airtight container for up to 3 days. The biscuit softens a bit as it sits, but the flavor holds well.
- Freezer: These freeze well after baking. Cool completely, wrap individually, and freeze for up to 2 months.
- Reheating: Warm in a 350°F oven or air fryer until the centers are hot and the outside crisps back up. The mistake to avoid is the microwave alone, which softens the dough and makes the cheese filling unevenly hot.
Questions I Get Asked About This Recipe

Garlic Parmesan Cheeseburger Bombs
Ingredients
Equipment
Method
- Preheat the oven to 375°F and line a baking sheet with parchment.
- Brown the ground beef with the diced onion in a skillet, then drain off excess fat.
- Add the minced garlic and Worcestershire sauce to the browned beef and cook for 1 minute.
- Season with salt and pepper, then cook just until evenly combined and let the mixture cool slightly.
- Flatten each biscuit into a 4-inch round.
- Place a spoonful of the beef mixture and 1 cube of cheddar in the center of each biscuit.
- Pull the edges up and pinch tightly to seal into a ball, then place seam-side down on the baking sheet.
- Mix the garlic parmesan butter with the melted butter, minced garlic, grated parmesan, and chopped parsley.
- Brush generously with garlic parmesan butter, then bake 15–18 minutes until deep golden brown.
- Brush with the remaining garlic parmesan butter and serve immediately.