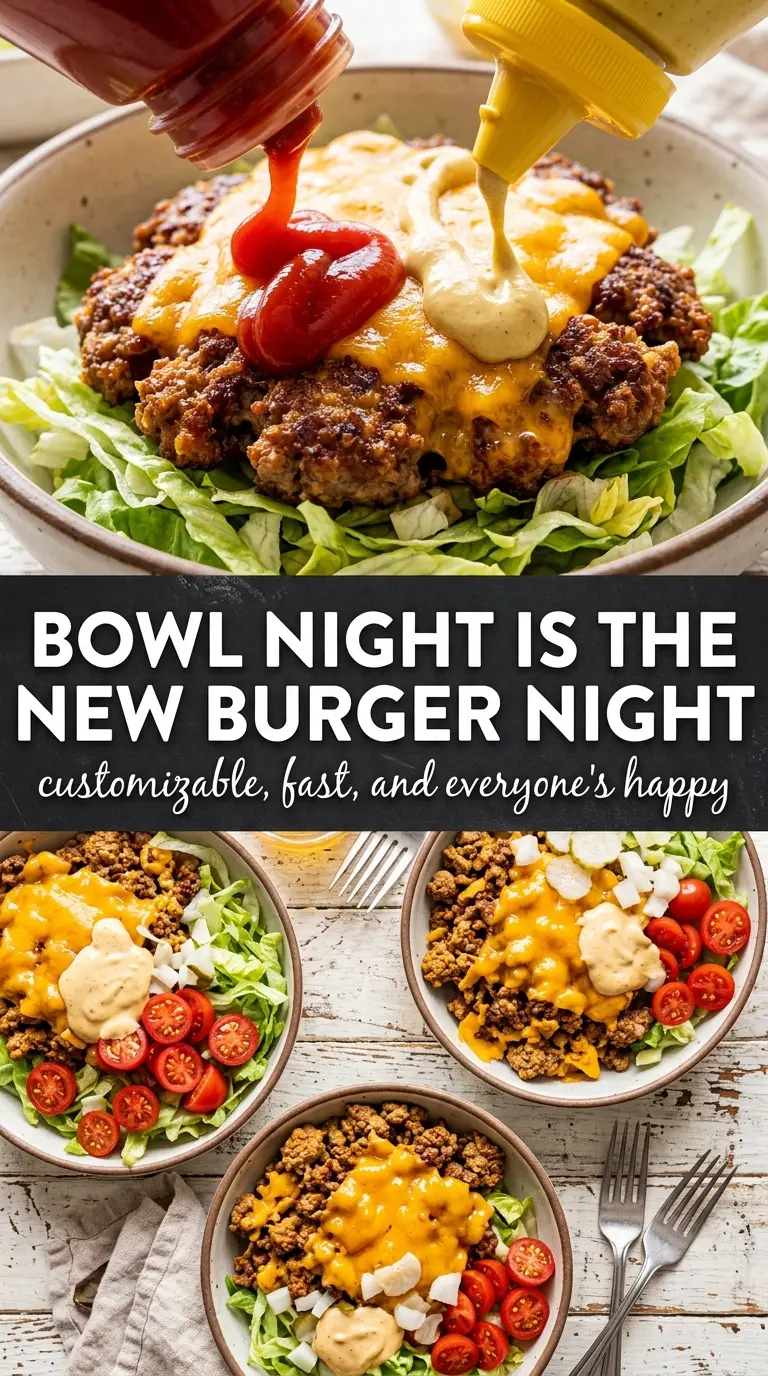
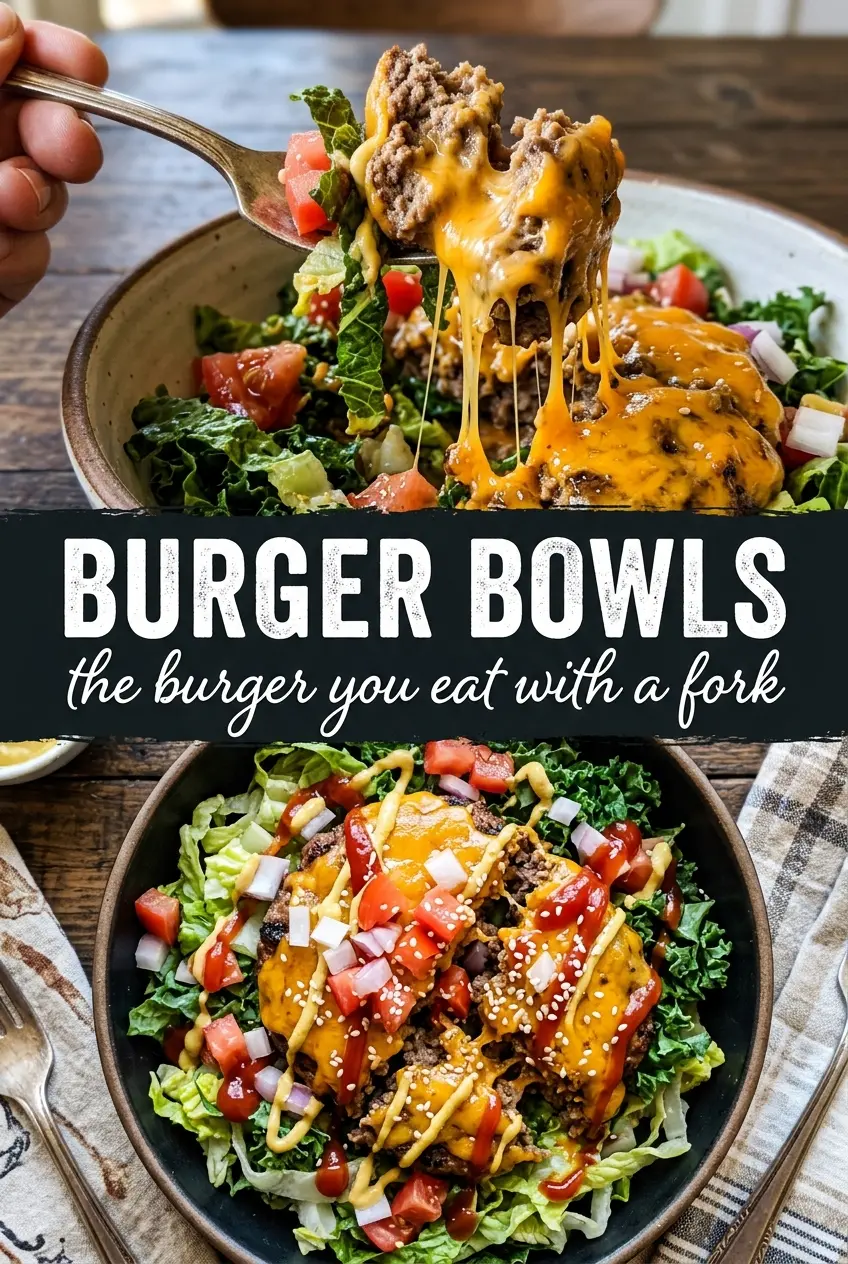
All the best parts of a cheeseburger land in one bowl here: juicy seasoned beef, crisp lettuce, sharp cheddar, pickles, avocado, and that creamy burger sauce tying everything together. It eats like a proper burger, but you get more crunch in every bite and none of the squished bun problem. The beef is cooked in a hot skillet until the edges brown and caramelize, then broken into small pieces so the sauce and toppings can coat every forkful.
The trick is to season the meat before it hits the pan and let it sit in the heat long enough to pick up real color. If you crowd the skillet or stir too soon, you’ll steam the beef instead of browning it, and this bowl loses the part that makes it taste like a burger. The sauce is a simple mix, but it needs a quick chill so the flavors settle and the texture thickens just enough to drizzle.
Below you’ll find a few smart swaps for the toppings, the best way to keep the beef from turning dry, and answers to the questions that come up when you want this to work for dinner without extra fuss.
The beef got those crispy edges just like a good burger, and the sauce thickened up after chilling so it clung to everything instead of running to the bottom of the bowl. My husband asked if we could put this on the regular dinner rotation.
These burger bowls are built for crisp lettuce, browned beef, and that creamy special sauce — pin them for the nights when you want burger night without the bun.
The Step That Keeps the Beef Juicy and Browned, Not Steamed
With burger bowls, the biggest mistake is treating the beef like taco meat and stirring constantly. You want the pan hot enough to brown the edges before the meat gets broken up too finely. That little bit of browning gives you the same savory note you’d expect from a grilled burger, and it matters because the bowl doesn’t have a bun to carry extra flavor.
Worcestershire is doing more than adding seasoning. It deepens the meat and brings a steakhouse-style edge without making the bowl taste heavy. The other seasonings stay in the background, which is exactly where they should be; garlic and onion powder round out the beef, but the browned meat still needs to taste like beef first.
- 80/20 ground beef — This ratio gives you enough fat for flavor and crisp edges without turning greasy. Leaner beef works, but the bowl will taste drier and you may want a touch more sauce.
- Worcestershire sauce — It adds depth fast and helps the meat taste seasoned all the way through. There isn’t a clean substitute that does the same job, though a splash of soy sauce can cover some of the savory note in a pinch.
- Romaine lettuce — Crunchy leaves hold up under warm beef and sauce better than softer greens. If you swap in iceberg, you get more snap; if you use spring mix, the bowl softens faster.
- Cheddar and pickles — These are the burger cues that make the bowl read like an actual cheeseburger. Use sharp cheddar if you want the flavor to stand up to the sauce.
What Each Ingredient Is Actually Doing in This Recipe
- Primary ingredient (the star) — Quality matters most. Choose the best you can find.
- Cooking medium (oil, butter, or broth) — This carries flavors and prevents dryness.
- Seasonings (salt, pepper, spices, herbs) — Layer flavors so nothing overpowers. Build depth gradually.
- Aromatics (garlic, onion, herbs) — Cook with fat to bloom flavors. Become the foundation.
- Supporting ingredients — Complement the main ingredient without overpowering it.
- Sauce or liquid (if applicable) — Brings flavors together. Balance richness with acid.
- Acid (lemon, vinegar, wine, or other) — Brightens and prevents flat-tasting results.
- Final finish (garnish, glaze, or sauce) — Prevents one-dimensional taste and adds visual appeal.
Building the Bowl So Every Bite Eats Like a Burger
Mix the Sauce First
Stir the mayo, ketchup, mustard, and relish together before anything else so it has time to chill while you cook. A quick rest in the fridge helps the sauce thicken and lose that raw condiment edge. If it tastes flat, it usually just needs salt or a little more relish, not more ketchup. Keep it cold until serving so it stays creamy against the warm beef.
Season the Beef Before It Hits the Pan
Work the Worcestershire, garlic powder, onion powder, salt, and pepper into the ground beef before cooking. You want the seasoning distributed through the meat, not sprinkled over the top after it’s already browned. Once the beef goes into the skillet, leave it alone long enough for the bottom to take on color. If the pan is crowded, cook in batches so the meat sears instead of releasing liquid.
Break It Up at the Right Moment
Start with larger chunks and let them develop a crust before breaking them smaller. That gives you browned bits on the outside and juicy meat inside, which is the texture that makes these bowls feel like burger crumbles instead of dry chopped beef. Keep cooking until there’s no pink left and the edges look crisp. If the meat looks gray and wet, the heat was too low or the pan was overloaded.
Assemble While the Beef Is Hot
Build each bowl with romaine on the bottom, then layer on the hot beef, tomatoes, avocado, red onion, pickles, and cheddar. The warmth from the meat softens the cheddar just enough without wilting the greens completely. Drizzle the sauce over the top right before serving so the lettuce stays crisp and the bowl keeps that fresh contrast. If you wait too long, the sauce sinks and the base loses its crunch.
How to Adapt Burger Bowls for Different Nights
For a dairy-free bowl
Skip the cheddar or use a dairy-free shred that melts softly over the warm beef. The bowl still works because the sauce and pickles carry the burger flavor, but you lose some of the salty richness that cheddar brings.
For a lower-carb version
This one already leans low carb, so the main adjustment is the sauce. Use a sugar-free ketchup and relish if you want to keep it tighter, and load up on avocado and lettuce for extra volume.
For a cheesier, diner-style bowl
Add the cheddar while the beef is still hot so it melts slightly into the crumbles. If you want that fast-food burger feel, swap the fresh tomatoes for extra pickles and a little shredded iceberg for more crunch.
For meal prep
Store the beef and sauce separately from the lettuce and toppings. The meat reheats well, but the bowl only stays crisp if you keep the greens dry until serving.
Storage and Reheating
- Refrigerator: Store the cooked beef and sauce for up to 4 days. The lettuce and toppings should stay separate so they don’t go limp.
- Freezer: The beef freezes well for up to 2 months. Freeze it flat in a sealed bag, then thaw in the fridge before reheating. Don’t freeze the assembled bowls.
- Reheating: Warm the beef in a skillet over medium heat or in the microwave in short bursts until just hot. Add a splash of water only if needed to loosen it. Reheat gently so the beef doesn’t dry out and the sauce doesn’t split.
Questions I Get Asked About This Recipe
Burger Bowls
Ingredients
Equipment
Method
- Mix the mayo, ketchup, mustard, and relish until smooth, then refrigerate for 10 minutes to thicken.
- While the sauce chills, prepare the romaine, tomatoes, avocado, red onion, pickles, and shredded cheddar so toppings are ready to assemble.
- Combine the ground beef with Worcestershire sauce, garlic powder, onion powder, salt, and pepper, mixing just until evenly distributed.
- Heat a cast iron skillet over medium-high heat, then add the beef and cook for 8–10 minutes, breaking it into small chunks, until cooked through with crispy edges visible.
- Add chopped romaine lettuce to four bowls as the base for a fresh, crisp layer.
- Top each bowl with the cooked beef crumbles, cherry tomatoes, avocado slices, diced red onion, dill pickle slices, and shredded cheddar.
- Drizzle generously with the chilled burger sauce and serve immediately so the cheddar stays warm over the hot beef.