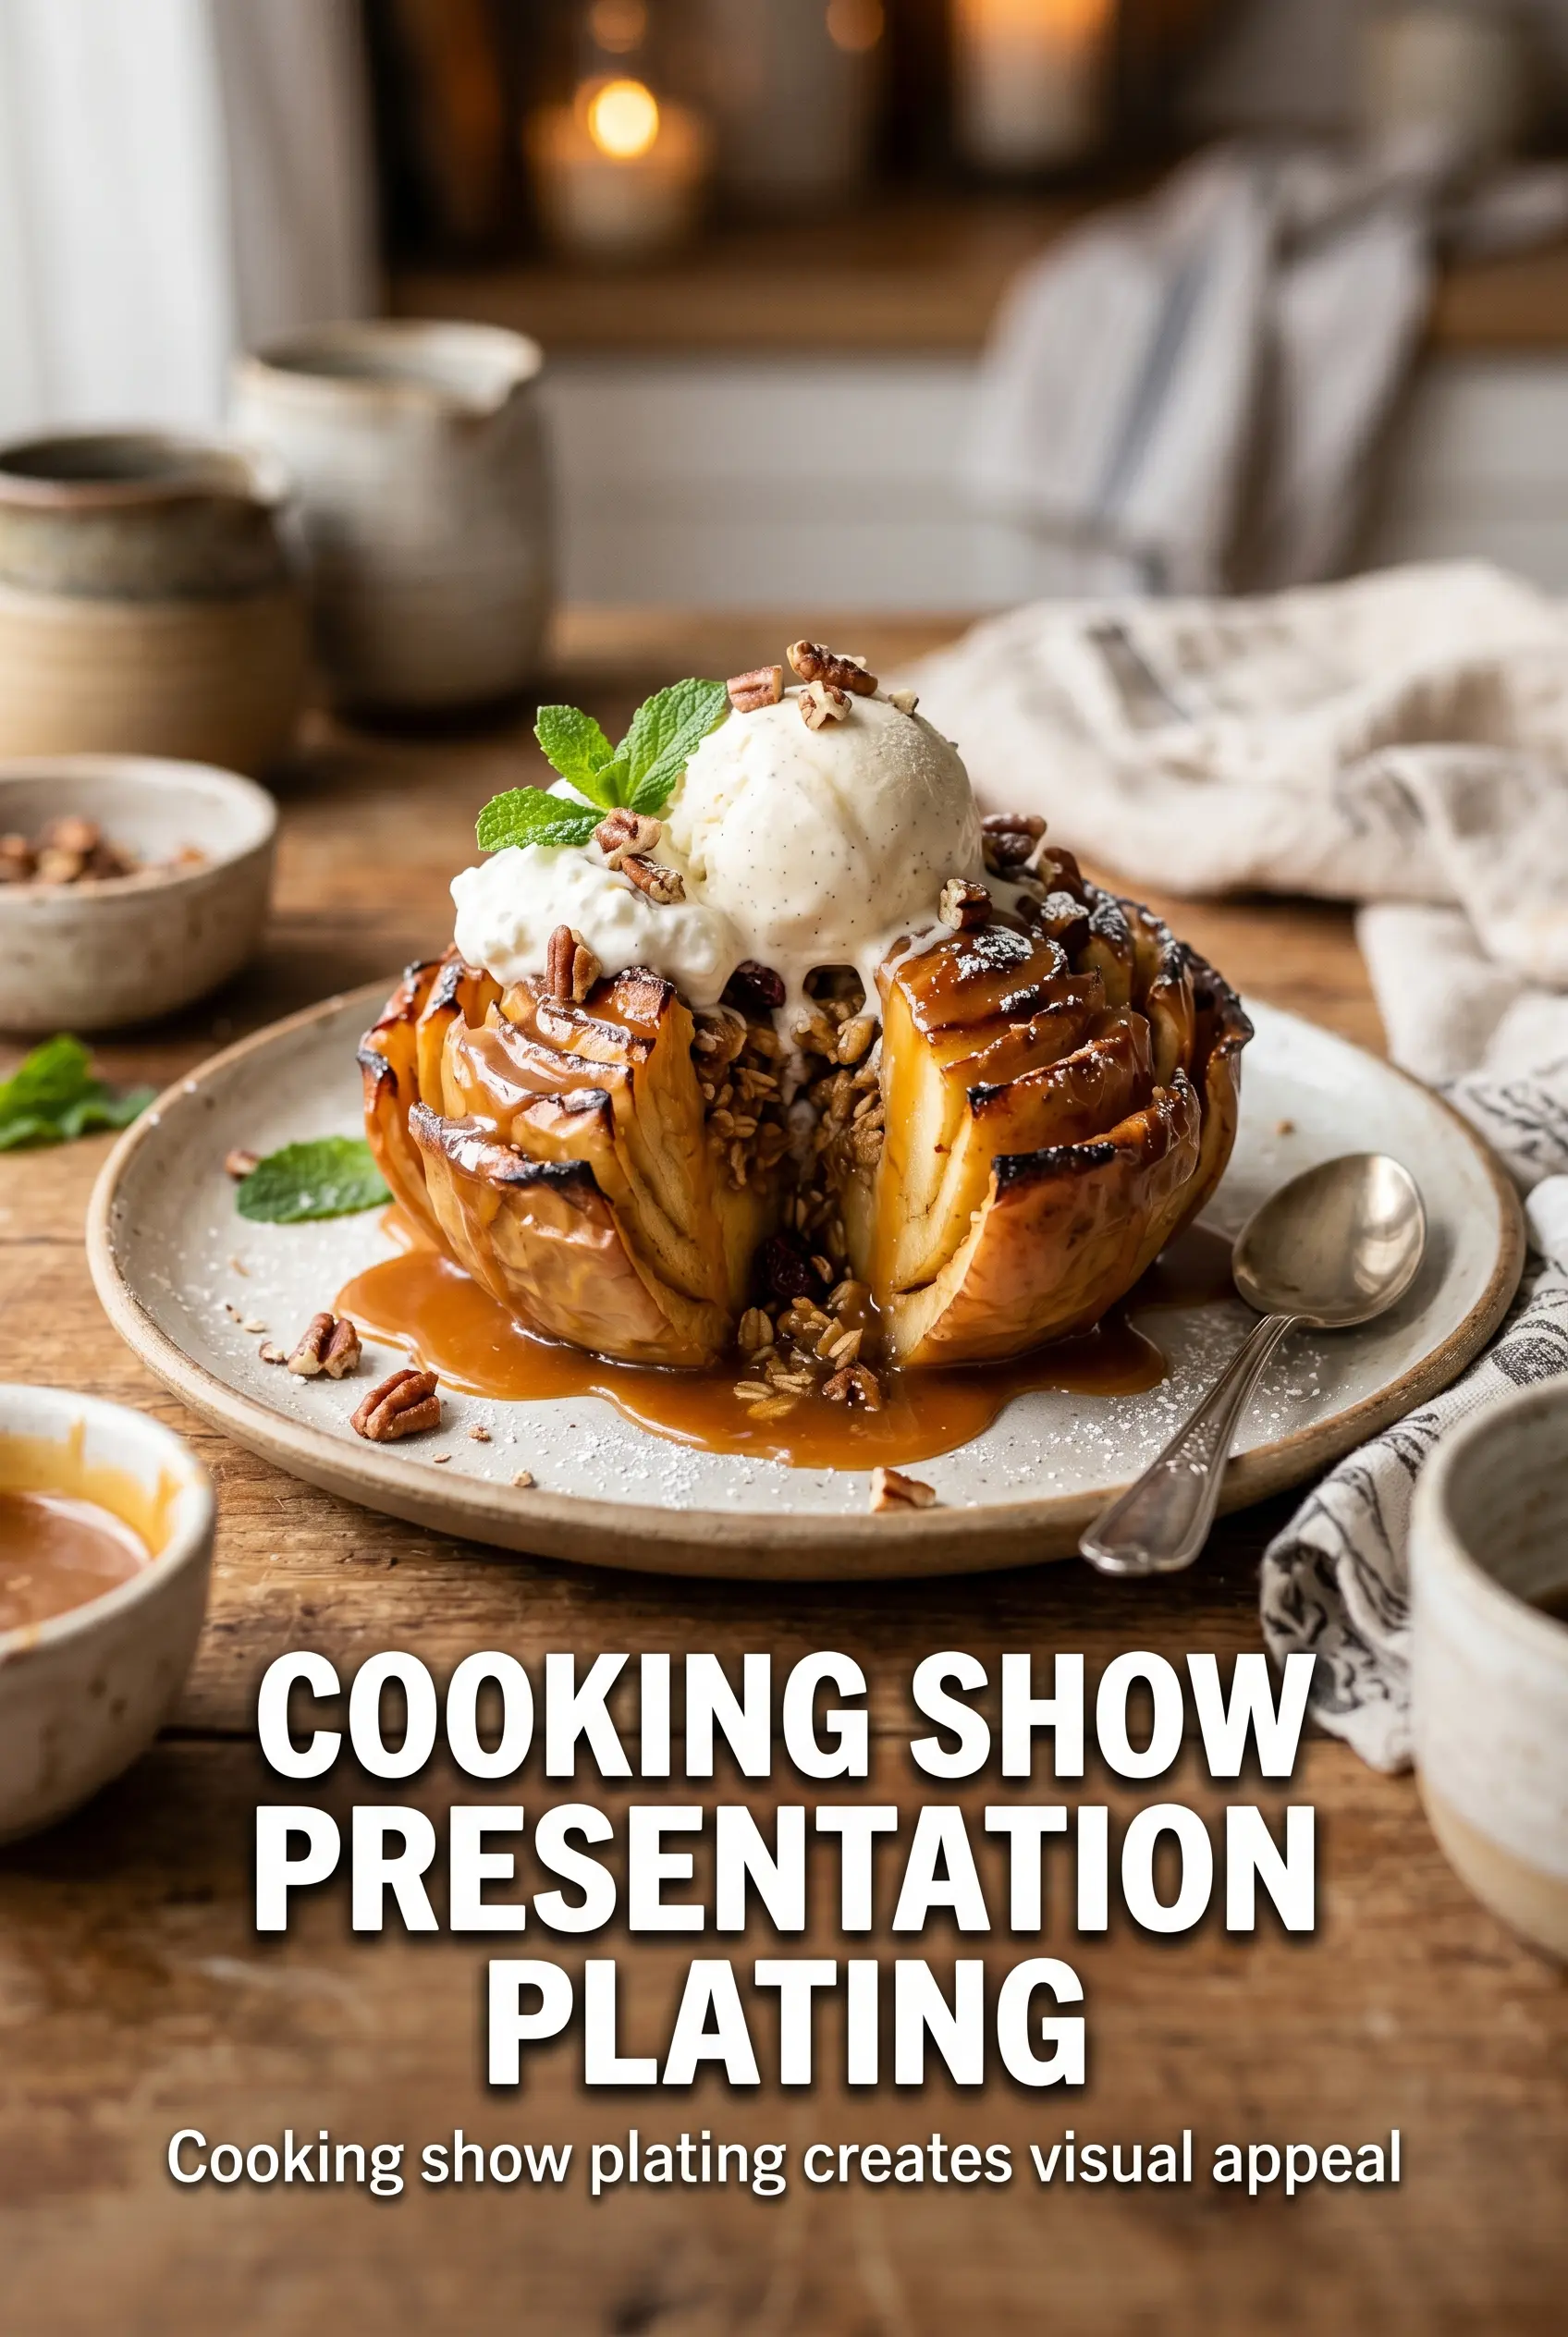
Bloomin’ grilled apples land on the plate with tender slices fanned open, sticky cinnamon edges, and just enough char to make the whole thing taste like dessert with a little edge. The apple keeps its shape, but the cuts open on the grill so the butter and brown sugar sink into every layer. That contrast of soft center, caramelized surface, and cold vanilla ice cream is what makes people go back for a second spoonful.
The trick is in the slicing. Cutting the apple almost all the way through gives you those petals, but the base has to stay intact or the whole thing collapses once it gets hot. Wrapping the bottom in foil helps the apple steam and soften without letting the sugar mixture burn before the inside is tender. Granny Smith brings a sharp bite that holds up well, while Honeycrisp gives you a sweeter, juicier result.
Below, I’ve included the part that matters most: how to keep the apples from falling apart on the grill, what each ingredient is doing, and a few smart swaps if you want to change the flavor or make it work with what you’ve got.
The slices opened up beautifully on the grill and the cinnamon butter soaked into every layer without making the apples mushy. I used Honeycrisp, and they were tender in 14 minutes with the edges perfectly caramelized.
Save these bloomin’ grilled apples for the nights when you want a warm grilled dessert with caramelized edges and a scoop of vanilla ice cream.
The Step That Keeps Bloomin’ Apples From Falling Apart
The biggest failure with this kind of dessert happens before the grill ever heats up. If you slice all the way through the apple, it opens too far and turns floppy once the heat softens the flesh. The slices need to stay connected at the base so they fan out like petals instead of collapsing into chunks.
Grilling over medium heat matters here. Too hot, and the sugar in the butter mixture scorches before the apples have time to tenderize. Too cool, and the apples steam without picking up the caramelized edges that make this recipe worth repeating. You want gentle heat, a covered or wrapped base, and enough time for the butter to seep between the slices.
- The foil wrap at the base protects the bottom from direct heat and helps the apples soften evenly.
- The cuts create surface area, which gives the cinnamon butter somewhere to settle and caramelize.
- The grill does two jobs at once: it tenderizes the apple and deepens the brown sugar into a sticky glaze.
What Each Ingredient Is Doing in These Grilled Apples
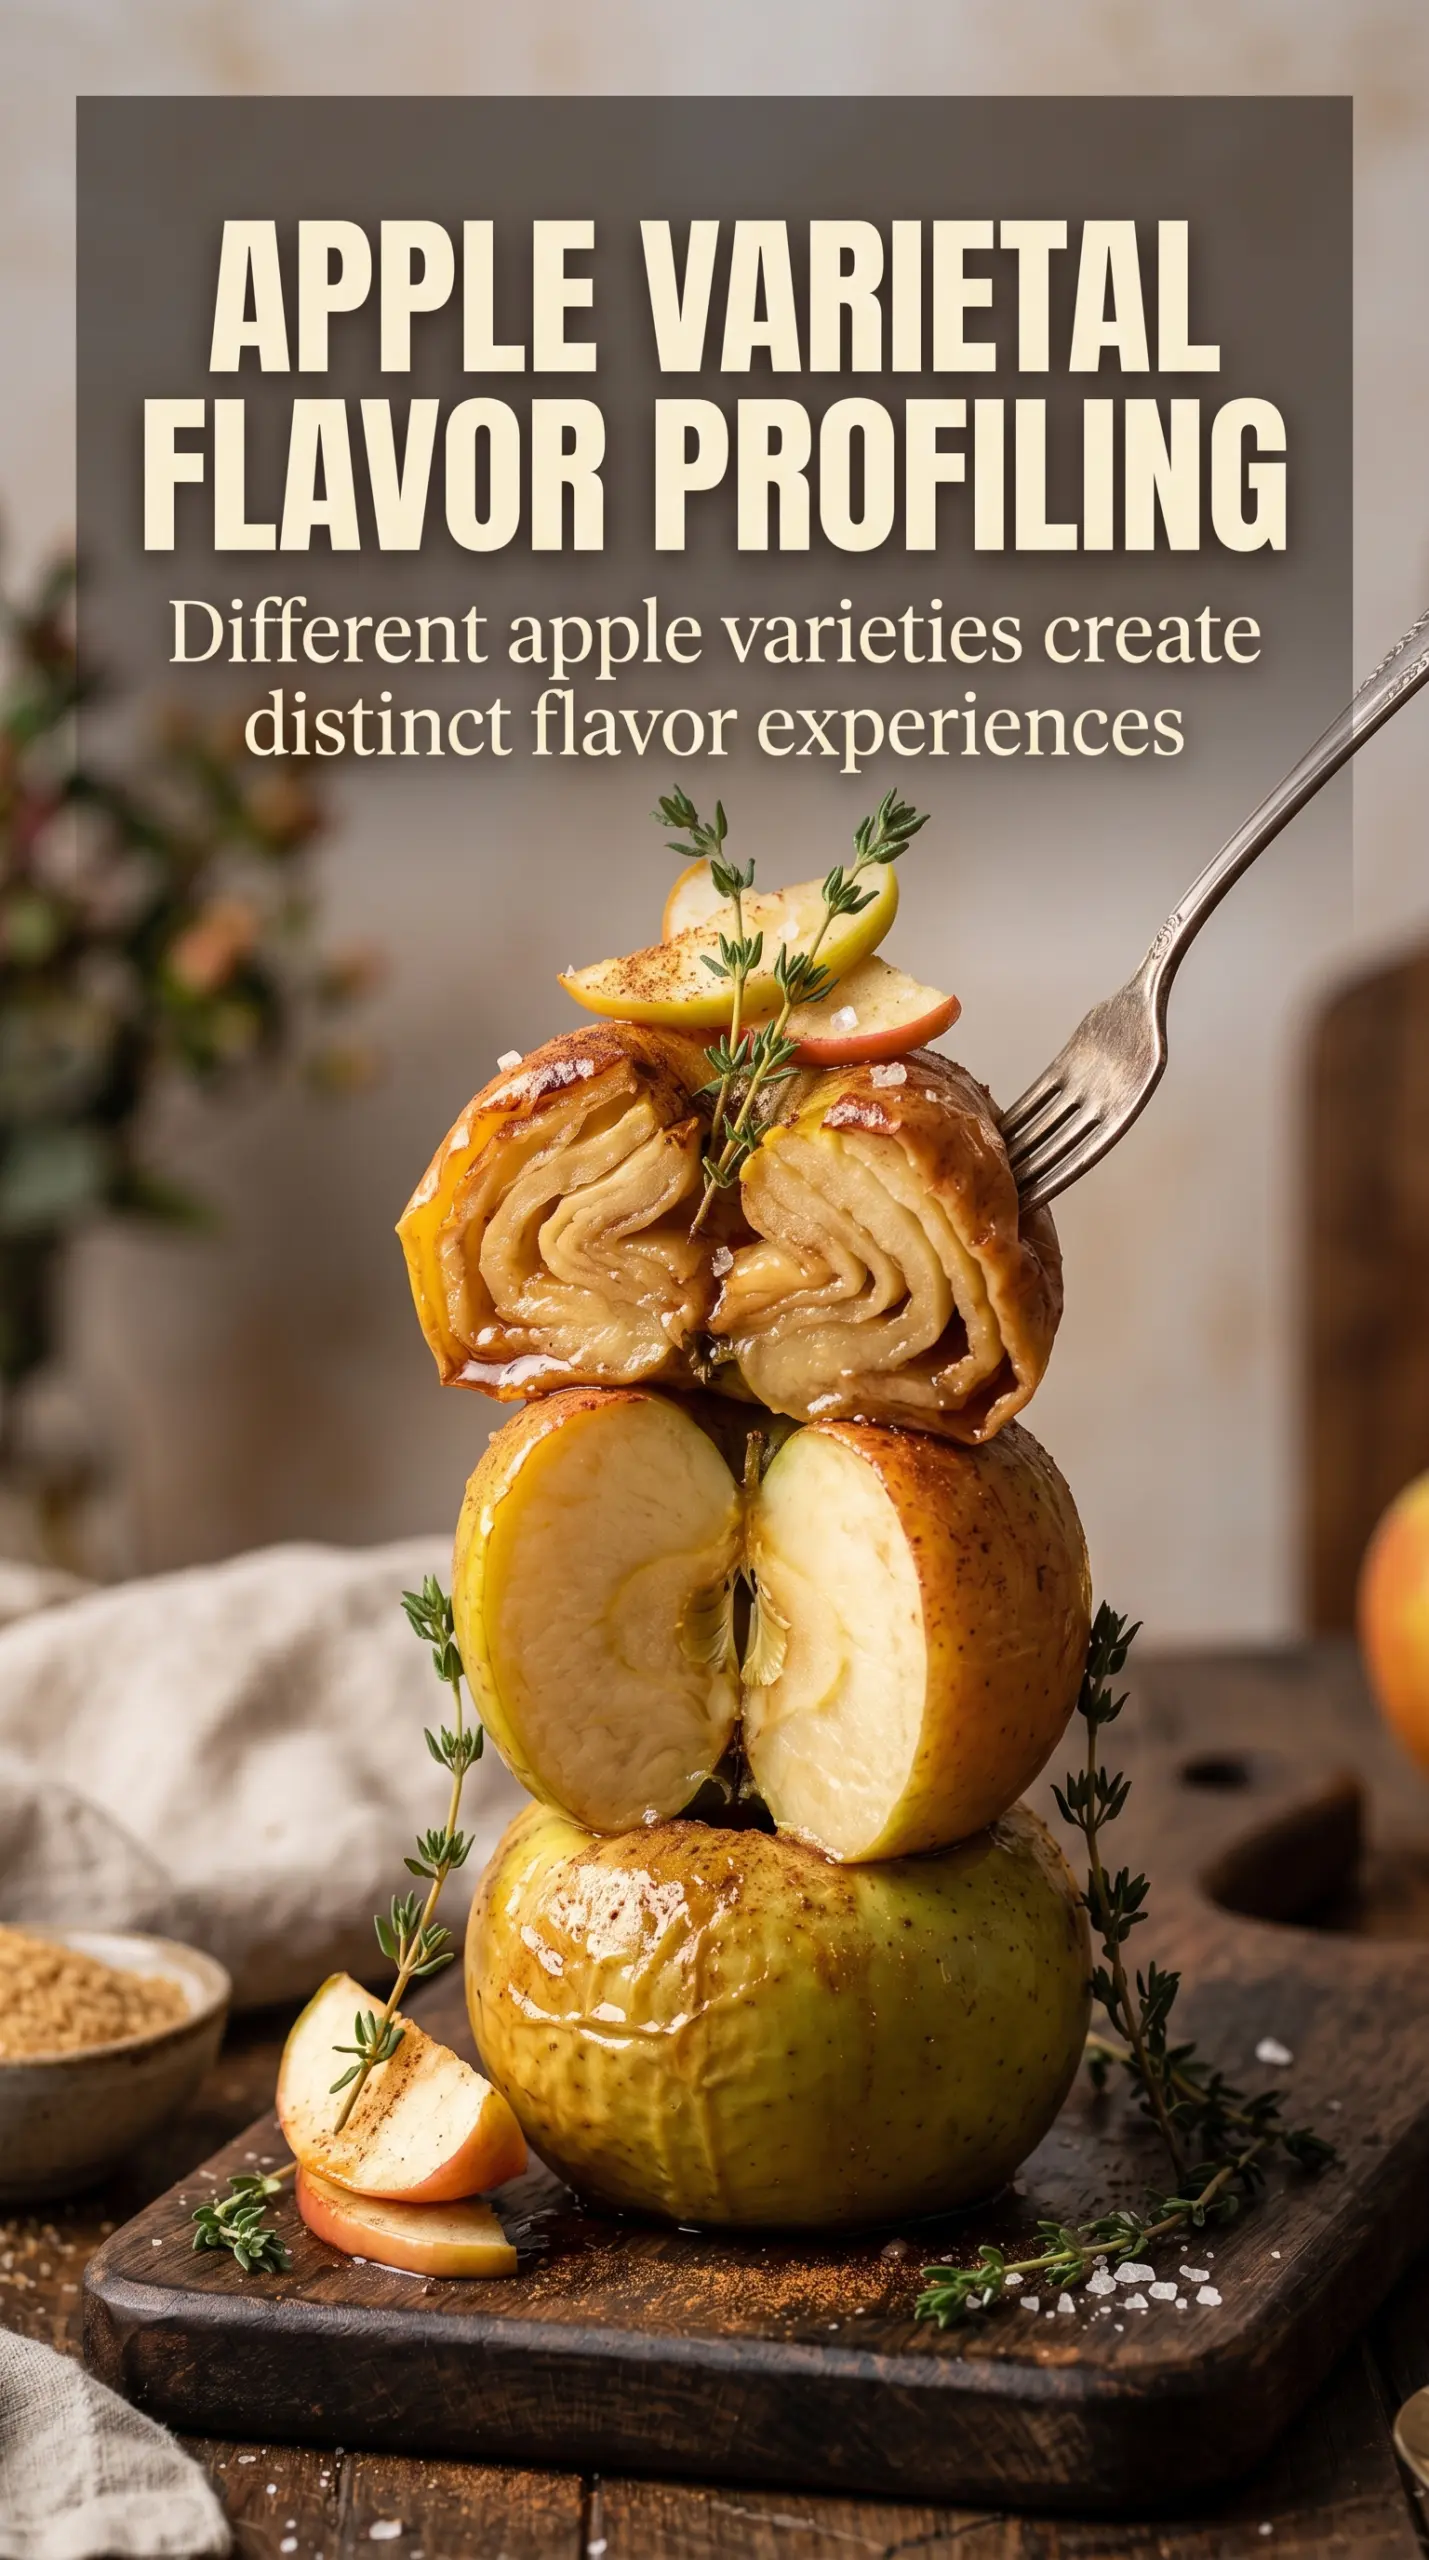
- Apples — Granny Smith keeps the dessert bright and tart, and it holds its shape well on the grill. Honeycrisp is a little sweeter and juicier, so the finished dessert tastes softer and more dessert-forward. Avoid apples that turn mealy when heated.
- Butter — Melted butter carries the cinnamon and brown sugar into the apple slices and helps everything caramelize. Use real butter here; a substitute won’t give you the same rich coating or browning.
- Brown sugar — This is what makes the top sticky and glossy. Light or dark brown sugar both work, but dark brown sugar gives a deeper molasses note.
- Cinnamon — Cinnamon is the backbone of the whole dish. Fresh cinnamon matters more than usual because there are only a few ingredients, and old spice tastes flat fast.
- Vanilla ice cream — It’s not just garnish. The cold cream melts into the hot apples and turns the whole dessert into something closer to a cobbler topping without the crust.
Getting the Apples Grilled Without Losing the Shape
Cutting the Bloom
Set each apple on a cutting board and slice thinly from top to bottom, stopping before you hit the base. The cuts should be close together so the apple fans open well, but they don’t need to be perfectly even. If the slices are too thick, the center stays stiff; if they’re too thin, the apple can break when you try to open it.
Brushing on the Cinnamon Butter
Whisk the melted butter, brown sugar, and cinnamon until the mixture looks glossy and loose enough to brush. Work it down into the cuts so the flavor reaches the middle of the apple, not just the top. If the sugar settles at the bottom of the bowl, stir it again before each apple because the last one should get the same amount of coating as the first.
Grilling to Tender and Caramelized
Wrap the bottom of each apple in foil, then grill over medium heat for 12 to 15 minutes. You’re looking for apples that give slightly when pressed and edges that turn deep golden with little caramelized spots. If the tops darken before the centers soften, move them to a cooler part of the grill or lower the heat; the sugar can burn fast once it starts to bubble.
Serving at the Right Moment
Pull the apples off while they still hold their shape and serve them warm with vanilla ice cream. That temperature contrast is part of what makes the dessert work, and it fades quickly once the apples sit too long. If you wait until they go fully cold, the sugars tighten and you lose that soft, syrupy finish.
How to Adjust These Bloomin’ Apples for Different Cooks and Different Grills
Make Them Dairy-Free
Swap the butter for a plant-based butter that melts cleanly and has a neutral flavor. Coconut oil works in a pinch, but it brings its own taste and won’t brown quite the same way, so the final dessert tastes a little different.
Use Pears Instead of Apples
Firm pears can work if you want a softer, floral finish. They cook a little faster than apples, so start checking them a few minutes early. Bartlett pears are often too soft once heated, so choose a firmer variety if possible.
Bake Them Instead of Grilling
If you don’t have a grill, bake the apples at 400°F until tender and browned around the edges. You’ll lose a little of the smoky note, but the caramelization still happens and the apples stay intact. Line the pan well so the sugar doesn’t glue itself to the tray.
Storage and Reheating
- Refrigerator: Store leftovers in an airtight container for up to 3 days. The apples soften more as they sit, but the flavor stays good.
- Freezer: These don’t freeze well. The texture turns mushy after thawing, and the fanned slices lose their shape.
- Reheating: Warm them in a 300°F oven until heated through. The microwave works, but it makes the apples collapse and the sugar topping can turn watery.
Answers to the Questions Worth Asking
Bloomin' Grilled Apples
Ingredients
Equipment
Method
- Core and slice each apple into thin cuts from top to bottom, stopping just before you slice all the way through so the apple stays intact and can fan open.
- In a bowl, mix the melted butter, brown sugar, and cinnamon until the cinnamon sugar looks evenly combined.
- Fan the apple slices open slightly and brush the cut surfaces thoroughly with the cinnamon butter mixture so the glaze seeps into the gaps.
- Wrap the bottom of each apple in foil, leaving the top exposed so it can caramelize on the grill grates.
- Place apples on the grill over medium heat and cook for 12-15 minutes, until the apples are tender and the top looks caramelized with glossy cinnamon-sugar patches.
- Serve the bloomin' grilled apples warm with vanilla ice cream, letting the melted ice cream coat the caramelized cinnamon apples.


