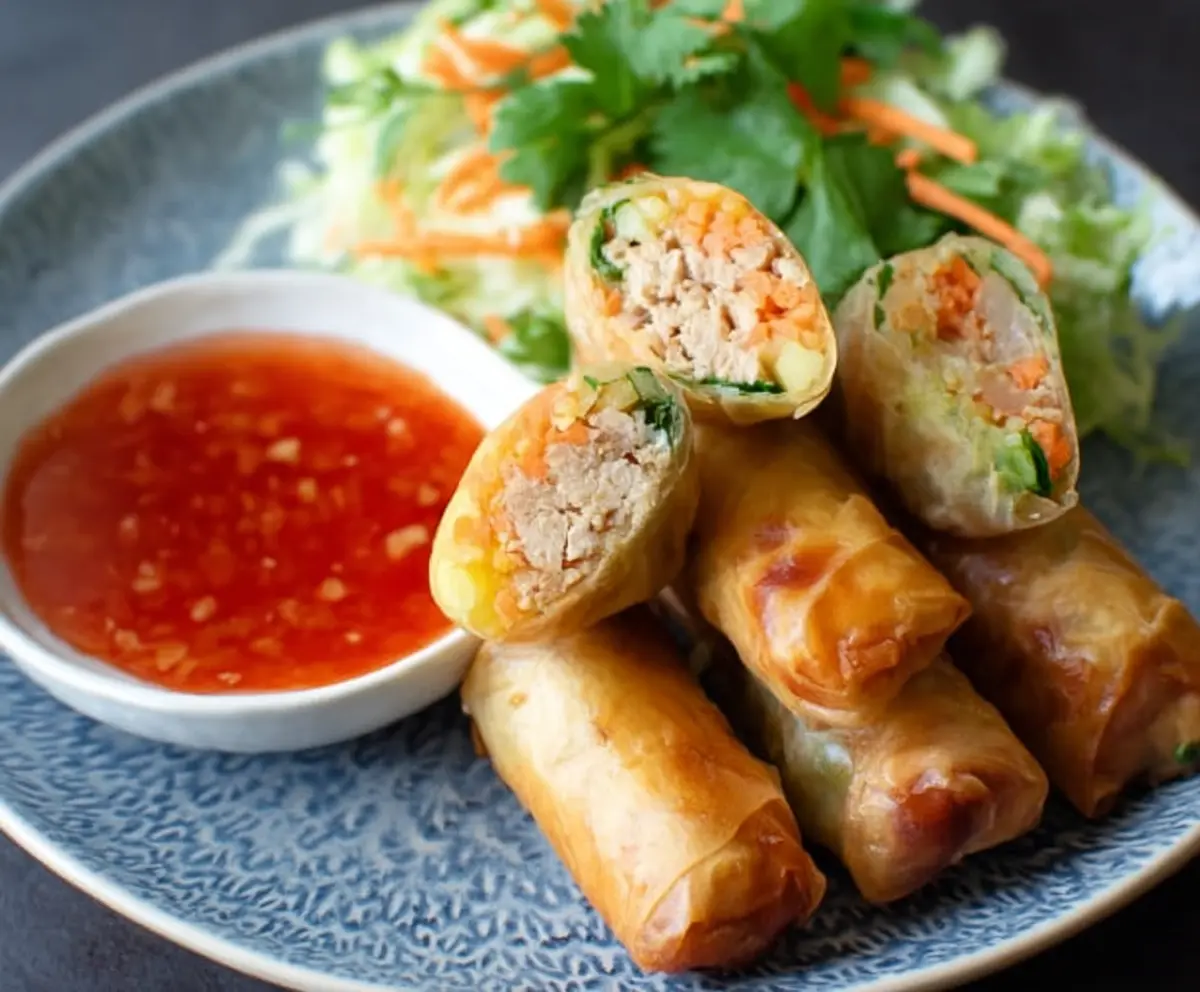
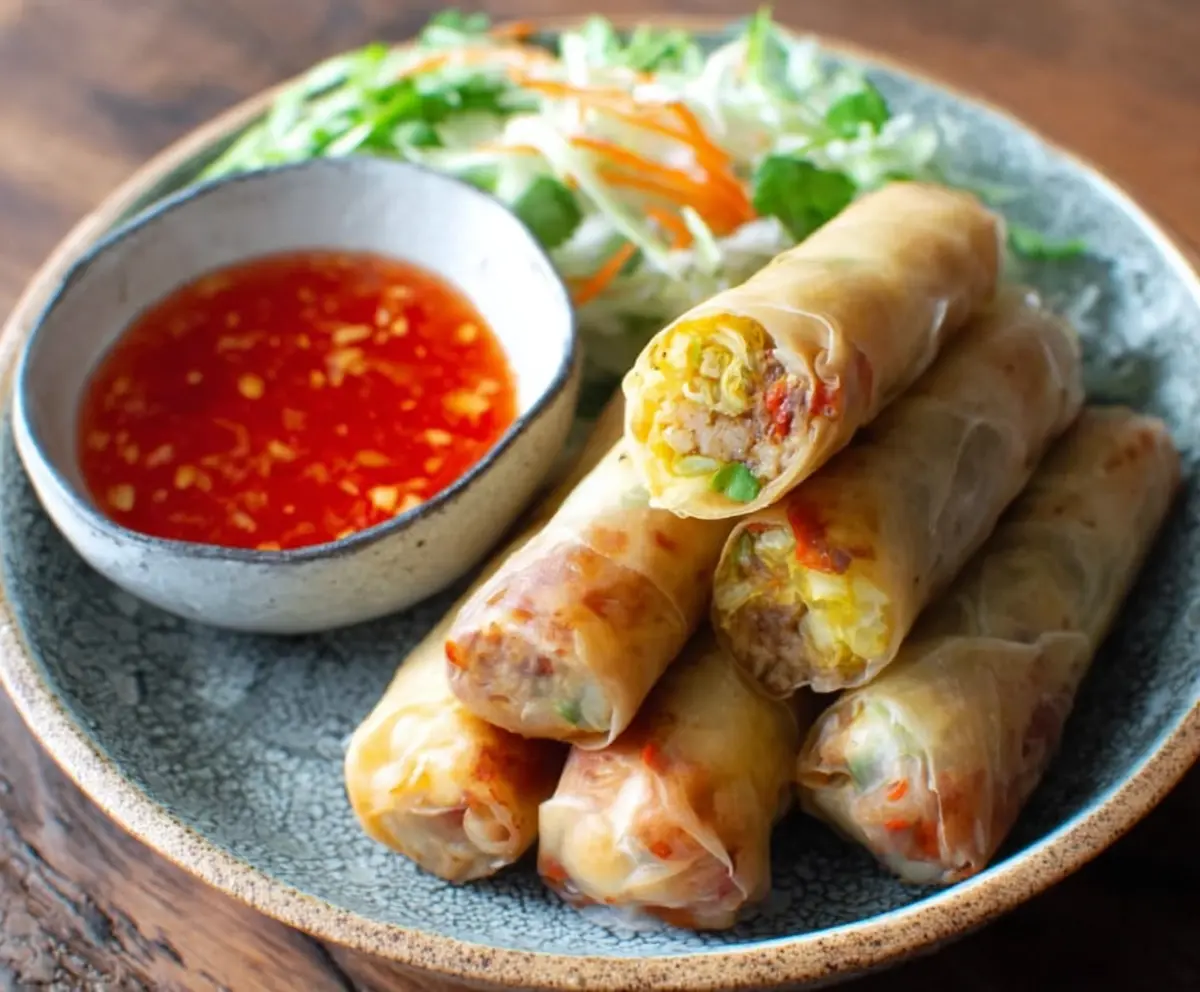
These Thai Chicken Spring Rolls are filled with tender chicken and fresh veggies, all wrapped in a crispy, light shell. Plus, they come with a tasty sweet chili sauce that makes every bite exciting!
Rolling these spring rolls is like a fun little craft project in your kitchen. Just keep an eye on them, or they might just disappear as fast as you can make them! 😄
I love serving these as a snack or appetizer. They’re so easy to make, and the sweet chili sauce adds that perfect touch. Trust me, you’ll want to keep this recipe handy!
Key Ingredients & Substitutions
Ground Chicken: This is the star of the spring rolls. If you want a lighter option, turkey can be a good substitute. For a vegetarian version, try using firm tofu or a mix of mushrooms and chopped veggies.
Spring Roll Wrappers: These are essential for that crispy texture. If you can’t find traditional wrappers, rice paper is a great alternative. Just keep in mind it may require a different rolling technique!
Fish Sauce: This adds a nice depth of flavor but can be skipped or replaced with soy sauce for a vegetarian option. Coconut aminos are another great substitute that’s soy-free and has a slightly sweeter taste.
Vegetables: Carrots and cabbage provide crunch, but feel free to add bell peppers or zucchini for extra color and nutrition. I love adding mushrooms for an earthy flavor!
How Do You Roll Spring Rolls Without Them Falling Apart?
Rolling spring rolls can be tricky at first, but with a little practice, you’ll get the hang of it! Follow these easy steps:
- Start with a damp wrapper to make it more pliable.
- Place the filling near the corner, but don’t overstuff. About 2 tablespoons is usually perfect.
- Fold the corner over the filling tightly, then fold in the sides. Keep it snug.
- Roll towards the opposite corner and seal with a bit of water. Make sure it’s sealed well to prevent leakage during frying.
Remember, practice makes perfect! If the roll doesn’t look perfect, it will still taste amazing.
How to Make Thai Chicken Spring Rolls with Sweet Chili Sauce
Ingredients You’ll Need:
For the Spring Rolls:
- 12 spring roll wrappers
- 1 lb (450g) ground chicken
- 1 medium carrot, finely shredded
- 1/2 cup cabbage, finely shredded
- 2 green onions, finely chopped
- 1/2 cup bean sprouts (optional)
- 1/4 cup fresh cilantro, chopped
- 2 cloves garlic, minced
- 1 tbsp soy sauce
- 1 tsp fish sauce
- 1/2 tsp ground white pepper
- 1 tsp sugar
- 1 tbsp vegetable oil (for cooking filling)
- Oil for deep frying
For the Sweet Chili Sauce:
- 1/2 cup sweet chili sauce (store-bought or homemade)
Optional Garnish and Sides:
- Fresh lettuce leaves
- Fresh cilantro sprigs
- Additional shredded carrot and cabbage
How Much Time Will You Need?
This recipe takes about 30 minutes to prepare and about 10 minutes to fry, so you’re looking at a total time of around 40 minutes. It’s a fun dish to make and great for sharing with family and friends!
Step-by-Step Instructions:
1. Prepare the Filling:
Start by heating 1 tablespoon of vegetable oil in a pan over medium heat. Once the oil is hot, add the minced garlic and cook for about 30 seconds until it’s fragrant. Then, add the ground chicken and cook it through, making sure to break it apart with a spoon until there’s no pink left.
2. Add Vegetables and Flavors:
Next, stir in the finely shredded carrot, shredded cabbage, chopped green onions, and bean sprouts (if using). Cook this mixture for about 2-3 minutes until the vegetables become slightly softened. After that, add the soy sauce, fish sauce, sugar, and ground white pepper. Mix everything well and cook for another 1-2 minutes. Finally, remove the pan from heat and fold in the chopped cilantro. Let this filling cool down to room temperature.
3. Roll the Spring Rolls:
Now it’s time to roll! Take a spring roll wrapper and lay it flat on a clean surface with one corner pointing towards you (it should look like a diamond). Spoon about 2 tablespoons of your chicken mixture near the corner closest to you. Fold that corner over the filling, then tuck in the sides tightly. Roll it up towards the opposite corner and seal the edge with a little bit of water.
4. Fry the Spring Rolls:
Heat oil in a deep frying pan or a wok to 350°F (175°C). Carefully place the spring rolls in, a few at a time, making sure not to crowd the pan. Fry them for about 3-5 minutes until they turn golden brown and crispy. Use a slotted spoon to take them out and drain them on some paper towels to soak up the excess oil.
5. Serve and Enjoy:
Arrange your beautiful Thai chicken spring rolls on a plate. To serve, add some fresh lettuce leaves, shredded carrot, and cabbage on the side along with sprigs of cilantro. Don’t forget the sweet chili sauce for dipping—they’ll be a hit!
Optional Homemade Sweet Chili Sauce:
If you’d like to make your own sweet chili sauce, here’s a quick recipe: In a saucepan, combine 1/2 cup water, 1/2 cup sugar, 1/4 cup rice vinegar, 2 tablespoons fish sauce, 1 tablespoon minced garlic, 1 teaspoon red chili flakes, and 1 tablespoon cornstarch mixed with 2 tablespoons water. Bring this mixture to a boil, stirring until it thickens, then cool it before serving. Yum!
Can I Use Other Proteins Instead of Chicken?
Absolutely! Ground turkey, pork, or even shrimp can work well as alternatives. For a vegetarian option, you can use firm tofu or a mix of mushrooms and vegetables. Just make sure to adjust the cooking times accordingly!
How Do I Store Leftover Spring Rolls?
Store any leftover spring rolls in an airtight container in the fridge for up to 2 days. To keep them crispy when reheating, place them in an oven or an air fryer for a few minutes instead of using a microwave.
Can I Make the Filling in Advance?
Yes, you can prepare the filling a day ahead! Just cook it as directed, let it cool completely, and then store it in an airtight container in the fridge. Assemble and fry the spring rolls when you’re ready to serve!
What If I Don’t Have Spring Roll Wrappers?
No problem! You can use rice paper wrappers as a substitute. They will require a different technique: just soak them in warm water for a few seconds until pliable, then fill and roll as you would with traditional wrappers. Just keep in mind they may not hold together as easily!


