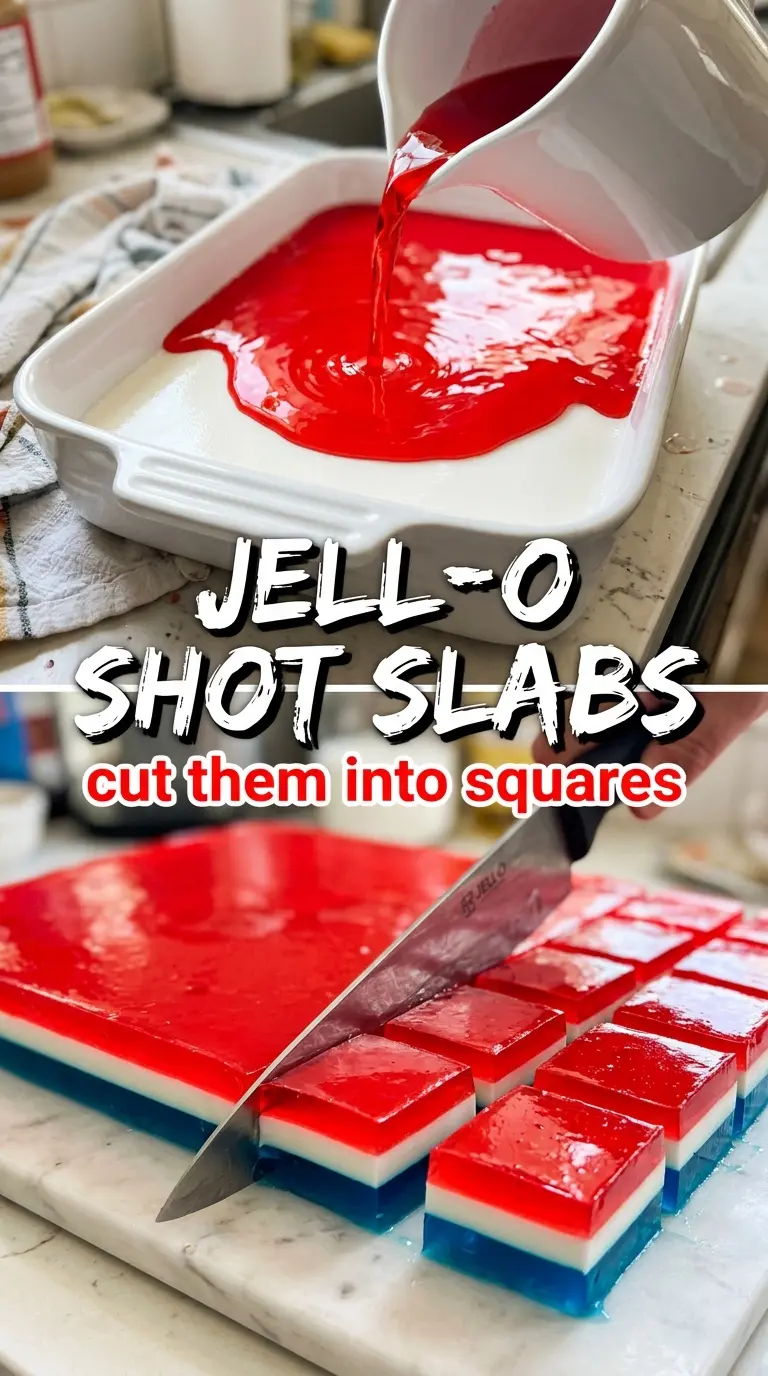
These red, white, and blue Jell-O shots set up in clean, distinct layers with a glossy finish and just enough boozy bite to keep them from tasting like plain party gelatin. The cherry base gives you that bright first flavor, the creamy middle softens the edges, and the blue layer finishes it with a cool, punchy pop that looks sharp in clear cups.
Layered Jell-O shots live or die on temperature and timing. Each layer needs to be fully set before the next one goes on, and the next mixture has to be cool enough not to melt what’s underneath. That’s why the white layer uses sweetened condensed milk plus unflavored gelatin instead of a dairy shortcut — it gives you opacity and structure without turning muddy or separating.
Below, I’ve laid out the exact pacing that keeps the layers crisp, plus a few swaps and troubleshooting notes for when you want cleaner edges, a stronger vodka finish, or a batch that still looks neat after a long party table.
The layers set up perfectly and the white middle stayed nice and opaque instead of blending into the red. I let each layer chill the full time and the cups came out clean and festive.
These layered red, white, and blue Jell-O shots stay neat when you chill each color fully before adding the next.
Why the Layers Stay Sharp Instead of Blending Together
The biggest mistake with layered Jell-O shots is rushing the next pour. If the first layer is even a little soft, the warm liquid above it will cut through and leave you with streaks instead of clean bands. A full set matters more than shaving ten minutes off the chill time.
The other thing that trips people up is temperature. The colored gelatin mixtures need to cool until they’re no longer hot to the touch, but not so long that they start to thicken in the bowl. That middle ground is what lets you pour gently without disturbing the layer below. The white layer is a little more forgiving because of the condensed milk, but it still needs to be cooled before it goes on.
- Fast-set the first layer in a shallow tray if your cups are small. Less depth means the red layer firms more quickly and gives you a sturdier base for the middle.
- Pour against the side of the cup. That softens the impact and keeps each layer from boring a hole into the one underneath.
- Chill each bowl just until cool, not cold and gummy. If the gelatin starts to thicken in the bowl, the layers land unevenly and the cups look cloudy.
What the Vodka, Gelatin, and Condensed Milk Are Each Doing
- Cherry or strawberry Jell-O — This gives you the red layer’s flavor and that classic bright color. Strawberry reads a little softer and sweeter; cherry is a little sharper. Either works, but don’t swap in a sugar-free box if you want the same texture and sheen.
- Berry blue Jell-O — The blue layer is mostly for contrast, but it still needs to taste clean and fruity instead of icy. Berry blue keeps the color vivid after chilling, which matters in clear cups.
- Unflavored gelatin — This is what keeps the white layer from turning loose or slumping. You can’t replace it with more condensed milk and expect the same set; that extra gelatin is what gives the middle its sliceable, layered look.
- Sweetened condensed milk — This makes the white layer opaque and adds the creamy sweetness that balances the vodka. Evaporated milk won’t give you the same richness or thickness.
- Cold vodka — Cold vodka helps the mixture stay stable when it hits the gelatin. Room-temperature liquor warms the mix and can slow setting, which is the last thing you want when you’re building layers.
Building Each Layer Without Breaking the One Below It
Mix the Colored Layers Until They’re Fully Dissolved
Stir the Jell-O into boiling water for a full two minutes so every grain dissolves. If you stop early, tiny granules can sink or cling to the bottom and leave the shots grainy. Add the cold vodka after the gelatin is dissolved, then stir gently so you don’t whip in bubbles that cloud the cups.
Set the Red Base Before the White Goes On
Pour the red layer into the cups only about one-third of the way full. That gives you room for clean bands without crowding the cup. Chill until the surface is fully set and doesn’t move when you tilt a cup slightly; if it still wobbles, the white layer will sink into it.
Cook the White Layer Just Long Enough to Dissolve the Gelatin
The white mixture needs heat to dissolve the unflavored gelatin, but it doesn’t need a rolling boil for long. Stir until the mixture looks smooth and unified, then let it cool before adding the cold water and spooning it over the set red layer. Pouring hot white mixture over the base is the fastest way to lose that crisp middle stripe.
Cool the Blue Layer Before the Final Pour
After the blue gelatin dissolves, add the vodka and let the bowl sit until it reaches room temperature. If it’s still warm, it will soften the white layer and blur the edges. Spoon or pour slowly over the back of a spoon for the neatest top layer, then chill until fully set.
How to Change These Shots for Different Crowds and Limits
Make Them Without Alcohol
Replace the vodka with cold water in both colored layers. The shots will set a little firmer and taste more like classic Jell-O cups, which is helpful if you’re serving a mixed-age crowd. Keep the chilling times the same so the layers still hold their shape.
Use a Stronger Vodka Flavor
You can swap part of the cold water in the colored layers for vodka if you want a more noticeable boozy finish, but don’t replace every bit of liquid with alcohol. Too much vodka slows the set and can leave the shots softer than you want. The texture stays best when the total liquid ratio stays close to the recipe.
Make Them Dairy-Free
The white layer is the hard part here because sweetened condensed milk gives it both color and body. A dairy-free condensed milk style substitute can work, but the flavor will be a little less rich and the white band may set slightly softer. Test the substitute first if presentation matters.
Turn Them Into a Bigger Batch
Double everything and use a second tray of cups so the layers don’t sit around too long while you work. The biggest issue in large batches is timing, not mixing, so keep the bowls warm enough to stay pourable but cool enough not to melt the set layers. If a batch starts thickening in the bowl, warm it for a few seconds in a water bath rather than microwaving it hard.
Storage and Reheating
- Refrigerator: Store covered for up to 3 days. After that, the layers start to weep a little and the tops lose their shine.
- Freezer: Don’t freeze them. Gelatin breaks down after thawing and the texture turns watery and spongy.
- Reheating: These aren’t a reheated recipe. Serve them cold straight from the fridge, and keep them chilled until the party starts so the layers stay firm.
Answers to the Problems That Come Up With Layered Jell-O Shots
Jell-O Shots (Red, White, and Blue)
Ingredients
Equipment
Method
- Dissolve cherry or strawberry Jell-O in 1 cup boiling water, then stir for 2 minutes. Mix in 1/2 cup cold vodka and pour into shot cups to fill one-third of the way.
- Refrigerate for 45 minutes until fully set, then look for a firm, no-wobble red layer before layering on top.
- Combine sweetened condensed milk, 1 cup boiling water, and unflavored gelatin, then stir until dissolved. Cool slightly, add 1/2 cup cold water, and stir again until smooth.
- Spoon gently over the set red layer so the surface stays intact and the layers remain distinct. Refrigerate for another 45 minutes until the white layer is set.
- Dissolve berry blue Jell-O in 1 cup boiling water, then stir for 2 minutes. Mix in 1/2 cup cold vodka, cool to room temperature, and gently pour over the white layer.
- Refrigerate for at least 1 hour until fully set, then serve cold. The finished cups should show clear, glossy red-white-blue stripes under the light.