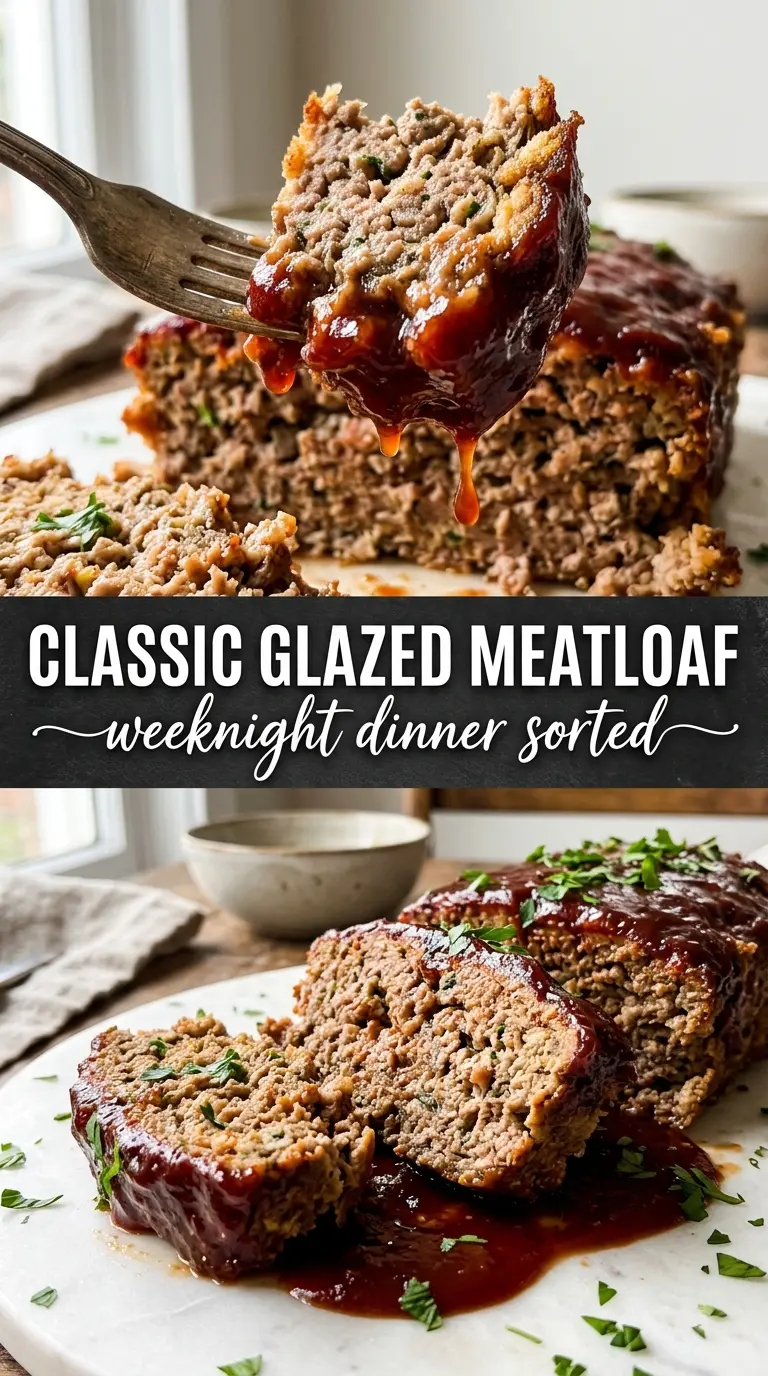
Classic glazed meatloaf should slice cleanly, stay moist in the center, and carry a sticky ketchup glaze that turns glossy and caramelized in the oven. The best versions don’t crumble apart on the plate or dry out by the second helping. They hold together, taste deeply savory, and still feel like comfort food done with a little more care than the usual weeknight loaf.
The texture comes from two things working together: enough binder to keep the loaf tender, and gentle mixing so the beef stays loose instead of turning dense. Grated onion is worth the extra minute because it disappears into the meat and keeps the loaf juicy without leaving hard bits behind. The glaze matters too. Brown sugar, ketchup, and vinegar give you that sweet-tangy top layer that clings instead of sliding off.
Below, I’ll walk through the small choices that keep meatloaf from getting heavy, plus the one timing detail that helps the glaze set without burning.
The glaze thickened up beautifully and the loaf stayed moist all the way through. I used the foil-lined baking sheet and it sliced like a dream after resting.
Classic glazed meatloaf with a sticky ketchup top is the kind of dinner that slices neatly and reheats even better the next day.
The Difference Between Tender Meatloaf and a Dense Brick
Meatloaf gets heavy when the beef is packed too tightly or mixed until it starts looking paste-like. Once that happens, the proteins tighten and the finished loaf slices like a compressed meatball instead of a tender dinner. The goal is a mixture that holds its shape but still looks loose before it goes in the oven.
The loaf pan versus sheet pan choice matters more than most people think. A sheet pan gives the edges room to brown and lets excess fat drain away, which helps the glaze cling and keeps the bottom from turning greasy. A loaf pan makes a taller, softer loaf, but if you use it, line it well and expect a little more moisture around the sides.
- 80/20 ground beef — This ratio gives you enough fat for flavor and moisture without leaving the loaf dry. Leaner beef can work, but the texture gets tighter and the meatloaf needs more help from the glaze and milk.
- Breadcrumbs and milk — Together they act like a soft filler that keeps the loaf tender. Plain breadcrumbs are fine here; seasoned ones can work, but they push the flavor in a different direction fast.
- Grated onion — Grating instead of chopping lets the onion melt into the loaf and release moisture evenly. If you only have a food processor, pulse the onion until it’s very fine, not watery.
- Worcestershire sauce — This adds the savory backbone that makes the meat taste seasoned all the way through. There isn’t a perfect substitute, but soy sauce plus a tiny splash of vinegar gets you close in a pinch.
What Each Ingredient Is Actually Doing in This Meatloaf or Meatballs
- Ground meat (the protein foundation) — Use 80/20 so it stays moist. Handle gently to keep texture tender instead of dense.
- Breadcrumbs or fillers (the binder) — These hold the meat together without making it dense. Soak in milk first so they add moisture.
- Egg (the structural binding agent) — This holds everything together during cooking. One egg per pound of meat is the right ratio.
- Onion and aromatics (the base flavor) — Mince finely so they distribute evenly. Raw onion softens as it cooks and becomes part of the texture.
- Seasonings (salt, pepper, Worcestershire, spices) — Build flavor boldly. The meat mixture carries the entire flavor profile.
- Milk or liquid (the moisture keeper) — This keeps the meatloaf tender instead of dense and dry. Don’t skip this step.
- Glaze or sauce (ketchup-based or other) — This adds sweetness, moisture, and flavor to the exterior. Apply strategically so it caramelizes.
- Resting time (the final step) — Let the meatloaf rest 10 minutes so it sets and slices cleanly. Cutting too soon makes it fall apart.
Building the Loaf So It Stays Juicy and Slices Cleanly
Mixing the Meat Without Toughening It
Combine everything in a large bowl and stop as soon as the ingredients look evenly distributed. The mixture should feel cohesive, but you should still see flecks of onion and breadcrumbs. If you overmix, the loaf will tighten up in the oven and the finished slices will have a springy, dense texture instead of a soft one.
Shaping for Even Baking
Form the loaf into a compact oval or press it into a prepared loaf pan without packing it down hard. A free-form loaf on a foil-lined baking sheet browns better on the outside, while a pan gives you a more traditional shape. Either way, the top should be smooth enough for the glaze to spread without sliding off the sides.
Glazing at the Right Time
Brush on half the glaze before baking so it starts to set into the top instead of sitting there like cold ketchup. Add the rest after the first bake so the sugars don’t scorch during the full cook time. If your glaze looks thin, it’s fine; it thickens in the oven and turns sticky as the meatloaf finishes.
Knowing When It’s Done
Pull the meatloaf when the center reaches 160°F and the top looks deeply lacquered at the edges. Don’t wait for the loaf to look completely firm in the oven, because carryover heat finishes the job during the rest. Let it sit for 10 minutes before slicing or the juices will run out onto the cutting board instead of staying in the slices.
How to Adapt This Meatloaf When You Need a Different Version
Gluten-Free Meatloaf
Swap the breadcrumbs for a gluten-free breadcrumb blend or crushed gluten-free crackers. The texture stays close to the original, though very fine crumbs can make the loaf a touch softer, so don’t add extra milk if the mixture already feels loose.
Dairy-Free Version
Replace the whole milk with unsweetened plain oat milk or beef broth. Oat milk keeps the mixture tender without changing the flavor much, while broth gives you a slightly more savory loaf with a firmer bite.
Turkey Meatloaf
Use ground turkey, but don’t skip the fat balance. Turkey is leaner than beef, so keep the milk and onion in place and watch the bake closely; it dries out faster, and pulling it right at 160°F matters even more.
Make-Ahead Meatloaf
Shape the loaf and mix the glaze up to a day ahead, then keep them covered in the fridge separately. Bake it straight from the fridge if you need to, but add a few extra minutes so the center has time to warm through evenly.
Storage and Reheating
- Refrigerator: Store sliced or whole meatloaf in an airtight container for up to 4 days. The glaze may soften a bit, but the flavor gets even better by day two.
- Freezer: Meatloaf freezes well. Wrap slices tightly or freeze the whole cooked loaf, then thaw overnight in the fridge for the best texture.
- Reheating: Reheat covered in a 300°F oven with a splash of water or broth in the pan until warmed through. Microwaving works for individual slices, but use short bursts so the beef doesn’t turn rubbery.
Answers to the Questions Worth Asking

Classic Glazed Meatloaf
Ingredients
Equipment
Method
- Preheat the oven to 350°F and line a loaf pan or baking sheet with foil.
- Combine ground beef, breadcrumbs, eggs, whole milk, grated onion, garlic, Worcestershire sauce, thyme, garlic powder, salt, and black pepper, mixing until just combined so the texture stays tender.
- Shape the mixture into a loaf on the baking sheet or press it into the loaf pan.
- Mix the glaze ingredients and spread half over the top of the meatloaf.
- Bake for 45 minutes at 350°F, then spread the remaining glaze over the top.
- Bake 15–20 minutes more at 350°F until the internal temperature reaches 160°F, with a shiny caramelized top.
- Rest the meatloaf for 10 minutes before slicing, so the juices set and the slices hold together.