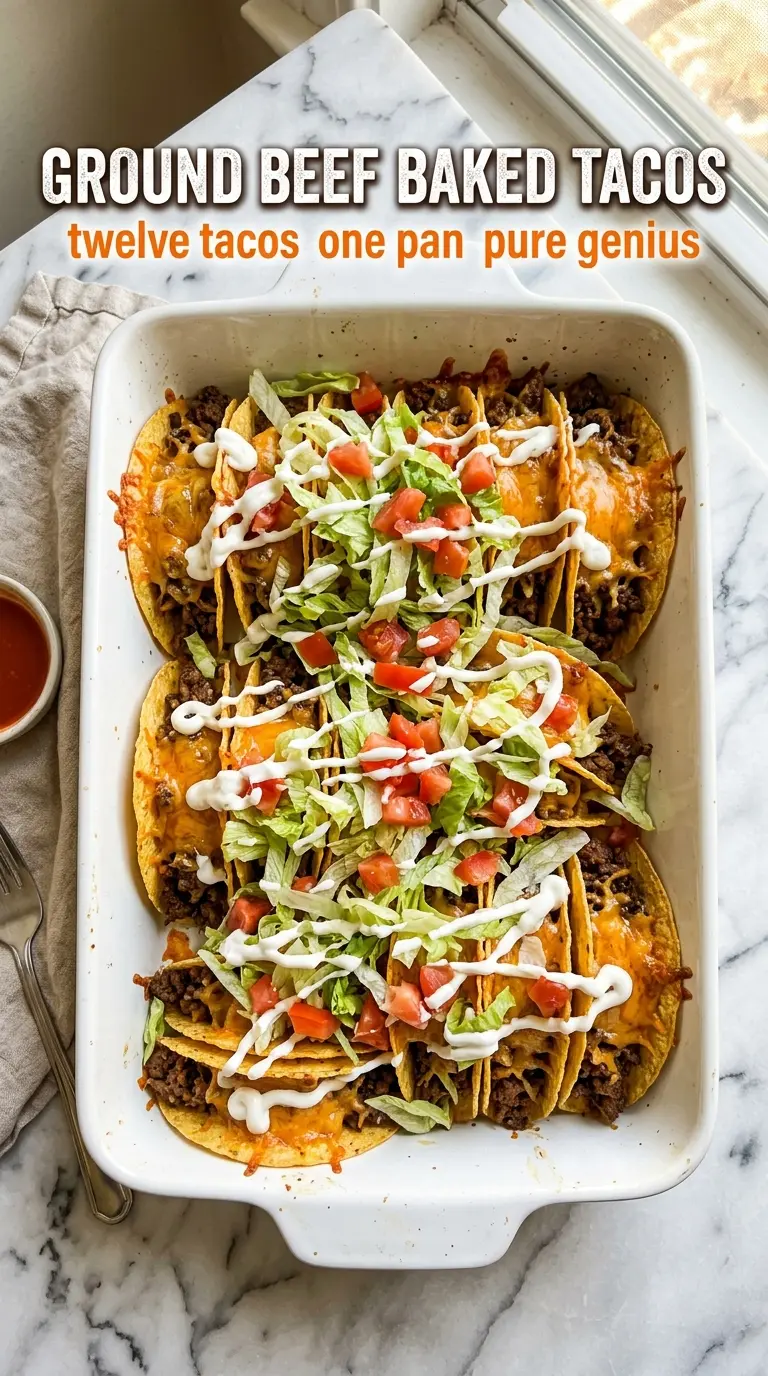
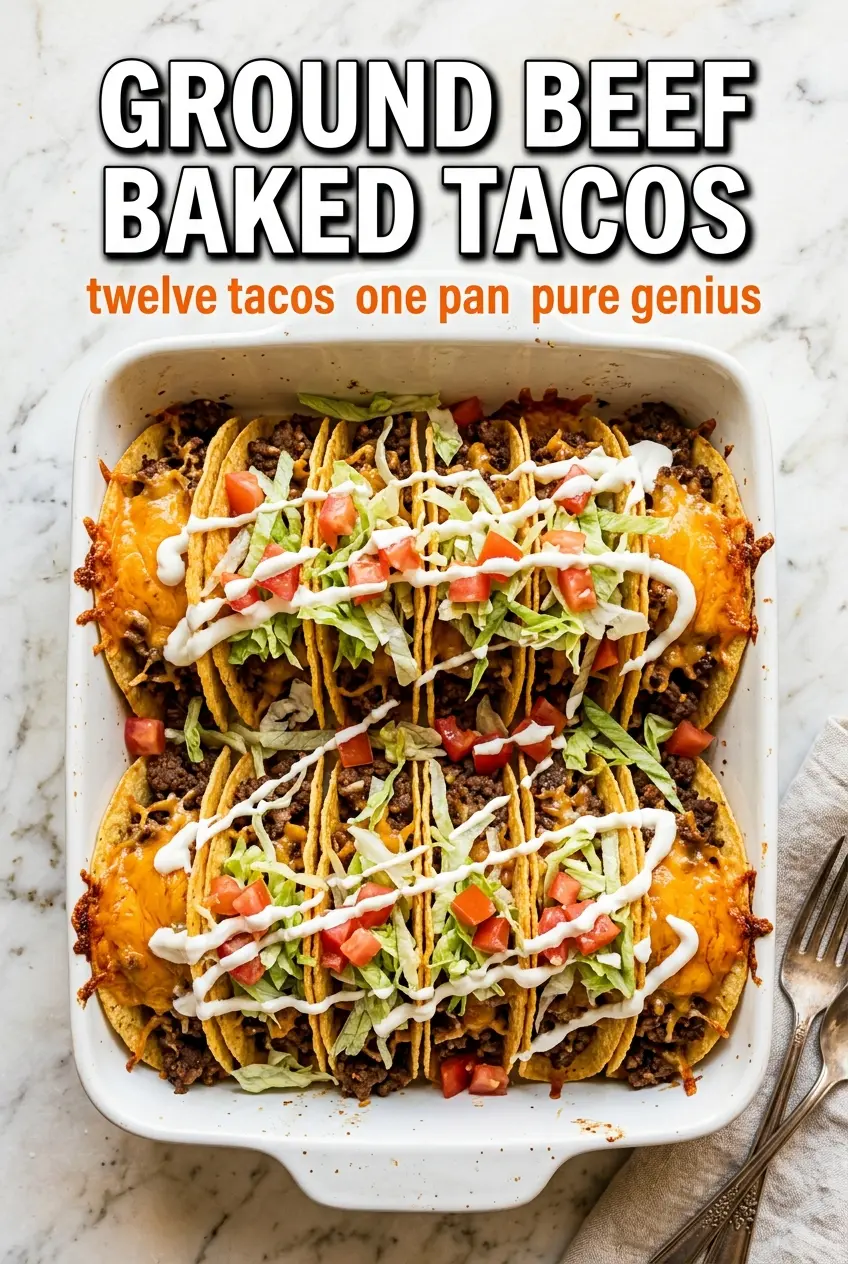
Ground beef baked tacos deliver the best parts of taco night in one tidy pan: crisp shells, juicy seasoned beef, and melted cheese that ties everything together. Baking them upright keeps the shells from getting soggy, and the cheese melts just enough to hold the filling in place without softening the crunch you want at the first bite.
The trick is simple. Cook the beef until the moisture is gone, then let the seasoning simmer with just enough water to coat every crumb. That keeps the filling bold instead of watery. Once the tacos are assembled, a short bake is enough to warm the shells and melt the cheese without drying out the meat.
Below, you’ll find the small details that matter here: how to keep hard shells from tipping over, when to add the toppings, and the easiest swaps if you want to change up the heat or make the filling stretch a little farther.
The shells stayed crisp all the way through and the cheese melted just enough to keep the beef in place. I loved that the taco seasoning simmered into the meat instead of tasting dusty.
Save these ground beef baked tacos for a crisp-shell taco night with melted cheese and no soggy bottoms.
The Trick to Keeping Hard Shells Crisp in the Oven
The biggest risk with baked tacos is moisture. If the beef goes into the shells wet, or if the tacos sit too long before baking, the shells start losing their crunch before they ever hit the table. The fix is to cook the filling until it looks saucy but not loose, then bake just long enough to melt the cheese and warm everything through.
The other thing that matters is support. Hard shells need something to lean against, whether that’s a snug baking dish, a taco rack, or folded foil tucked around the sides. If the shells wobble, the filling shifts and the cheese ends up in the pan instead of on the tacos.
- Cook off the water in the beef. After the seasoning goes in, simmer until the liquid is mostly absorbed and the meat looks glossy, not soupy.
- Bake only until the cheese melts. Ten to twelve minutes is enough. A longer bake dries the meat and makes the shells taste stale.
- Add cold toppings after baking. Lettuce, sour cream, tomatoes, and jalapeño all belong on at the end so they stay fresh and the shells stay crisp.
What Each Ingredient Is Doing in These Baked Tacos
The beef is the backbone here, so use something with enough fat to stay tender after baking. If you go too lean, the filling can turn dry once the tacos spend a few minutes in the oven. Taco seasoning does the heavy lifting for spice and salt, but it needs a little water to bloom and cling to the meat instead of sitting in dusty pockets.
Hard taco shells are non-negotiable for this version. Soft tortillas won’t give you the same upright structure or that toasted crunch after baking. Cheddar melts nicely and adds a sharp edge, but a Monterey Jack-cheddar blend works well if you want a softer melt. The tomatoes, lettuce, sour cream, and jalapeño all stay out of the oven on purpose so each bite has contrast instead of one heavy, blended texture.
- Ground beef — 80/20 or 85/15 gives the best balance of flavor and juiciness. If you use extra-lean beef, add a spoonful of oil to keep the filling from tasting flat.
- Taco seasoning — Store-bought works fine here because it melts into the beef as it simmers. If yours is salt-free, season the meat a little more aggressively before baking.
- Cheddar cheese — Shred it yourself if you can. Pre-shredded cheese melts, but the anti-caking coating can keep it from forming that nice smooth layer.
- Sour cream — A small dollop cools the heat and adds richness after baking. Full-fat sour cream holds its shape best.
Building the Tacos So Nothing Falls Apart in the Oven
Brown the Beef Until the Pan Is Dry
Cook the ground beef over medium-high heat and break it up as it browns. Keep going until there’s no pink left and the pan is no longer full of liquid. If you leave excess fat or moisture behind, the seasoning turns greasy and the shells pick it up fast. Drain the beef before the taco seasoning goes in, then return it to the skillet so the flavor sticks to the meat instead of floating in the pan.
Simmer the Seasoning Into the Meat
Add the taco seasoning and water, then stir until every crumb is coated. Let it simmer for 2 to 3 minutes, just until the liquid tightens up and clings to the beef. You want a moist filling, not a runny one. If it still looks loose, give it another minute on the heat before spooning it into the shells.
Set the Shells and Bake Briefly
Stand the taco shells upright in a baking dish and fill them while they’re already supported. Divide the beef evenly so the shells don’t tip from one heavy side, then top with cheese. Bake at 350°F until the cheese melts and the shells smell toasted, usually 10 to 12 minutes. If the tacos sit in the pan after baking, the steam softens the shells, so serve them right away.
Finish With Cold Toppings
Add the lettuce, tomatoes, sour cream, and jalapeño after baking so the contrast stays sharp. The cold toppings wake up the warm beef and melted cheese, and they keep the tacos from tasting one-note. Salsa belongs on the side so each person can control how wet their taco gets. That matters more than people think, because salsa poured straight into the shell is how crunchy tacos turn floppy.
How to Adapt These Ground Beef Baked Tacos for Different Nights
Make It Spicier
Add extra diced jalapeño to the beef after it simmers, or swap in a hot taco seasoning. You can also use pepper jack instead of cheddar for a sharper finish. The tacos stay the same structurally, but the heat moves from the toppings into the filling.
Use Ground Turkey Instead
Ground turkey works, but it needs a little help to taste full. Add a teaspoon of oil when browning and don’t skip the simmering step, since turkey can taste dry if the seasoning never gets a chance to settle into it. The result is lighter, but the shells and toppings behave the same way.
Make It Gluten-Free
Use certified gluten-free taco seasoning and gluten-free hard shells. Everything else in the recipe already fits naturally. This is one of the rare taco dinners that adapts cleanly without changing the method at all.
Stretch the Filling for More Servings
Add a drained can of black beans or pinto beans after the beef is seasoned. The filling becomes a little softer and more rustic, but it still bakes well and gives you more tacos without buying another pound of meat. Keep the seasoning bold so the beans don’t taste plain.
Storage and Reheating
- Refrigerator: Store the beef separately from the shells for up to 4 days. The shells lose their crunch if they sit assembled.
- Freezer: Freeze the cooked beef filling for up to 2 months. Hard shells and fresh toppings don’t freeze well.
- Reheating: Warm the beef in a skillet or microwave, then build fresh tacos and bake briefly if you want the cheese melted again. Reheating already assembled tacos in the microwave softens the shells fast.
Questions I Get Asked About This Recipe
Ground Beef Baked Tacos
Ingredients
Equipment
Method
- Preheat oven to 350°F. Brown ground beef in a skillet over medium-high heat, breaking it into crumbles as it cooks, then drain excess fat.
- Add taco seasoning and water to the beef, stirring to combine, then simmer for 2-3 minutes until thickened slightly and evenly seasoned.
- Arrange taco shells in a baking dish, standing them upright, then divide seasoned beef among the shells so the filling reaches near the top.
- Sprinkle shredded cheddar cheese over each taco. Bake for 10-12 minutes until shells are crispy and the cheese is melted and bubbling at the edges.
- Top each taco with diced tomatoes and shredded lettuce for a fresh layer that contrasts the hot beef. Add a dollop of sour cream and diced jalapeño for heat and creaminess.
- Serve with salsa on the side so everyone can control the topping amount.