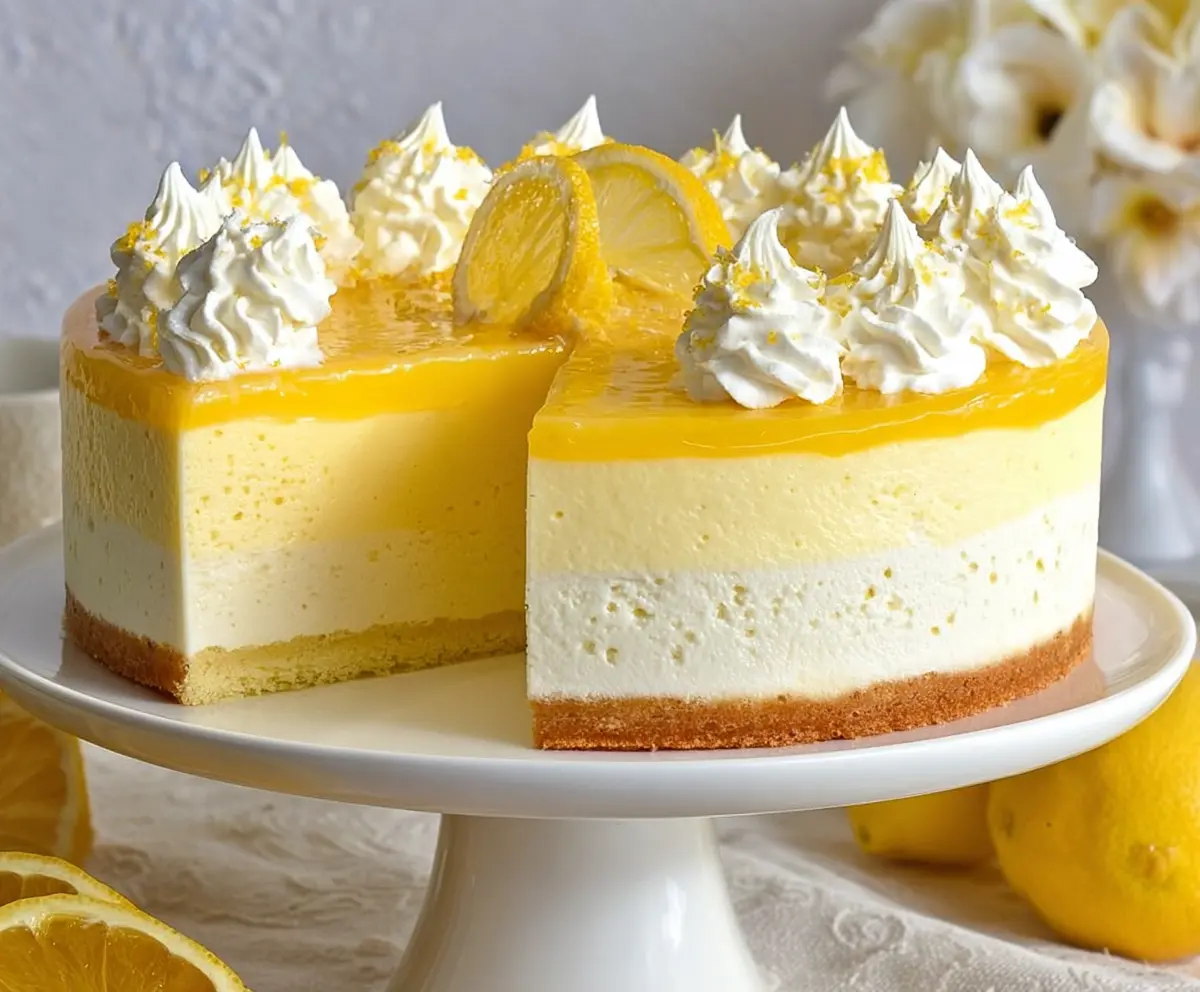
This Lemon Mousse Cake is a light and fluffy treat that’s perfect for any occasion! With a tangy lemon flavor and creamy mousse layers, it’s a refreshing delight.
Making this cake is easier than it sounds! I love how it lifts my spirits with its bright taste, and the best part is, it looks so pretty on the table—like sunshine served on a plate! 🌞
Key Ingredients & Substitutions
Digestive Biscuits or Graham Crackers: These create a tasty crust. If you can’t find them, any plain cookie, like vanilla wafers or similar, can work in a pinch. Just crush them well for a good texture!
Cream Cheese: This is key for the creamy texture. You can substitute with a non-dairy cream cheese if you want a vegan option, but it may alter the taste slightly.
Heavy Cream: Necessary for both mousse layers, heavy cream gives a great richness. If you’re looking for a lighter option, you can use whipped topping, which works but may not have the same flavor depth.
Gelatin: It helps set the mousse. If you prefer a plant-based alternative, agar-agar is a wonderful option and works similarly, just make sure to check the specific instructions for using it!
Lemon Juice and Zest: Fresh lemon juice is best for bright flavor. If you don’t have fresh lemons, bottled juice will work, though fresh really enhances the taste. Don’t skip the zest; it adds essential lemony aroma and flavor.
How Do You Perfectly Bloom Gelatin?
Blooming gelatin is crucial for getting the right consistency in your mousse. You’ll want to do this step carefully so it dissolves smoothly when mixed in. Here’s how to do it:
- Sprinkle the gelatin over the required cold water in a bowl, making sure it covers evenly.
- Let it sit for 5-10 minutes, allowing it to absorb the water and swell, which is called blooming.
- After blooming, gently heat it (use a microwave or stovetop) until it dissolves completely. It should not boil!
Doing this properly gives your mousse that lovely creamy texture and prevents any lumps, which is what you’ll want in your cake!

How to Make Lemon Mousse Cake
Ingredients You’ll Need:
For the Crust:
- 200g (7 oz) digestive biscuits or graham crackers, crushed
- 100g (7 tbsp) unsalted butter, melted
For the White Mousse Layer:
- 250ml (1 cup) heavy cream
- 200g (7 oz) cream cheese, softened
- 60g (1/3 cup) sugar
- 1 tbsp powdered gelatin or agar-agar
- 60ml (1/4 cup) cold water
For the Lemon Mousse Layer:
- 250ml (1 cup) heavy cream
- 200g (7 oz) cream cheese, softened
- 100g (1/2 cup) sugar
- 3 large lemons (zest and juice)
- 2 tbsp powdered gelatin or agar-agar
- 80ml (1/3 cup) cold water
For the Lemon Jelly Topping:
- 200ml (about 3/4 cup + 2 tbsp) fresh lemon juice
- 80g (1/3 cup + 1 tbsp) sugar
- 2 tbsp powdered gelatin or agar-agar
- Lemon slices for garnish
For Decoration:
- Whipped cream (about 250ml / 1 cup)
- Lemon zest for sprinkling
How Much Time Will You Need?
This recipe takes about 20 minutes of active prep time, plus chilling time. You’ll need at least 1 hour for the white mousse layer to set, and an additional 2-3 hours for the lemon mousse layer, followed by 1-2 hours for the jelly topping. So, be sure to plan ahead and give yourself plenty of time for this refreshing dessert!
Step-by-Step Instructions:
1. Prepare the Crust:
Start by mixing the crushed digestive biscuits with the melted butter in a medium bowl. Use a fork to combine until everything is well mixed. Then, press the mixture firmly and evenly into the bottom of a 9-inch (23 cm) springform pan. Once done, pop it into the refrigerator to chill while you prepare the mousse layers.
2. Make the White Mousse Layer:
In a small bowl, sprinkle 1 tablespoon of gelatin over 60ml of cold water. Let this sit for about 5 minutes to bloom. In the meantime, whip the 250ml of heavy cream in a separate bowl until soft peaks form. Set this mixture aside. Then, in another bowl, beat the softened cream cheese with 60g of sugar until smooth and creamy.
Gently heat the bloomed gelatin until it’s fully dissolved—don’t let it boil! Combine this gelatin with the cream cheese mixture and stir until well blended. Now, gently fold in the whipped cream until just combined. Pour this white mousse mixture over the chilled crust and smooth the top with a spatula. Return it to the fridge to set for at least 1 hour.
3. Make the Lemon Mousse Layer:
Now it’s time for the lemon mousse! Sprinkle 2 tablespoons of gelatin over 80ml of cold water and let it bloom for 5 minutes. Whip the heavy cream as you did before until soft peaks form and set aside. In a new bowl, beat the softened cream cheese with 100g sugar, along with the zest and juice of the 3 lemons until smooth.
Next, heat the bloomed gelatin until it’s dissolved, and stir it into the lemon cream cheese mixture. Gently fold in the whipped cream carefully to maintain that light and airy texture. Pour this lemon mousse layer over the perfectly set white mousse and smooth it out. Refrigerate for an additional 2-3 hours, or until fully set.
4. Prepare the Lemon Jelly Topping:
To make the lemon jelly, sprinkle the remaining 2 tablespoons of gelatin over a small amount of cold water and allow it to bloom for 5 minutes. In a small saucepan, heat the 200ml of lemon juice with 80g of sugar over medium heat, stirring just until the sugar dissolves—no boiling! Remove from heat and stir in the bloomed gelatin until it’s fully combined. Let the mixture cool slightly but avoid letting it set.
Now, pour the lemon jelly evenly over the set lemon mousse layer. Put everything back in the fridge for at least 1-2 hours until the jelly topping has firmed up.
5. Decorate and Serve:
Once everything is set, it’s time to garnish! Pipe whipped cream in decorative dollops on top of your cake, add lemon slices for decor, and sprinkle a little lemon zest for that finishing touch. Carefully remove the springform pan before slicing. Enjoy your fresh, creamy, and tangy Lemon Mousse Cake with your friends and family!
Can I Use a Different Type of Biscuit for the Crust?
Absolutely! While digestive biscuits or graham crackers are traditional, you can use any plain cookie, like vanilla wafers or shortbread. Just make sure they are crushed into fine crumbs for a sturdy crust.
What If I Don’t Have Gelatin?
If you don’t have gelatin, agar-agar is a great alternative. Just keep in mind that it sets differently, so check the package instructions for the proper ratios and methods to use it successfully.
Can I Make This Ahead of Time?
Yes, this cake is perfect for making in advance! You can prepare it a day or two ahead. Just store it covered in the fridge to keep it fresh. The flavors will even meld beautifully over time.
How Do I Store Leftovers?
Store any leftover cake slices in an airtight container in the refrigerator for up to 3 days. To revive the flavors, you can serve it chilled or let it sit at room temperature for a bit before enjoying!


