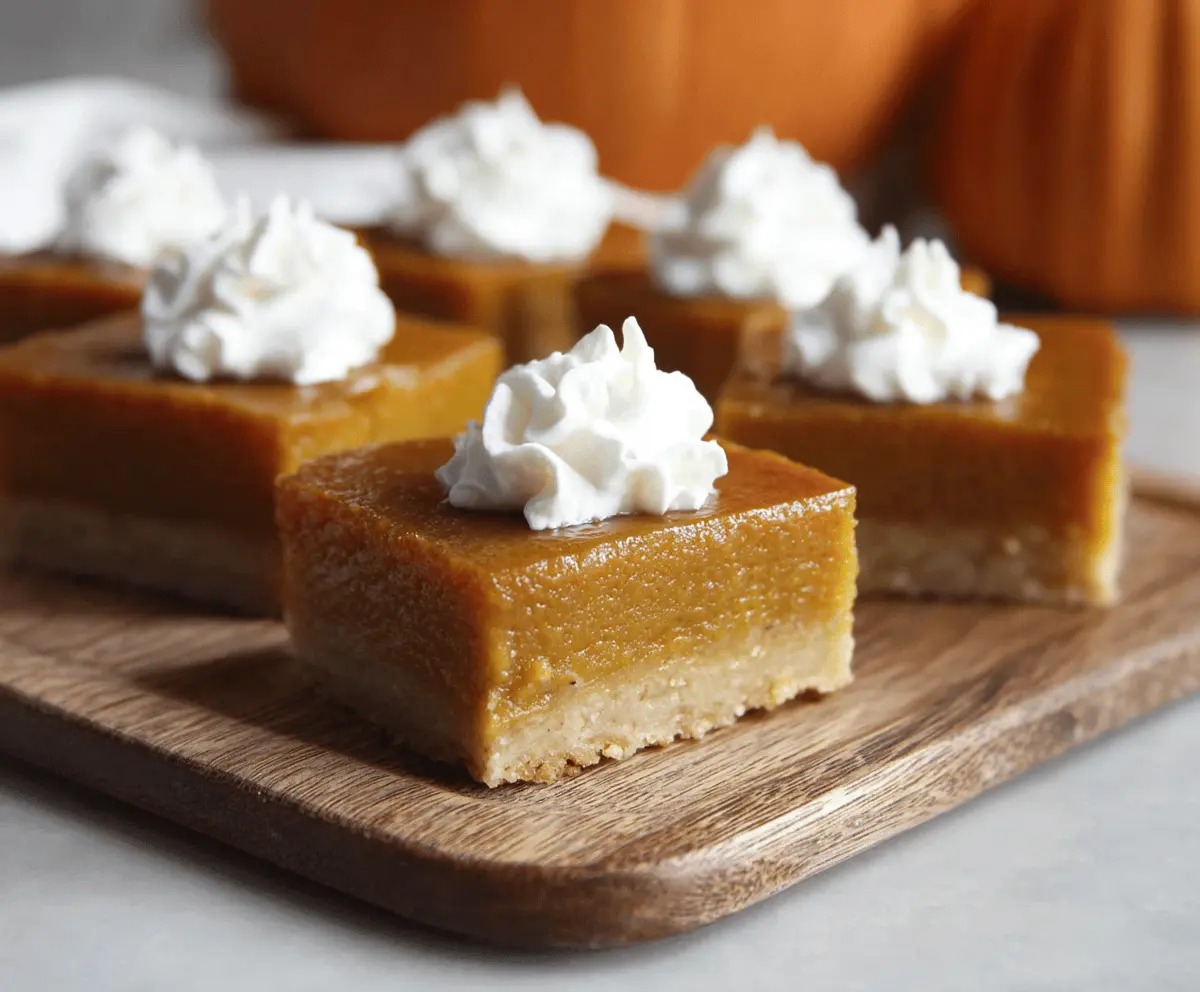
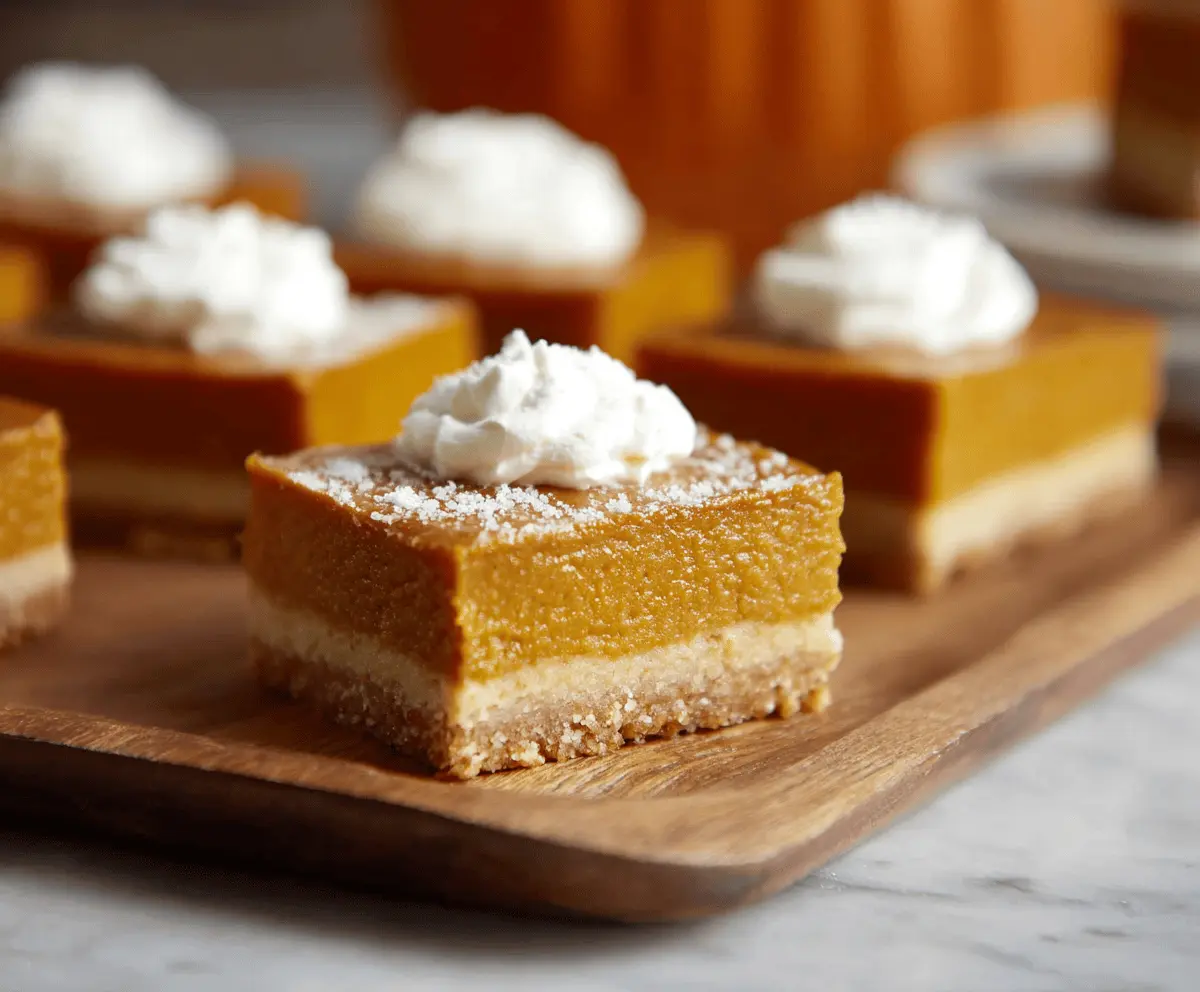
These Pumpkin Pie Bars offer all the warm, spiced goodness of traditional pumpkin pie in a handy, cuttable form. They have a buttery crust and a creamy filling that will make autumn your favorite season!
Making these bars is super easy—mix, pour, and bake! I love serving them with a dollop of whipped cream on top. You can’t go wrong with pumpkin and whipped cream—it’s a classic combo! 🥧
Key Ingredients & Substitutions
All-Purpose Flour: A staple for the crust, it creates a tender texture. If you’re gluten-free, try a 1-to-1 gluten-free flour blend as a substitute.
Powdered Sugar: This adds sweetness and helps to create a crumbly crust. If you’re out, granulated sugar can work, just be sure to mix it well to prevent grit.
Pumpkin Puree: Essential for the filling’s flavor, canned pumpkin is convenient. If you prefer fresh, roast and puree your own pumpkin for a homemade touch!
Brown Sugar: Brings deep sweetness. You can replace it with white sugar or coconut sugar if needed, but the flavor might change a bit.
Pumpkin Pie Spice: This is a blend of warm spices. If you don’t have it, mix your own using cinnamon, nutmeg, and ginger for a similar taste.
How Do I Achieve the Perfect Crust?
The crust is key to these pumpkin pie bars. You want it buttery and firm enough to hold the filling. Here’s how to make sure you nail it:
- Mix your dry ingredients first. This prevents clumps of sugar.
- When adding melted butter, mix until crumbly. Don’t overmix; it should be a bit loose for the ideal texture.
- Press the crust firmly into the pan with your hands or the bottom of a cup for an even layer. This helps it bake evenly.
What’s the Best Way to Cool and Slice the Bars?
Cooling is crucial for clean slices. Here’s how to get it right:
- Let them cool in the pan until they’re at room temperature. Then, refrigerate for at least 2 hours. This sets the filling!
- Use the parchment paper to lift it out gently before cutting. A sharp knife dipped in hot water makes clean cuts.
- Wipe the knife between cuts to keep the edges neat.
These tips should help you create delicious pumpkin pie bars that impress your family and friends! Enjoy slicing and serving!
How to Make Pumpkin Pie Bars
Ingredients You’ll Need:
For the Crust:
- 1 ½ cups all-purpose flour
- ½ cup powdered sugar
- ¾ cup unsalted butter, melted
- ¼ teaspoon salt
For the Pumpkin Filling:
- 1 (15 oz) can pumpkin puree
- ¾ cup brown sugar, packed
- 2 large eggs
- ¾ cup evaporated milk
- 2 teaspoons pumpkin pie spice
- ¼ teaspoon salt
Optional for Serving:
- Whipped cream
How Much Time Will You Need?
This recipe takes about 15 minutes to prep and another 55 minutes for baking and cooling, plus 2 hours for chilling in the refrigerator. In total, you’ll spend about 3 hours to have perfectly delicious pumpkin pie bars ready to enjoy!
Step-by-Step Instructions:
1. Prepare the Oven and Pan:
Start by preheating your oven to 350°F (175°C). While that’s warming up, take a 9×9-inch baking pan and line it with parchment paper, leaving some excess hanging over the edges. This will help you lift the bars out after they cool!
2. Make the Crust:
In a medium bowl, mix the all-purpose flour, powdered sugar, and salt together. Gradually pour in the melted butter, stirring until everything looks crumbly and sandy. This mixture should hold together when you squeeze it in your hand!
3. Press and Bake the Crust:
Press the crust mixture firmly into the bottom of your prepared pan; it should be an even layer. Bake the crust in the oven for about 15 minutes or until you see it turning lightly golden around the edges. Once done, take it out and let it cool slightly.
4. Prepare the Pumpkin Filling:
In a large mixing bowl, whisk together the pumpkin puree, brown sugar, eggs, evaporated milk, pumpkin pie spice, and salt. Make sure everything is blended until it’s nice and smooth.
5. Combine it All:
Carefully pour the smooth pumpkin filling over the baked crust. Spread it evenly so every bite is delicious!
6. Bake the Bars:
Put the pan back in the oven and bake for about 40-45 minutes. The bars are done when they are set; you can check by inserting a toothpick in the center. If it comes out clean or with just a couple of moist crumbs, you’re good to go!
7. Cool and Chill:
After baking, let the bars cool completely in the pan on a wire rack. Once they’re cool, place them in the refrigerator for at least 2 hours to firm up. This will help you slice them easily!
8. Serve Up the Deliciousness:
When you’re ready to serve, use the overhanging parchment paper to lift the bars out of the pan. Cut them into squares and top with whipped cream if you like. Enjoy your delightful pumpkin pie bars!
These bars bring all the cozy flavors of pumpkin pie in a fun, easy-to-share format. Perfect for Thanksgiving, parties, or just a tasty treat at home!
Can I Use Fresh Pumpkin Instead of Canned Puree?
Absolutely! If you prefer fresh pumpkin, roast and puree your own pumpkin. Just make sure to drain off any excess moisture so the filling sets correctly.
How Can I Store Leftover Pumpkin Pie Bars?
Store any leftover bars in an airtight container in the refrigerator for up to 4 days. For extended storage, you can freeze them for up to 3 months. Just make sure to wrap them tightly to prevent freezer burn!
What If I Don’t Have Evaporated Milk?
No worries! You can substitute evaporated milk with an equal amount of whole milk or homemade milk alternative. Just know that using regular milk will make the filling slightly less creamy.
Can I Make These Bars Gluten-Free?
Yes! Simply substitute the all-purpose flour with a gluten-free 1-to-1 baking flour blend. This will help achieve a similar texture for the crust!