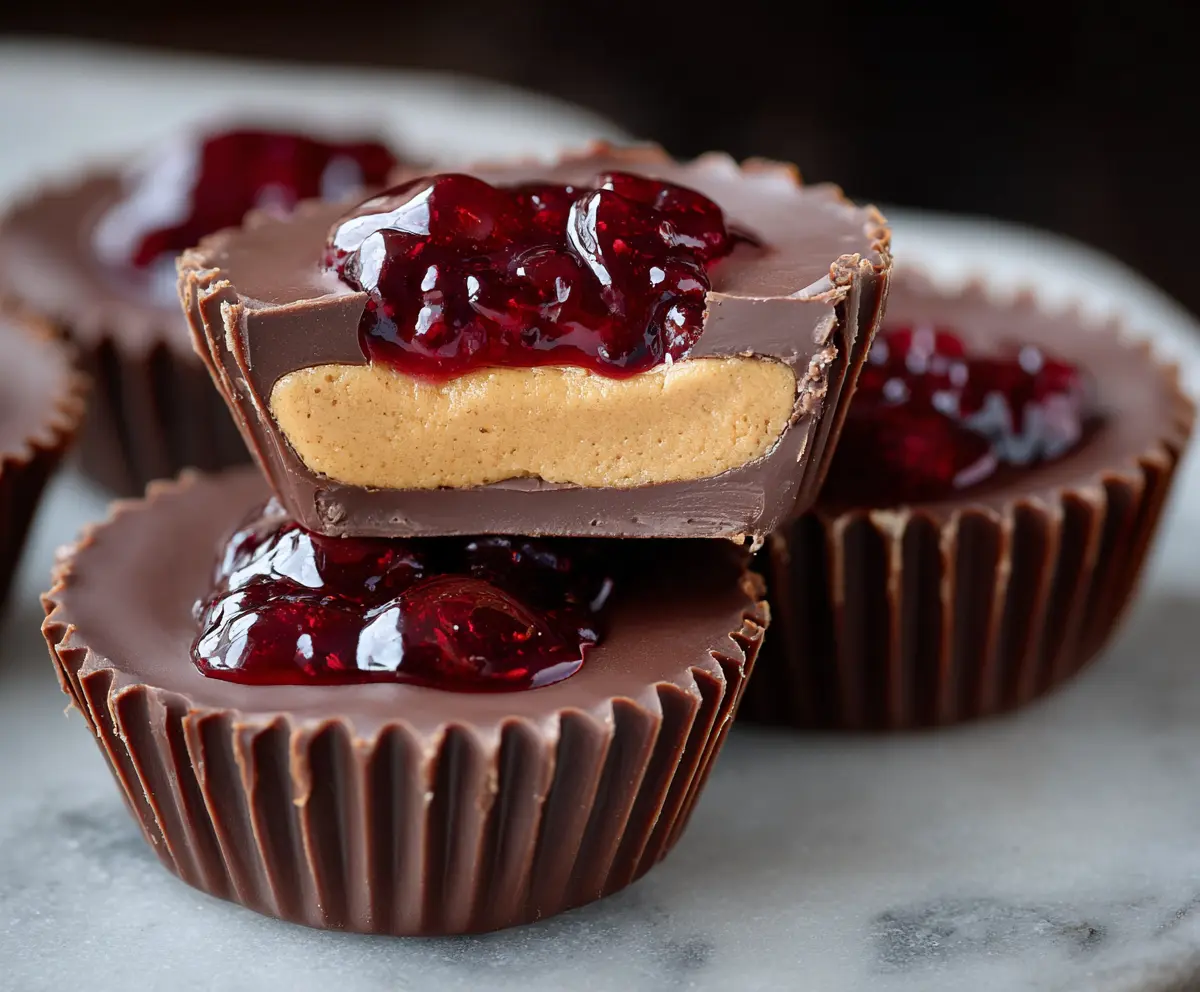
These Peanut Butter and Jelly Cups are sweet little treats that blend creamy peanut butter with your favorite jelly all in a crunchy shell. They’re perfect for kids and adults alike!
Honestly, how can you go wrong with peanut butter and jelly? I love popping these cups into my lunch or just enjoying them as a sweet snack. They’re a total crowd-pleaser! 😄
Key Ingredients & Substitutions
Chocolate Chips: Using semi-sweet chocolate chips gives a rich flavor. If you want it sweeter, try milk chocolate. Dark chocolate can give a more intense taste, which is great if you fancy a bit more bitterness to balance the sweetness!
Peanut Butter: Creamy peanut butter is perfect for this recipe. If you’re nut-free or want a healthier option, you can substitute almond butter or sunflower seed butter for a similar creamy texture.
Powdered Sugar: This sugar helps sweeten the peanut butter mixture without making it gritty. If you’re watching sugar intake, you could use a sugar alternative like stevia or monk fruit in the same amount.
Jelly or Jam: Classic choices like cherry or strawberry jelly work well, but feel free to use any flavor you like! Raspberry or even grape jelly could add a fun twist.
How Do You Achieve a Smooth Chocolate Shell?
Making a perfect chocolate shell can be tricky, but with a bit of care, it’s easy! Here’s how to get a smooth and even chocolate coating:
- Heat the chocolate slowly in the microwave, stirring frequently. This prevents overheating and helps maintain a nice texture.
- When coating the liners, make sure the chocolate reaches the edges to avoid any gaps. Using the back of a spoon works well to spread it out evenly.
- Let the chocolate set in the freezer. This helps it firm up quickly, making it easier to fill with peanut butter and jelly.
With these tips, you’ll have perfectly layered cups every time!

How to Make Peanut Butter And Jelly Cups
Ingredients You’ll Need:
For the Cups:
- 1 ½ cups semi-sweet chocolate chips or chocolate candy melts
- ¾ cup creamy peanut butter (natural or regular)
- 3 tablespoons powdered sugar
- 1 teaspoon vanilla extract
- ¼ cup cherry or strawberry jelly or jam
How Much Time Will You Need?
This delightful recipe takes about 20 minutes of active prep time, plus an additional 30 minutes for chilling in the freezer. So in total, you’re looking at approximately 50 minutes before you can enjoy these tasty treats! A bit of waiting, but totally worth it!
Step-by-Step Instructions:
1. Prepare the Muffin Tin:
Start by lining a muffin tin or a mini cupcake pan with paper liners. This step is important as it will help you easily remove the cups later once they are set.
2. Melt the Chocolate:
In a microwave-safe bowl, melt the chocolate chips or candy melts. Do this in 30-second intervals to prevent burning. Stir the mixture after each interval until it is smooth and fully melted. It should be silky—perfect for creating those delicious cups!
3. Create the Chocolate Shell:
Spoon about 1 tablespoon of the melted chocolate into each paper liner. Using the back of a spoon or your clean finger, spread the melted chocolate evenly around the bottom and up the sides of the liner to form a shell. Make sure it’s evenly coated!
4. Set the Chocolate Shell:
Place the muffin tin in the freezer for about 10 minutes to set the chocolate shell. This helps it harden up nicely!
5. Prepare the Peanut Butter Filling:
While you’re waiting for the chocolate to set, mix together the creamy peanut butter, powdered sugar, and vanilla extract in a bowl. Keep mixing until it’s smooth and creamy. This will be your delicious filling!
6. Fill the Chocolate Shells:
Once the chocolate shell is set, remove the pan from the freezer. Using a spoon or piping bag, add a generous spoonful of the peanut butter mixture to each chocolate shell, leaving a little space at the top for the jelly.
7. Add the Jelly:
Top the peanut butter layer in each cup with a small dollop (about ½ teaspoon) of your chosen jelly or jam. This adds that classic PB&J flavor!
8. Seal With More Chocolate:
Pour more melted chocolate over the peanut butter and jelly layers, filling each cup nearly to the top and sealing the edges. Make sure the jelly is covered so it doesn’t leak out.
9. Chill Again:
Return the pan to the freezer for about 15–20 minutes, or until the cups are fully set and firm to the touch.
10. Final Touches:
Once fully set, carefully remove the paper liners to reveal your beautiful Peanut Butter and Jelly Cups! Store any leftovers in an airtight container in the refrigerator for up to a week.
Enjoy these delightful, nostalgic treats that bring together the best flavors of childhood in every bite!
Can I Use Different Types of Chocolate for This Recipe?
Absolutely! While semi-sweet chocolate works beautifully, you can also use milk chocolate for a sweeter taste or dark chocolate for a richer flavor. Just keep in mind that the sweetness of the finished cups will change depending on the chocolate you choose!
Can I Make These Peanut Butter And Jelly Cups Vegan?
Yes! To make vegan cups, use dairy-free chocolate chips and unsweetened peanut butter. You can also substitute the powdered sugar with a plant-based sweetener if desired. Just check all ingredient labels to ensure they are vegan-friendly!
How Do I Store Leftover Peanut Butter Cups?
Store any leftover cups in an airtight container in the refrigerator for up to a week. For longer storage, you can freeze them! Just place them in a freezer-safe container with parchment paper between layers to prevent sticking, and they’ll last up to 3 months.
Can I Customize the Filling or Jelly Flavor?
Definitely! Feel free to experiment with different nut butters like almond or cashew, and try various flavors of jelly or jam. Raspberry, grape, or even chocolate hazelnut spreads can add a fun twist to your Peanut Butter And Jelly Cups!