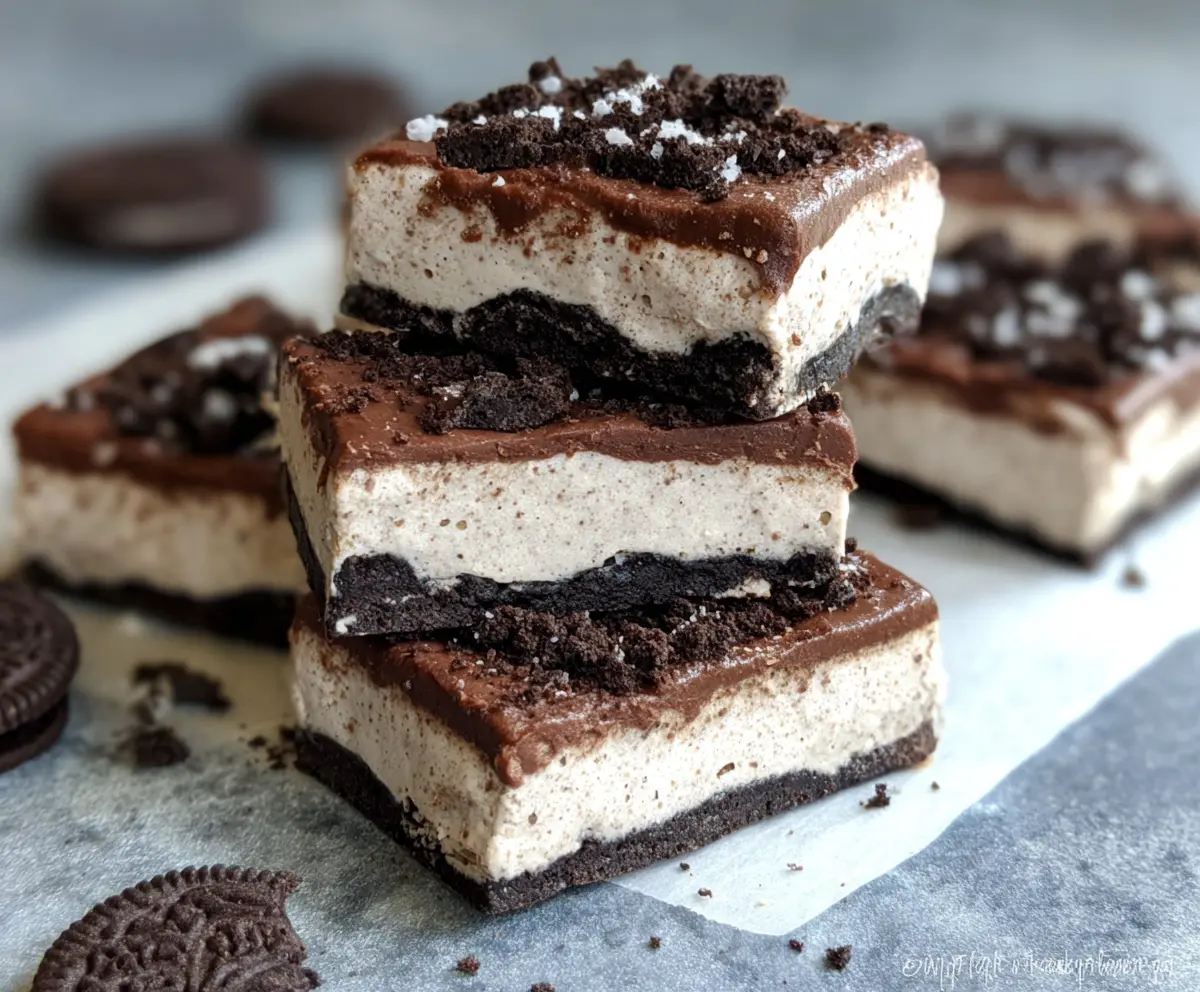
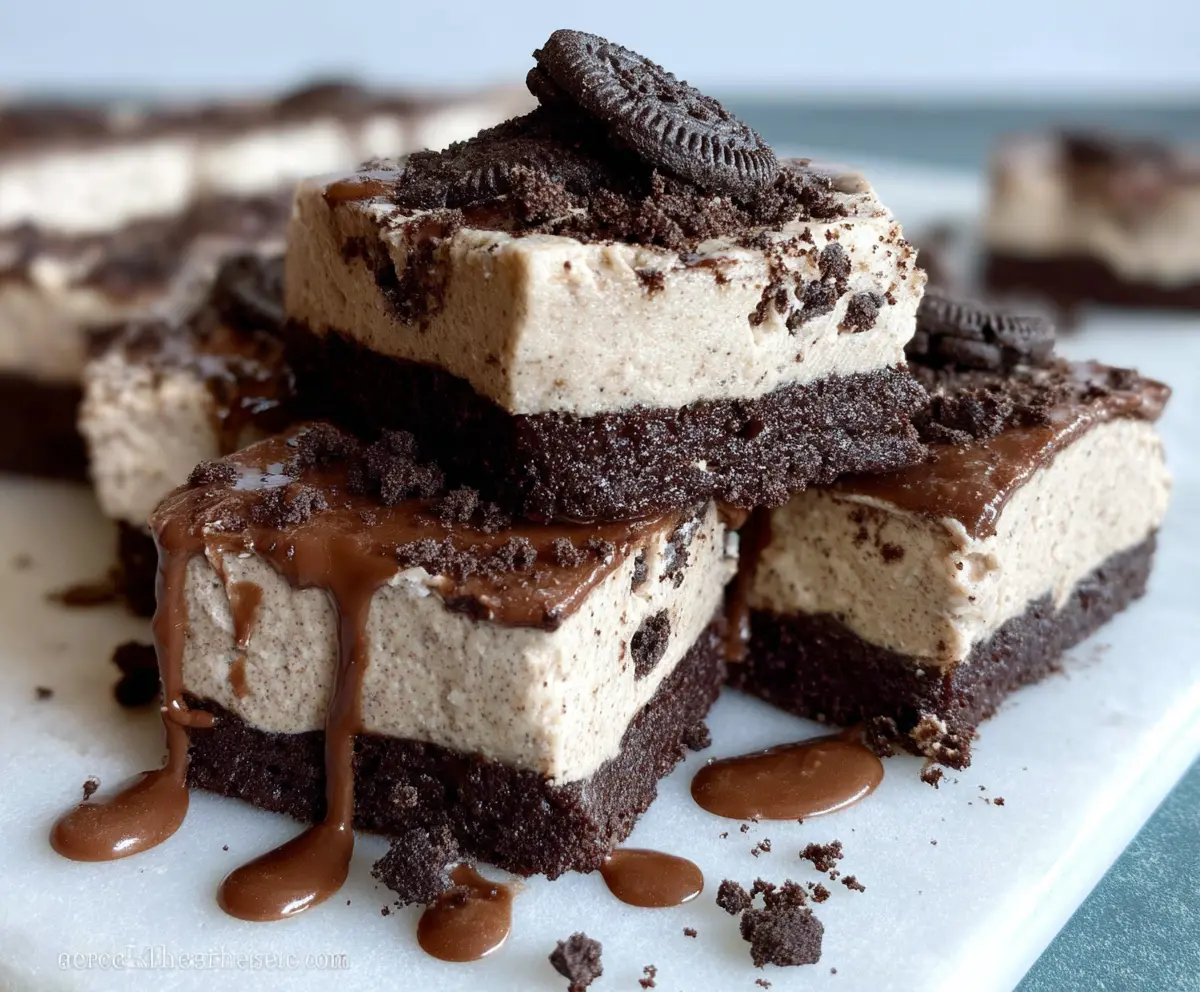
These No Bake Oreo Protein Bars are a tasty way to enjoy a treat while getting some protein. Made with crushed Oreos and protein powder, they’re quick and super simple to whip up!
I love how easy they are to make—just mix, shape, and chill! Plus, who can resist that chocolatey Oreo flavor? It’s like having dessert that’s good for you. Yum! 😋
Key Ingredients & Substitutions
Oreo Cookies: These are the stars of this recipe! They add that classic chocolate flavor and crunch. If you’re looking for a gluten-free option, try using gluten-free chocolate sandwich cookies instead.
Protein Powder: I prefer using vanilla or cookies and cream protein powder for the best flavor. However, any protein powder will work. If you’re dairy-free, there are plant-based protein powders available too!
Greek Yogurt: Greek yogurt adds creaminess and protein. If you don’t have it, plain yogurt can work too. For a dairy-free option, use coconut yogurt.
Cream Cheese: This gives a rich, smooth texture. Neufchâtel cheese is a lighter alternative. Vegan cream cheese can substitute if you’re looking for dairy-free options.
Honey or Maple Syrup: Both naturally sweeten the bars. If you need a vegan option, go for maple syrup. Agave syrup is another good substitute.
How Do I Make Sure My Bars Set Firmly?
The key to getting these bars to set properly is refrigerating them long enough. Start by preparing your base well, pressing it firmly into the pan.
- After layering in the protein mixture, make sure it’s spread evenly with no gaps.
- Chilling is crucial. Refrigerate for at least 2-3 hours, but overnight is even better to fully set before cutting.
- When ready, use the parchment paper to lift them out; this helps avoid any breakage while cutting.
Following these steps will help ensure your bars are firm, easy to cut, and hold their shape perfectly!
No Bake Oreo Protein Bars
Ingredients You’ll Need:
For the Base and Topping:
- 15 Oreo cookies, crushed
For the Protein Mixture:
- 1 cup vanilla or cookies and cream protein powder
- 1/2 cup Greek yogurt (or plain yogurt)
- 1/2 cup cream cheese, softened
- 1/4 cup honey or maple syrup
- 1/2 tsp vanilla extract
- Optional: pinch of salt
For the Top Layer:
- 3/4 cup chocolate protein pudding or chocolate protein mix prepared as pudding
How Much Time Will You Need?
This recipe takes about 15 minutes of prep time and at least 2-3 hours to chill in the refrigerator. It’s a quick and easy treat that simply requires mixing, layering, and letting it set.
Step-by-Step Instructions:
1. Prepare Your Pan:
Begin by lining an 8×8 inch square pan with parchment paper. This will make it easy to lift the bars out once they’re set.
2. Make the Base Layer:
In a small bowl, crush about 12 Oreo cookies until they are fine crumbs. Firmly press these crumbs into the bottom of the prepared pan to create an even base layer. This will be the delicious foundation of your protein bars!
3. Mix the Protein Filling:
In a mixing bowl, combine the protein powder, Greek yogurt, softened cream cheese, honey or maple syrup, vanilla extract, and the optional pinch of salt. Use a whisk or hand mixer to blend it all together until it’s smooth and creamy. It should look delicious and feel fluffy too!
4. Add Oreo Texture:
Fold about 3 crushed Oreos into the protein mixture for extra flavor and crunch. This gives each bite a wonderful surprise!
5. Spread the Protein Mixture:
Evenly spread the protein mixture over the Oreo cookie base in the pan. Use a spatula or the back of a spoon to smooth it out. Make sure it’s even so every bite tastes great!
6. Prepare the Top Layer:
Now, get your chocolate protein pudding ready. Follow the package instructions to prepare it, or if you’re using a pre-made pudding, just mix it and set it aside.
7. Layer the Pudding:
Pour and spread the chocolate protein pudding layer evenly on top of the protein mixture. This adds a decadent finish and a lovely chocolate flavor!
8. Garnish with Oreos:
Sprinkle any remaining crushed Oreo cookies on top of the pudding for a beautiful finish. It not only looks nice but also adds extra crunch!
9. Chill Out:
Cover the pan with plastic wrap or foil and refrigerate for at least 2-3 hours. This step is important for helping the bars set properly.
10. Cut and Enjoy:
Once the bars are firm, carefully pull them out of the pan using the parchment paper. Place them on a cutting board and slice them into squares or rectangles, however you like!
11. Storage Tips:
Store any leftovers in an airtight container in the refrigerator for up to 5 days. These bars are best enjoyed chilled!
These No Bake Oreo Protein Bars are creamy, chocolatey, and oh-so-satisfying. With their delicious crunch from the Oreo base and topping, you might just find them to be your new favorite snack. Enjoy!
Can I Use Different Types of Protein Powder?
Absolutely! While vanilla or cookies and cream protein powder work best for flavor, you can use any protein powder you have on hand. Just keep in mind that flavored powders will change the final taste of the bars.
How Do I Store Leftovers?
Store any leftover bars in an airtight container in the refrigerator for up to 5 days. For longer storage, you can freeze individual bars wrapped tightly in plastic wrap, and then place them in a freezer bag for up to 2 months.
Can I Substitute Cream Cheese?
Yes! If you need a dairy-free option, you can use vegan cream cheese or even cottage cheese for a healthier alternative. Just keep in mind that different substitutes may alter the texture slightly.
How Can I Make These Protein Bars Vegan?
To make these bars vegan, substitute Greek yogurt with coconut yogurt, cream cheese with vegan cream cheese, and use maple syrup instead of honey. Make sure your protein powder is also plant-based!