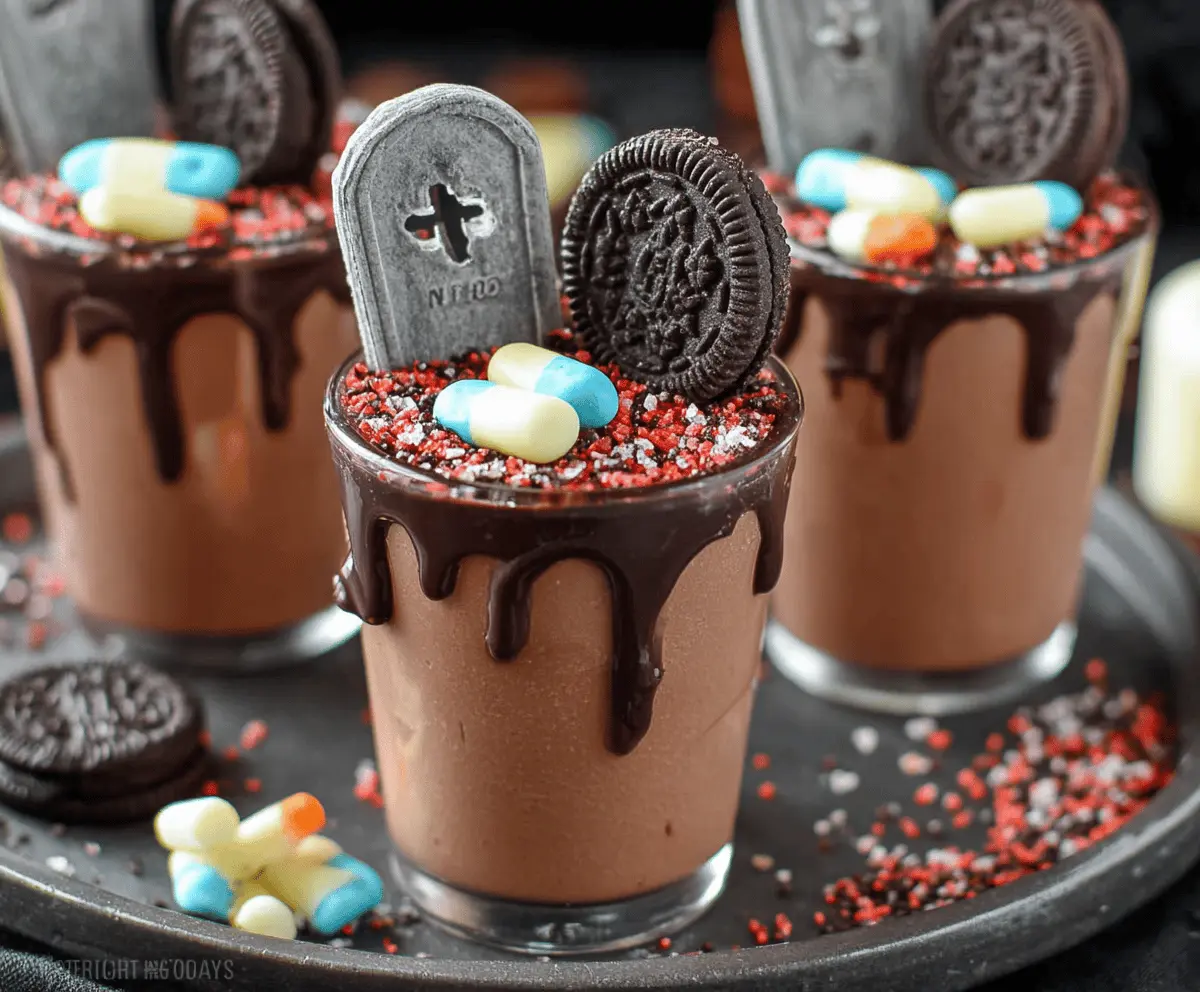
These spooky Graveyard Chocolate Pudding Cups are a fun and tasty treat! Made with creamy chocolate pudding and topped with crushed cookies to look like dirt, they are perfect for Halloween.
Sometimes, I add gummy worms for a squirmy surprise, and it just makes everyone giggle! They’re so easy to make – just mix, layer, and enjoy. Perfect for any party!
Key Ingredients & Substitutions
Chocolate Sandwich Cookies: Oreo cookies are perfect for this recipe because they add a nice chocolate flavor and texture. If you’re looking for a gluten-free option, try using gluten-free chocolate sandwich cookies.
Instant Chocolate Pudding Mix: This gives the cups a rich chocolate flavor. If you’re feeling adventurous, you can substitute with vanilla pudding and add cocoa powder for a chocolate twist!
Milk: Whole milk makes the pudding creamier, but you can use 2% or almond milk for a lighter version. Just remember that the thickness may vary with different milk types.
Whipped Cream: I like the lightness of whipped cream, but you can substitute with whipped coconut cream for a dairy-free option. It’ll add a nice flavor too.
Edible Decorations: Use any candy toppings you like! Candy corn would make a great seasonal touch instead of the colored chocolates.
How Do You Achieve the Perfect Layering Technique?
Layering your pudding cups takes a bit of care, but it’s easy! Start with crushed cookies at the bottom and create even layers for a lovely presentation. Make sure your pudding is thick enough so it doesn’t mix with the cookie layer.
- Divide the crushed cookies evenly and press them gently into the bottom of each cup for a strong base.
- Once you’ve added the pudding, use a spoon or piping bag for clean lines. This makes your layers look neat!
- Don’t forget to layer some crushed cookies on top to maintain that dirt appearance.
- Finish with a dollop of whipped cream to give it that final touch and place your tombstones carefully so they stand out.
Graveyard Chocolate Pudding Cups
Ingredients You’ll Need:
For the Pudding Cups:
- 2 cups crushed chocolate sandwich cookies (like Oreos), divided
- 2 (3.9 oz) packages instant chocolate pudding mix
- 3 1/2 cups cold milk
- 1 cup whipped cream or whipped topping
For Decoration:
- Whole or half Oreo cookies for tombstones
- Colored candy-coated chocolates (like M&Ms)
- Optional: gummy worms or candy bones for decoration
How Much Time Will You Need?
This recipe takes about 10 minutes to prepare, plus an additional 5 minutes for the pudding to set. It’s a quick treat to whip up for Halloween or any spooky occasion. Don’t forget to chill your cups afterward before serving!
Step-by-Step Instructions:
1. Mixing the Pudding:
Start by whisking the instant chocolate pudding mix and cold milk in a large bowl. Keep whisking until the mixture thickens, which should take about 2 minutes. Once thickened, let it sit in the refrigerator for about 5 minutes to firm up even more.
2. Preparing the “Dirt”:
While the pudding sets, take 1 1/2 cups of the chocolate sandwich cookies and crush them finely to resemble dirt. You can use a food processor or place them in a zip-lock bag and crush them with a rolling pin.
3. Layering the Cups:
Now it’s time to assemble! Take your clear serving cups and place half of the crushed cookies at the bottom of each cup to create the base layer.
4. Adding the Pudding:
Next, spoon or pipe the chocolate pudding evenly over the cookie base. Make sure to fill each cup just up to the top of the cookie layer.
5. Creating the Dirt Layer:
Sprinkle the remaining crushed cookies generously on top of the pudding layer. This will resemble the “dirt” of your graveyard!
6. Topping It Off:
Add a delightful dollop of whipped cream on top of each cup. It’s the fluffy cloud on your graveyard scene!
7. Designing the Graveyard:
Now for the fun part! Insert a whole or half Oreo cookie into the whipped cream as a tombstone on top of the pudding. This adds an eerie yet tasty touch to your cups.
8. Final Touches:
Sprinkle some colorful candy-coated chocolates on the dirt for decoration. They add a pop of color and make it playful!
9. Optional Spooky Additions:
If you want to enhance the spooky vibe, feel free to add gummy worms or candy bones around the tombstone. It makes the whole dessert even more fun!
10. Chill and Serve:
Finally, cover the cups and chill them in the refrigerator until you’re ready to serve. These treats are best enjoyed cold!
Enjoy your fun, creepy Graveyard Chocolate Pudding Cups — perfect for Halloween parties or anytime you want a deliciously spooky treat!

Can I Use Different Types of Cookies for the Dirt Layer?
Absolutely! While Oreos are classic, you can use any chocolate sandwich cookies or even graham crackers for a lighter flavor. Just make sure they can be crushed finely for that dirt texture.
How Can I Make This Recipe Dairy-Free?
You can easily convert this recipe to be dairy-free by using non-dairy milk (like almond, coconut, or soy milk) and dairy-free whipped topping. Look for instant pudding brands that don’t contain dairy for a fully dairy-free option.
Can I Prepare These Pudding Cups Ahead of Time?
Yes! You can make these cups a day in advance. Just assemble them, cover with plastic wrap, and store them in the refrigerator. They’ll stay fresh, and the flavors will meld beautifully!
What Is the Best Way to Store Leftover Pudding Cups?
Store any leftovers in an airtight container in the refrigerator. They should be good for up to 2-3 days. Just give them a quick stir if the pudding separates slightly before serving!