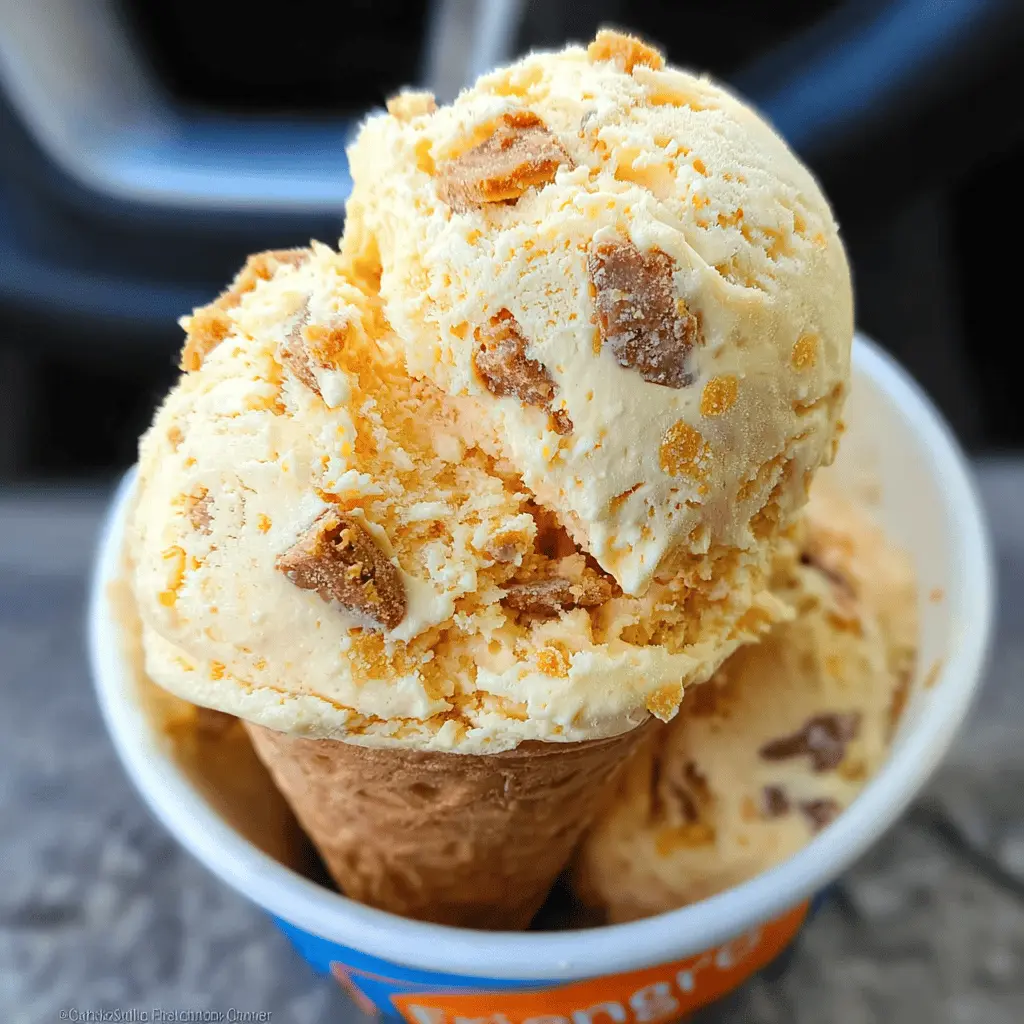
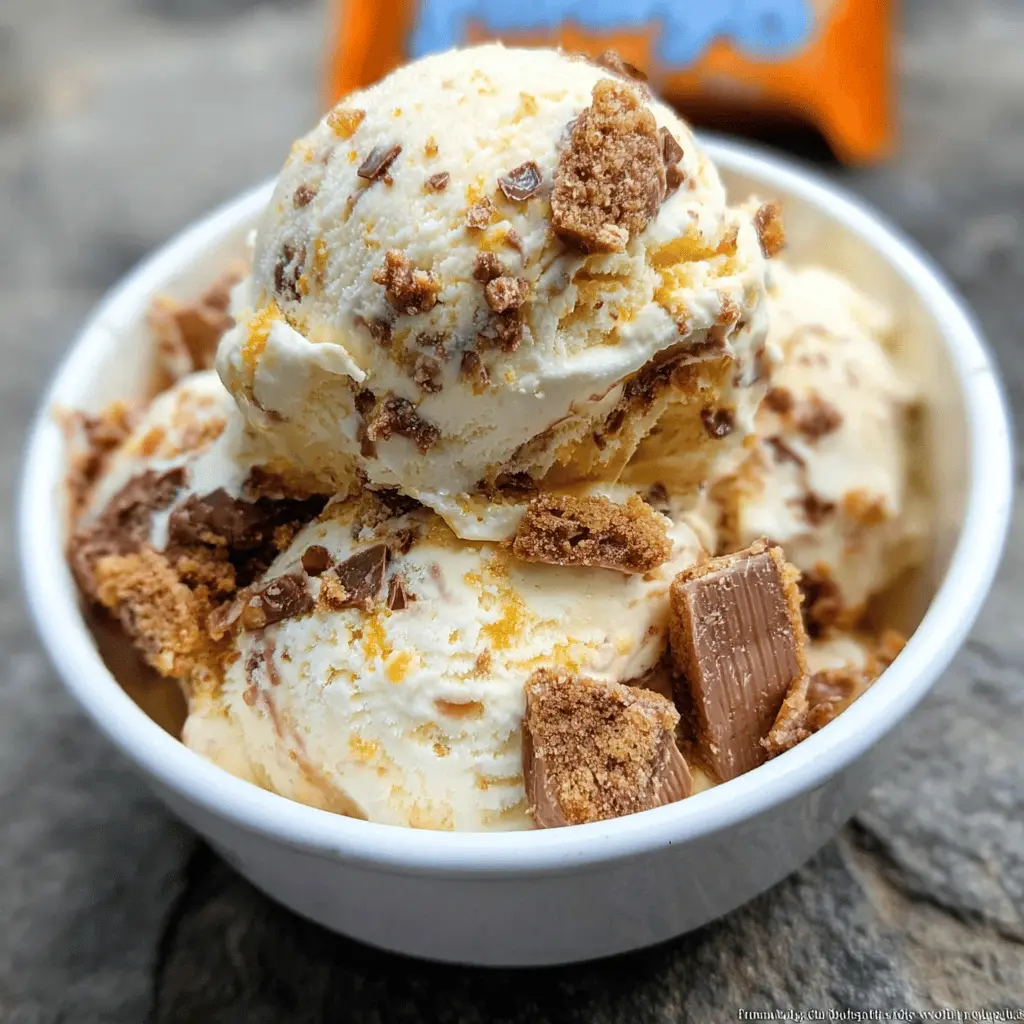
This Easy Homemade Butterfinger Ice Cream is a treat you’ll love! With creamy vanilla ice cream and crunchy Butterfinger pieces, it’s a fun delight for any day.
Making it is a breeze! Just mix, freeze, and enjoy. My favorite part? Sneaking a bite before it’s fully frozen—it’s like a sweet little secret! 🍦
Key Ingredients & Substitutions
Heavy Cream: This is crucial for a rich texture. If you need a lighter option, you can use half-and-half, but the creaminess will be reduced. For a dairy-free version, look for coconut cream as a substitute.
Sweetened Condensed Milk: This ingredient is what makes the ice cream creamy and sweet. If you’re watching your sugar, you can find low-sugar or sugar-free varieties. Evaporated milk can also work in a pinch, just add a little extra sugar.
Butterfinger Candy Bars: These give the ice cream its signature flavor. If you prefer a different candy, Reese’s Peanut Butter Cups or a similar chocolate-peanut butter candy can be great alternatives. You can even try chopped nuts for a crunchy twist.
How Do You Whip the Cream to the Right Consistency?
Whipping cream is a vital step to create light and fluffy ice cream. Here’s how to do it right:
- Ensure your mixing bowl and beaters are cold. This helps the cream whip better.
- Start whipping on a medium speed until it begins to thicken, then increase to high speed.
- Stop when stiff peaks form, meaning the cream stands up when you lift the beaters.
Be careful not to over-whip, as this can turn the cream into butter. Just whip until you see peaks, and you’re good to go!
Easy Homemade Butterfinger Ice Cream
Ingredients You’ll Need:
- 2 cups heavy cream
- 1 (14 oz) can sweetened condensed milk
- 1 teaspoon pure vanilla extract
- 3-4 Butterfinger candy bars, chopped into small pieces
How Much Time Will You Need?
This delicious Butterfinger ice cream takes about 15 minutes of prep time, plus at least 6 hours to freeze. Total time is around 6 hours and 15 minutes.
Step-by-Step Instructions:
1. Whip the Cream:
Start by pouring the heavy cream into a large mixing bowl. Using an electric mixer, whip the cream on medium speed until soft peaks form. Once it begins to thicken, increase to high speed until stiff peaks form. This means the cream will hold its shape and stand up when you lift the beaters.
2. Mix the Base:
Gently fold the sweetened condensed milk and vanilla extract into the whipped cream. Use a spatula to carefully combine the ingredients without deflating the whipped cream. This will keep your ice cream light and fluffy!
3. Add Candy Bars:
Now, take your chopped Butterfinger pieces and gently fold them into the mixture. Make sure they are evenly distributed so you get a little piece of Butterfinger in every scoop!
4. Freeze the Mixture:
Pour the entire mixture into a freezer-safe container. Smooth the top with a spatula to level it out. Cover the container with a lid or plastic wrap to keep the ice cream fresh while it freezes.
5. Freeze Until Firm:
Place the container in the freezer and let it chill for at least 6 hours, or until the ice cream is firm enough to scoop. If you can wait longer, it’s even better!
6. Serve and Enjoy:
Once your ice cream is frozen, scoop it into bowls and enjoy! Each bite will be a delightful mix of creamy vanilla and crunchy Butterfinger. Perfect for a warm day or any time you want a sweet treat!
FAQ for Easy Homemade Butterfinger Ice Cream
Can I Use a Different Type of Cream?
Yes, you can substitute half-and-half for the heavy cream for a lighter version, but the texture will be less creamy. For a dairy-free option, try using coconut cream, which will add a unique flavor!
How Can I Store Leftover Ice Cream?
Store any leftover ice cream in an airtight container in the freezer. It will stay fresh for up to two weeks. Just let it sit out for a few minutes at room temperature before scooping if it gets too hard.
Can I Add Other Mix-Ins?
Absolutely! Feel free to customize your ice cream with other mix-ins like chopped nuts, chocolate chips, or even different candy bars. Just be sure to fold them in gently, so you maintain the light texture.
Is It Possible to Make This Without an Electric Mixer?
Yes! While using an electric mixer is the easiest way to whip the cream, you can do it by hand with a whisk. It will just take more time and effort to achieve the same stiff peaks.