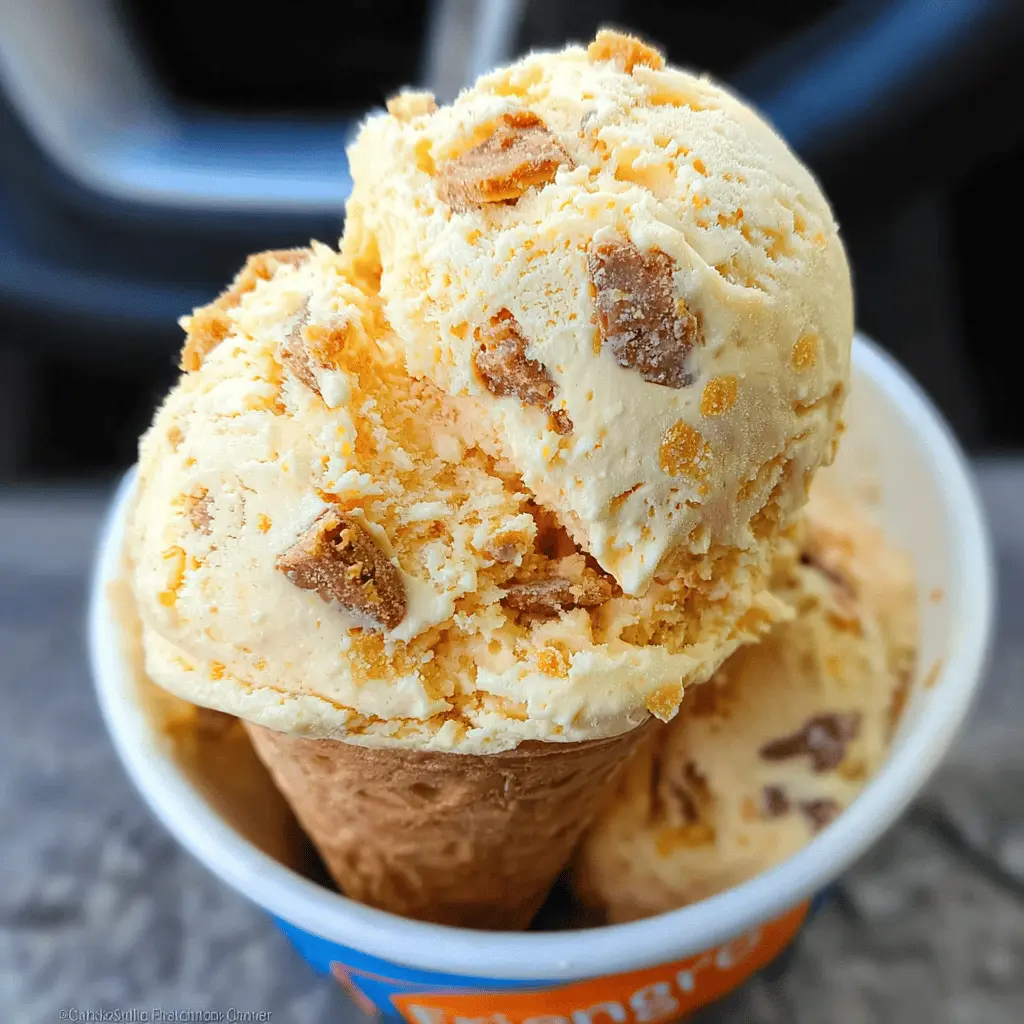
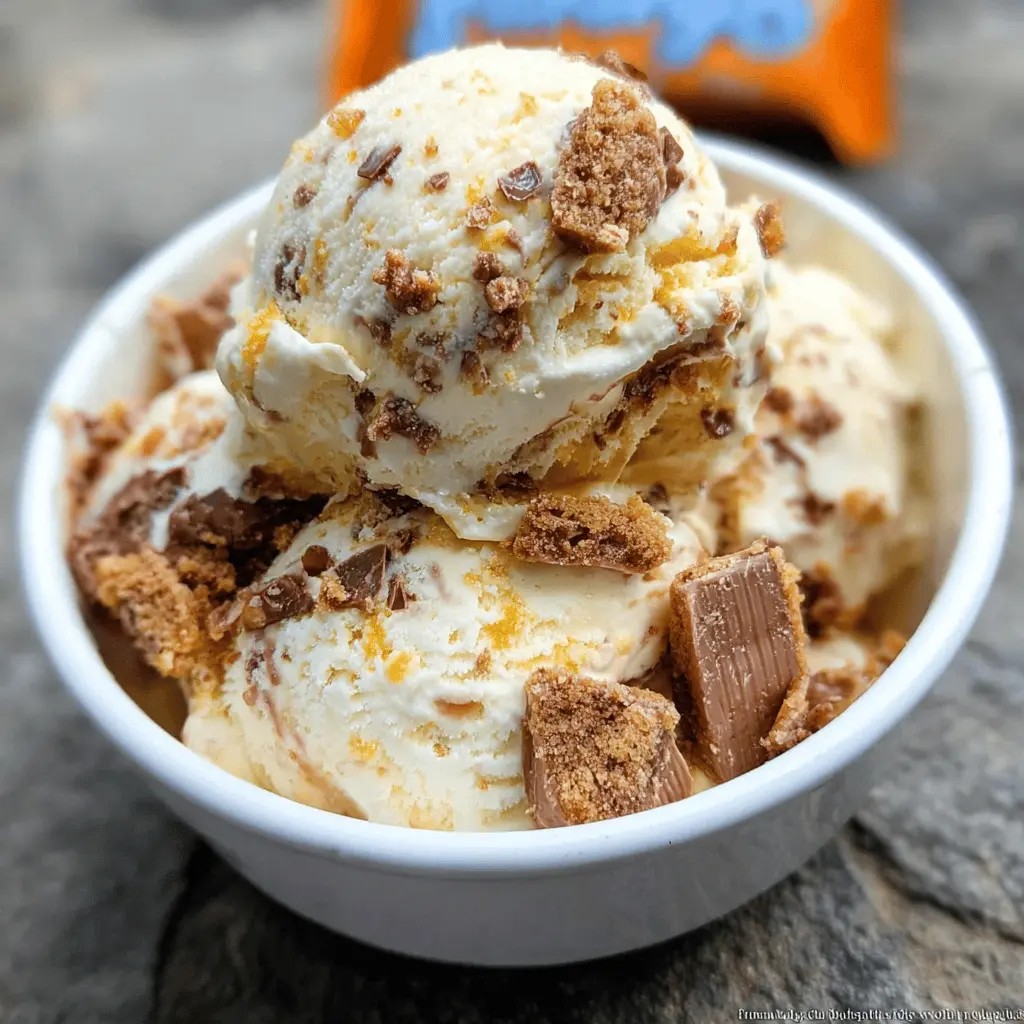
This Easy Homemade Butterfinger Ice Cream is a tasty treat with smooth vanilla ice cream and crunchy bits of Butterfinger candy mixed in. It’s a fun way to enjoy your favorite candy!
I love making this ice cream because it’s super simple and always a hit. Plus, who wouldn’t want to snack on Butterfinger pieces while making it? Just scoop, mix, and freeze!
Key Ingredients & Substitutions
Heavy Cream: This is crucial for a rich and creamy texture. If you’re looking for a lower-fat option, try using half-and-half, but the texture may be less creamy.
Whole Milk: Whole milk gives the ice cream a smooth consistency. You can substitute it with 2% milk or almond milk for a lighter version, but the flavor and creaminess will differ slightly.
Sugar: Granulated sugar provides sweetness. For a healthier substitute, consider using honey or agave nectar; just remember to adjust the quantity since they’re sweeter than sugar.
Vanilla Extract: Pure vanilla gives a wonderful flavor. If you don’t have it, imitation vanilla extract works, though it may be less aromatic.
Butterfinger Candy Bars: These provide that delicious crunch and flavor. If you want a different taste, try using Reese’s Peanut Butter Cups or any other chocolate-bar candy for a fun twist!
How Do You Get the Perfect Creamy Texture in Homemade Ice Cream?
Getting that creamy dreaminess in your homemade ice cream is all about the method. Here’s what you need to do:
- Mix the ingredients well—ensure the sugar completely dissolves in the mixture. This helps prevent icy crystals.
- Churn it! An ice cream maker is key. It quickly incorporates air, giving your ice cream a smooth texture. If you don’t have one, you can freeze the mixture in a container and stir every 30 minutes for about 2-3 hours.
- Add your Butterfinger pieces toward the end. This allows them to mix in without getting overly broken up, maintaining that perfect crunchy texture.
- Be patient with freezing. After churning, let it freeze a bit longer to firm up. This final freeze is essential for a scoopable ice cream.
Easy Homemade Butterfinger Ice Cream
Ingredients You’ll Need:
- 2 cups heavy cream
- 1 cup whole milk
- 3/4 cup granulated sugar
- 1 tablespoon pure vanilla extract
- 3/4 cup crushed Butterfinger candy bars (about 3-4 bars)
How Much Time Will You Need?
Making this delicious Butterfinger ice cream will take about 10 minutes of prep time, plus around 20-25 minutes to churn in the ice cream maker. After that, you’ll need to freeze it for at least 3-4 hours to let it firm up properly. So, in total, plan for about 4-5 hours from start to finish, but most of this is just waiting time!
Step-by-Step Instructions:
1. Mix The Ingredients:
Start by pouring the heavy cream and whole milk into a large mixing bowl. Add the granulated sugar and vanilla extract to the bowl. Using a whisk, mix everything together until the sugar is completely dissolved. You want a nice, smooth mixture without any graininess.
2. Churn In Your Ice Cream Maker:
Now, pour that creamy mixture into your ice cream maker. Follow the manufacturer’s instructions and churn it for about 20-25 minutes. You’ll want to watch as it thickens into a deliciously soft-serve consistency!
3. Add The Butterfinger Bits:
As the ice cream is nearing the end of its churning time, slowly add the crushed Butterfinger pieces in the last 5 minutes. This will help distribute those yummy, crunchy bits throughout your ice cream without turning them into dust.
4. Freeze Until Firm:
Once you’ve added the Butterfinger, transfer your soft ice cream into an airtight container. Make sure to seal it tightly! Place it in the freezer for at least 3-4 hours, or until it’s fully firm. This step is important for that perfect scoopable texture.
5. Serve and Enjoy!
After the waiting game, it’s finally time to enjoy your homemade Butterfinger ice cream! Scoop it into bowls and indulge in the creamy goodness speckled with crunchy Butterfinger pieces. Perfect for a hot day or just when you’re craving a sweet treat!
FAQs About Easy Homemade Butterfinger Ice Cream
Can I Use Other Candy Instead of Butterfingers?
Absolutely! Feel free to substitute Butterfingers with your favorite candy bars like Reese’s Peanut Butter Cups, Snickers, or even crushed Oreos for a different flavor twist.
How Long Does Homemade Ice Cream Last in the Freezer?
Your homemade Butterfinger ice cream can last in the freezer for up to 2-3 weeks when stored in an airtight container. Just be mindful of leaving it too long, as it may develop ice crystals over time.
What If I Don’t Have an Ice Cream Maker?
No problem! You can pour the mixture into a shallow dish and freeze it. Every 30 minutes, stir it vigorously with a fork to break up any ice crystals, repeating this process for about 2-3 hours until it’s creamy and firm.
Can I Make This Ice Cream Vegan or Dairy-Free?
Yes! Substitute the heavy cream and whole milk with full-fat coconut milk or almond milk, and use a dairy-free sugar option. The flavor will be slightly different, but it will still be delicious!