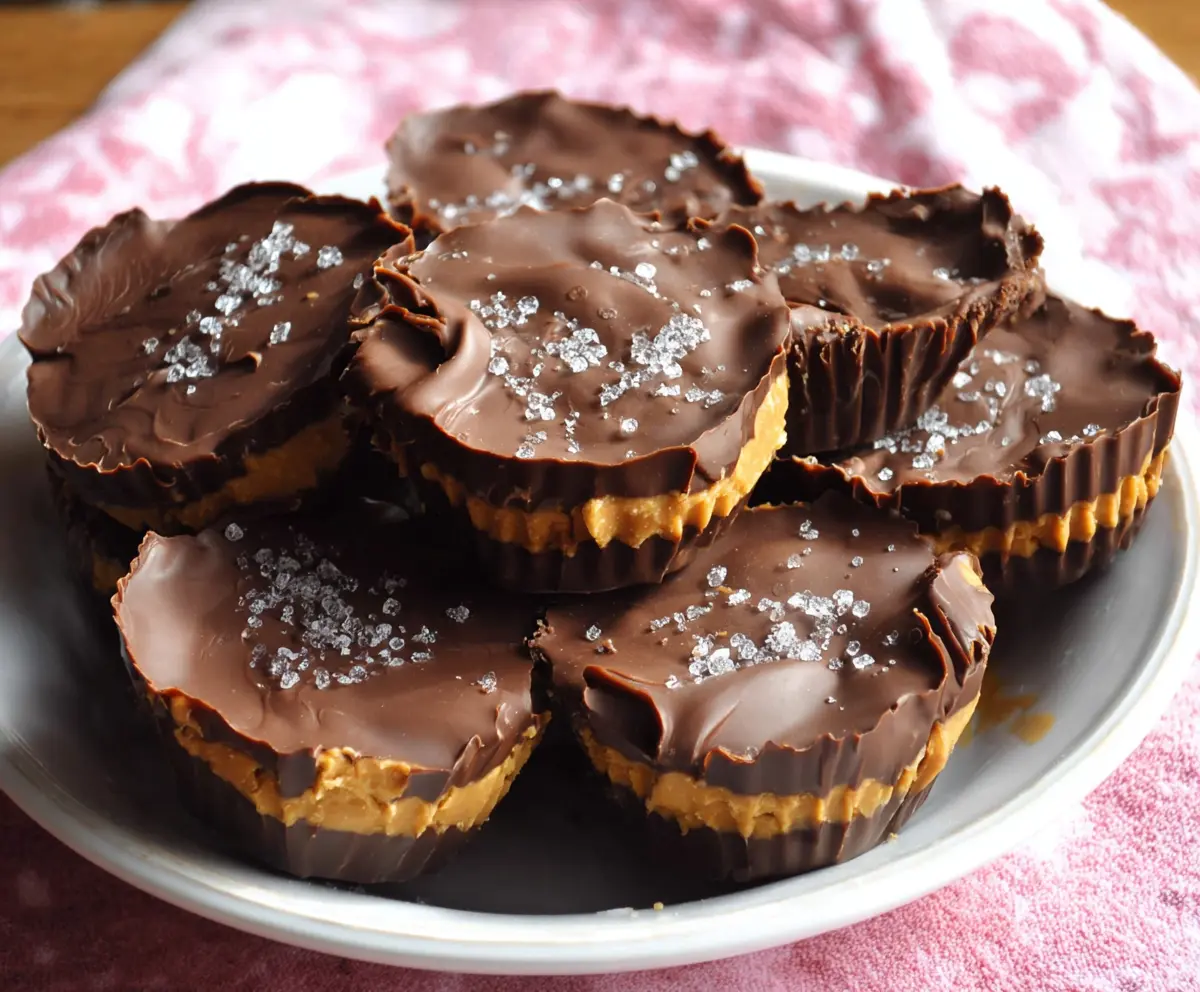
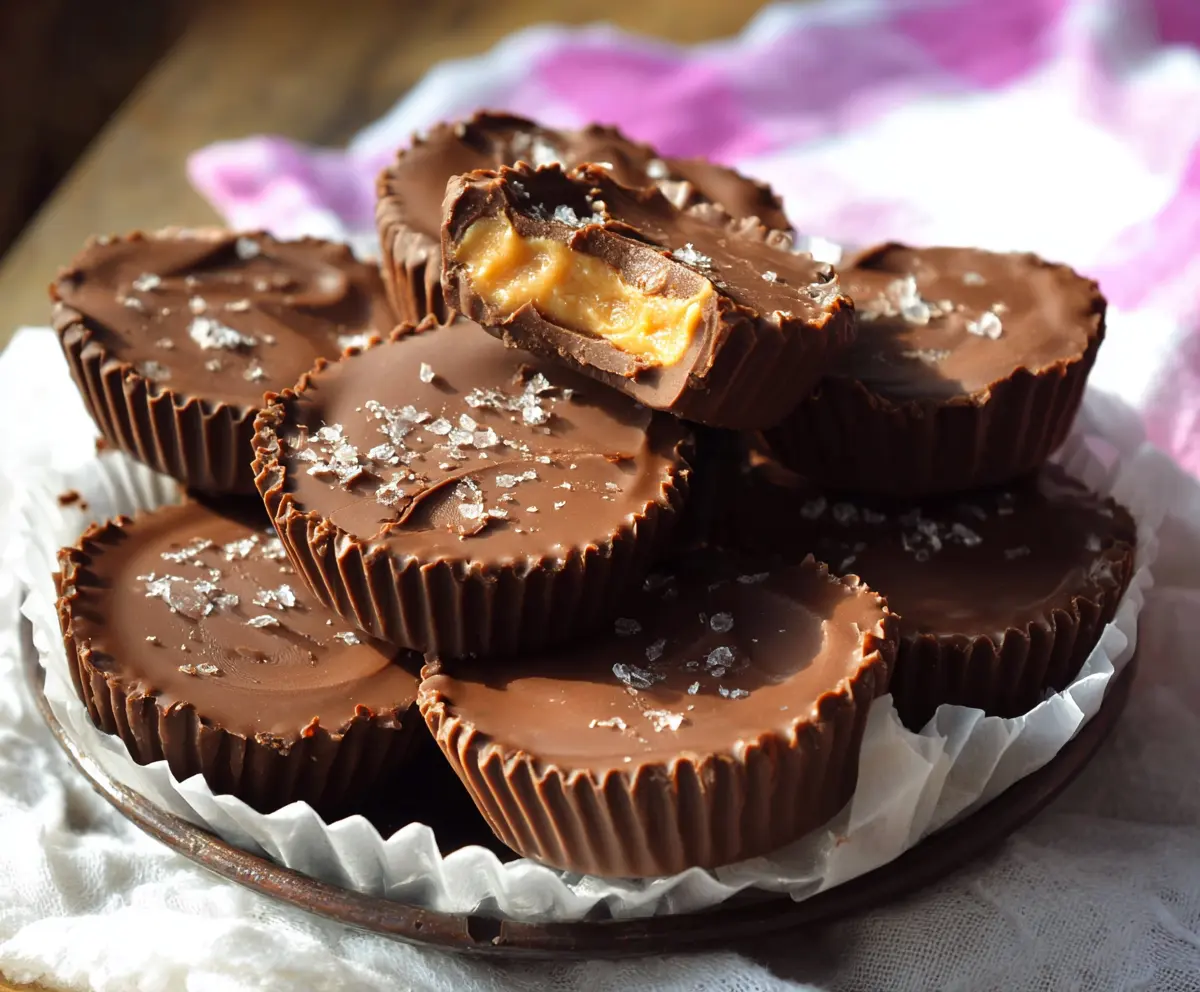
Chocolate peanut butter cups are the perfect sweet treat! With a smooth peanut butter center wrapped in rich chocolate, they’re hard to resist. Yum!
Honestly, making these at home is so simple! I love popping them in the fridge to chill and then enjoying one (or two) right away. Who can say no to that combo? 😄
Key Ingredients & Substitutions
Peanut Butter: I recommend using smooth peanut butter for a creamy texture. If you’re nut-free, try sun butter or almond butter as alternatives. Stick to unsweetened or lightly salted varieties to control sweetness and salt levels.
Unsalted Butter: This helps balance the flavors in the filling. If you’re dairy-free, you can substitute with coconut oil or a dairy-free butter spread to get that creamy consistency.
Powdered Sugar: Essential for sweetness and smoothness. If you’re looking for a healthier option, consider using coconut sugar blended into a fine powder, or maple syrup, but be mindful of the consistency.
Chocolate Chips: Semi-sweet or dark chocolate chips are perfect for coating. If you’d prefer, milk chocolate can work too. For vegan options, choose dairy-free chocolate chips, which taste great!
Coconut Oil: Adding oil makes the chocolate smoother for pouring. If you don’t have it, a neutral vegetable oil will work fine, though I think coconut oil gives a nice flavor.
What’s the Best Way to Melt Chocolate Smoothly?
Melted chocolate can be tricky, but following a few simple steps makes it easy! To achieve a smooth, creamy chocolate for your cups, here’s what to do:
- Use a microwave-safe bowl. Combine chocolate chips and optional coconut oil.
- Microwave in 30-second intervals, stirring after each, until melted. This helps avoid burning!
- Once melted, stir gently to combine and make sure it’s silky. If it’s too thick, you can add a bit more oil.
Remember, patience is key. Melting too quickly can lead to a grainy texture, so take your time.
How to Make Chocolate Peanut Butter Cups
Ingredients You’ll Need:
For the Filling:
- 1 cup smooth peanut butter (unsweetened or lightly salted)
- 1/4 cup unsalted butter, softened
- 1/4 cup powdered sugar, sifted
For the Chocolate Coating:
- 1 1/2 cups semi-sweet or dark chocolate chips
- 1 tablespoon coconut oil or vegetable oil (optional, for smoother chocolate)
For Topping:
- Flaky sea salt, for sprinkling on top
How Much Time Will You Need?
This delightful treat will take about 15 minutes to prepare and then another 30 minutes to chill in the freezer. With a total of around 45 minutes, you’ll have delicious homemade chocolate peanut butter cups ready to enjoy.
Step-by-Step Instructions:
1. Prepare the Muffin Tin:
Start by lining a muffin tin with cupcake liners, or you can use silicone muffin molds. This makes it super easy to take the cups out later!
2. Mix the Peanut Butter Filling:
In a medium bowl, combine the smooth peanut butter, softened butter, and sifted powdered sugar. Use a spatula or a spoon to mix it all together until it’s nice and smooth. Make sure everything is well incorporated—no lumps allowed!
3. Melt the Chocolate:
In a microwave-safe bowl, combine your chocolate chips and the coconut oil if you’re using it. Pop it into the microwave and heat it up in 30-second bursts. After each burst, stir well. Keep going until the chocolate is fully melted and smooth. This will take about 1-2 minutes, depending on your microwave.
4. Create the Chocolate Base:
Take about 1 teaspoon of the melted chocolate and spoon it into the bottom of each muffin liner. Use the back of your spoon to spread it evenly across the bottom, creating a nice base layer. Yum!
5. Chill the Base:
Put the muffin tin in the freezer for about 10 minutes, or until the chocolate bottom is solid and set. This step is crucial for holding everything together!
6. Add the Peanut Butter Layer:
Once the chocolate base is set, take your peanut butter mixture. Form small balls or spoonfuls and gently press them into the chocolate layer in each cup. Flatten them slightly to create an even layer.
7. Top with More Chocolate:
Pour the remaining melted chocolate over the peanut butter layer in each cup, covering them completely. We want all that delicious peanut butter hidden under a chocolate blanket!
8. Sprinkle with Sea Salt:
While the chocolate is still wet, sprinkle a little flaky sea salt on top of each cup. This adds a nice little flavor boost!
9. Final Chill:
Return the muffin tin to the freezer and let it chill for at least 30 more minutes until the chocolate is firm. Patience is key, but it will be worth it!
10. Serve and Enjoy:
Once set, gently peel the peanut butter cups out of the liners or molds. Store them in an airtight container in the refrigerator until you’re ready to serve. Enjoy your delicious homemade Chocolate Peanut Butter Cups!
Can I Use Natural Peanut Butter Instead of Regular Peanut Butter?
Absolutely! Natural peanut butter works well, but it may be a bit runnier. If it’s more liquidy, you might want to adjust the powdered sugar to achieve the desired consistency for the filling.
How Should I Store Leftover Peanut Butter Cups?
Store any leftovers in an airtight container in the refrigerator for up to two weeks. You can also freeze them for longer storage; just make sure to separate layers with parchment paper!
Can I Make These Vegan?
Yes! Simply use dairy-free chocolate chips and substitute the butter with a plant-based butter or coconut oil. You’ll still end up with delicious treats without any animal products.
What Can I Use Instead of Cupcake Liners?
If you don’t have cupcake liners, silicone muffin molds work great! You can also lightly grease the muffin tin with a bit of oil to help release the cups easily.


