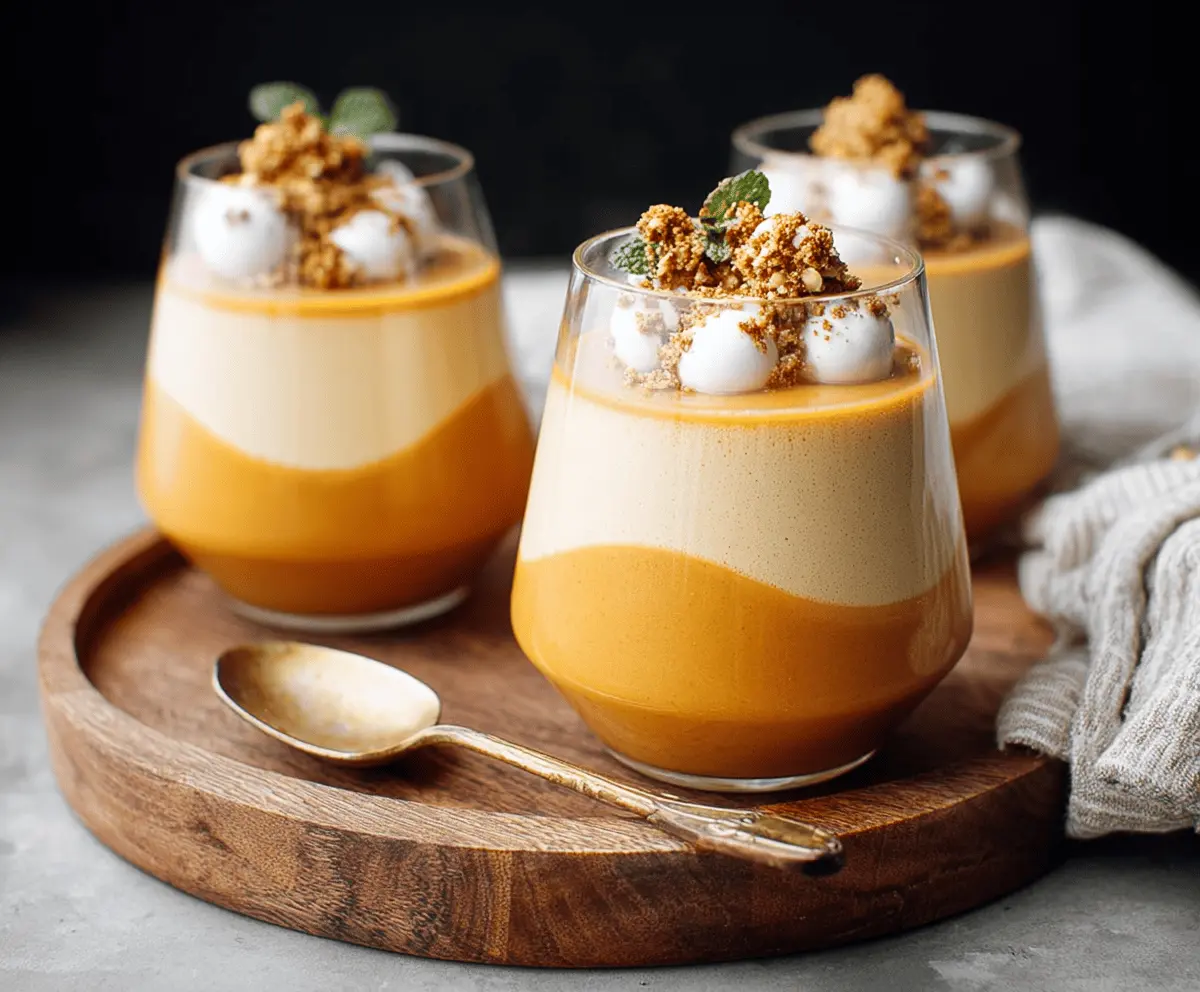
This pumpkin panna cotta is a creamy, dreamy dessert that’s a perfect treat for fall! With a hint of spice and that gorgeous orange color, it’s sure to impress.
I love serving it with a sprinkle of cinnamon on top. It always gets cozy vibes from everyone at the table. Who could resist that? 🍂💛
Key Ingredients & Substitutions
Pumpkin Puree: You can use canned pumpkin puree for ease. If you prefer fresh, make sure to cook and puree it well to get that smooth texture.
Sugar: Regular granulated sugar works well, but you could substitute with maple syrup for a hint of extra flavor. Use less syrup, as it’s sweeter than sugar.
Gelatin: If you’re looking for a vegetarian option, you can use agar-agar instead of gelatin. Just follow the package instructions for the right ratio.
Heavy Cream: For a lighter version, consider using half-and-half or coconut cream for a dairy-free option. Coconut cream will give a nice flavor twist!
How Do You Get Perfectly Layered Panna Cotta?
To achieve those stunning layers, timing and texture are crucial. You need to let the first layer set before adding the second, or else they will mix and spoil the look!
- Make sure the pumpkin layer has cooled to room temperature before refrigerating. It should be slightly tacky on the surface when you’re ready to add the vanilla layer.
- Pour the vanilla layer slowly over the back of a spoon. This helps it sit gently atop the pumpkin layer without disturbing it.
Chilling for long enough in the fridge will also help maintain those layers. Aim for at least 4 hours, but overnight is best! Happy layering!
How to Make Pumpkin Panna Cotta
Ingredients You’ll Need:
For Pumpkin Layer:
- 1 cup pumpkin puree (canned or fresh)
- 1/4 cup granulated sugar
- 1 tsp pumpkin pie spice
- 1 1/2 cups heavy cream
- 1 tsp vanilla extract
- 2 tsp gelatin powder
- 3 tbsp cold water
For Vanilla Layer:
- 1 1/2 cups heavy cream
- 1/4 cup granulated sugar
- 1 tsp vanilla bean paste or extract
- 2 tsp gelatin powder
- 3 tbsp cold water
For Garnish:
- Whipped cream or coconut whipped cream
- Crumbled spiced cookie or granola
- Fresh mint leaves (optional)
- Ground cinnamon or nutmeg (optional)
How Much Time Will You Need?
This delicious pumpkin panna cotta will take you about 30 minutes of hands-on prep time. After that, you’ll need to chill it in the refrigerator for at least 6 hours, preferably overnight for the best results. So, sit back and let the fridge do the hard work while you are dreaming about the yummy layers to come!
Step-by-Step Instructions:
1. Prepare Gelatin for Pumpkin Layer:
Start by sprinkling 2 teaspoons of gelatin over 3 tablespoons of cold water in a small bowl. Let it sit for about 5 minutes to bloom—this will help it dissolve better later on!
2. Make the Pumpkin Panna Cotta Base:
In a saucepan, mix together the pumpkin puree, sugar, pumpkin pie spice, heavy cream, and vanilla extract. Warm this mixture over medium heat, stirring occasionally until the sugar is dissolved and it’s hot, but don’t let it boil! Once it’s ready, take it off the heat and stir in the bloomed gelatin until it’s completely dissolved.
3. Pour the Pumpkin Layer:
Carefully pour the pumpkin mixture into serving glasses or molds until they are about half full. If you’re feeling fancy and want a layered look, you can tilt the glasses slightly to create an elegant wave effect. Now, refrigerate these for at least 2 hours until they are set but just slightly tacky on top.
4. Prepare Gelatin for Vanilla Layer:
Now it’s time to bloom the remaining gelatin. Sprinkle the 2 teaspoons of gelatin over 3 tablespoons of cold water in a bowl and wait 5 minutes.
5. Make the Vanilla Panna Cotta Base:
In a clean saucepan, combine the heavy cream, sugar, and vanilla bean paste or extract. Warm this gently until the sugar dissolves and it’s hot but again—no boiling! Remove it from heat and mix in the bloomed gelatin until dissolved.
6. Pour the Vanilla Layer:
Once the pumpkin layer is set, carefully pour the vanilla panna cotta on top of the pumpkin layer. You can pour it over the back of a spoon to help it sit gently on top, preventing them from mixing. Return the glasses to the fridge and chill for at least 4 hours or ideally overnight until fully set.
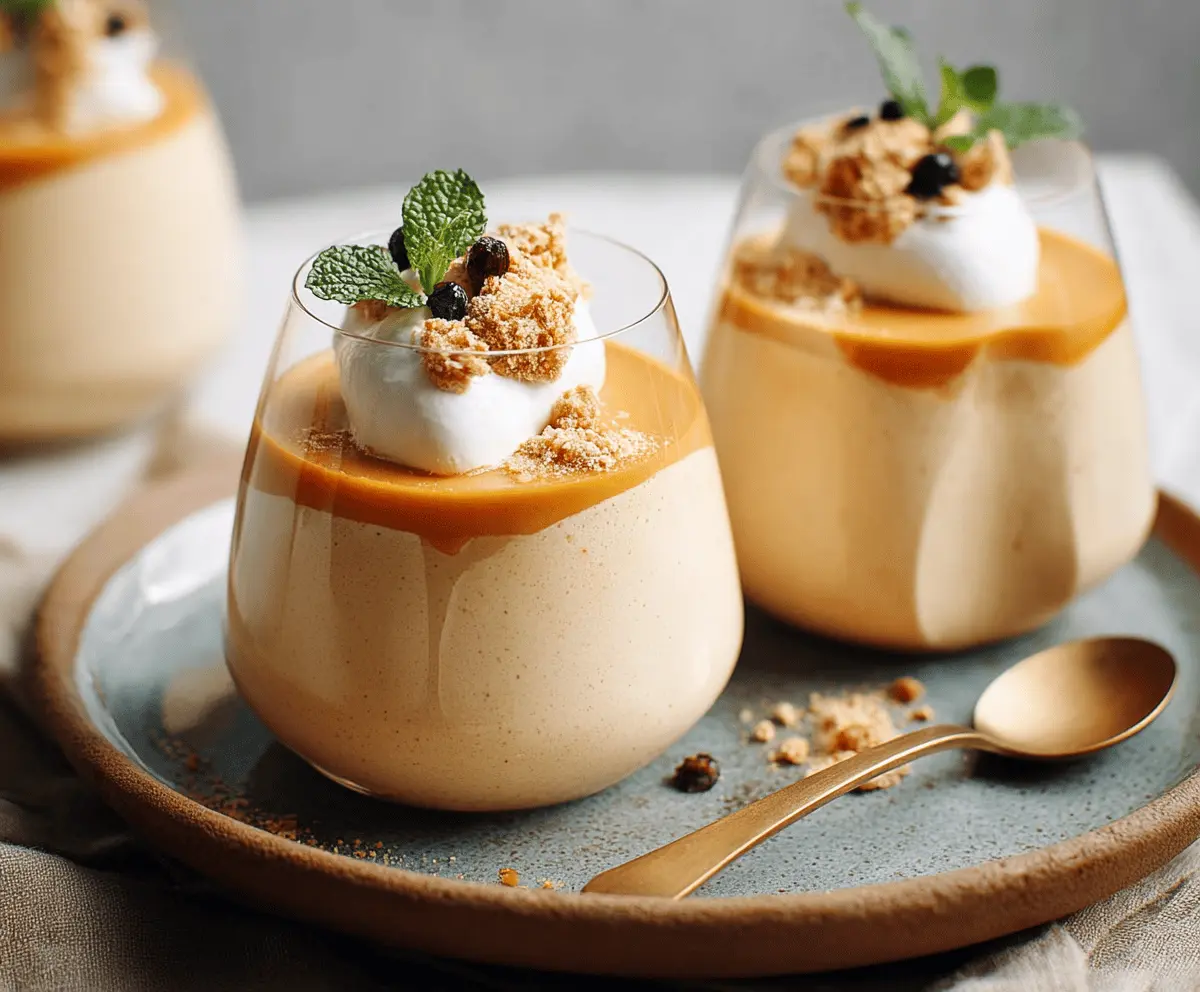
7. Garnish and Serve:
When you’re ready to serve, feel free to get creative! Top each panna cotta with a dollop of whipped cream, a sprinkle of crumbled spiced cookies or granola, a light dusting of cinnamon or nutmeg, and if you like, a lovely fresh mint leaf for that finishing touch. Serve chilled and enjoy your beautifully layered, creamy pumpkin panna cotta!
This delightful dessert blends the sweetness of pumpkin with a creamy vanilla panna cotta, enhanced by warm spices and a little crunch. Perfect for fall gatherings or cozy nights in! Enjoy every smooth, creamy bite!
Can I Use Store-Bought Pumpkin Puree?
Absolutely! Canned pumpkin puree is a convenient choice and works great in this recipe. Just make sure it’s pure pumpkin and not pumpkin pie filling, which contains added sugars and spices.
How Can I Make This Recipe Dairy-Free?
You can easily make this panna cotta dairy-free by using coconut cream instead of heavy cream. Just replace the cream in both the pumpkin and vanilla layers with an equal amount of thick, full-fat coconut cream for a delicious twist!
Can I Make This Ahead of Time?
Yes, definitely! This dessert is perfect for making ahead. You can prepare and assemble the panna cotta up to 2 days in advance. Just store it covered in the fridge until you’re ready to serve.
How Do I Store Leftovers?
Store any leftovers in an airtight container in the refrigerator for up to 3 days. To enjoy them later, just grab a spoon and dig in—no need to reheat!


