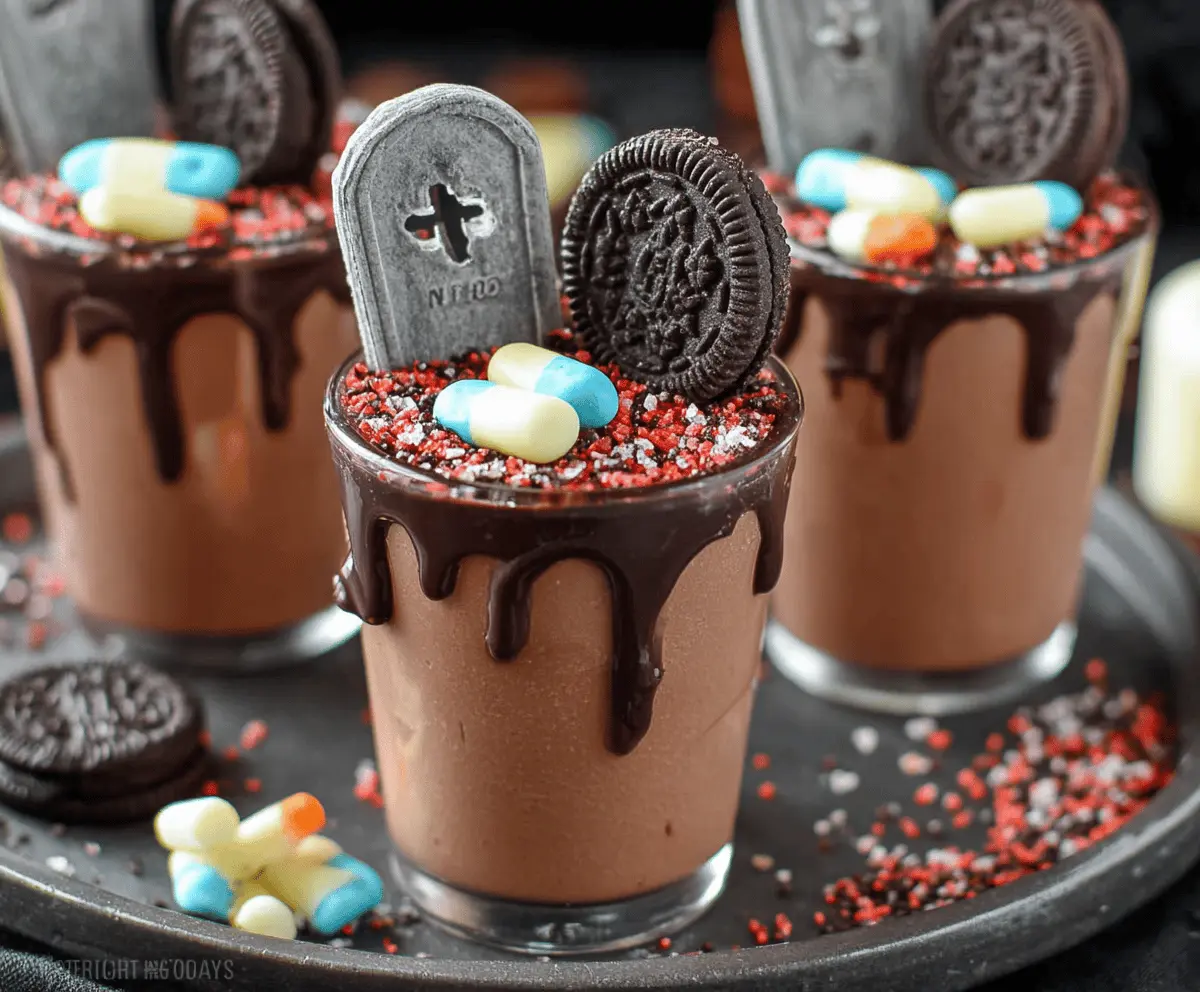
These Graveyard Chocolate Pudding Cups are spooky and fun! With smooth chocolate pudding topped with crushed cookies and gummy worms, they’re sure to delight both kids and adults.
Making these is a scream! Just layer your pudding, sprinkle the “dirt,” and add some creepy crawlers. They make a sweet treat for Halloween that’s super simple and oh-so-tasty!
Key Ingredients & Substitutions
Chocolate Pudding Mix: Instant pudding mix is super easy to work with! If you want a homemade touch, you can make pudding from scratch using cocoa powder, cornstarch, sugar, milk, and vanilla.
Chocolate Sandwich Cookies: Oreos are classic for the “dirt,” but any chocolate cookie works great! If you’re gluten-free, look for gluten-free chocolate sandwich cookies.
Whipped Topping: I prefer using Cool Whip for its convenience and texture. You can use homemade whipped cream too! Just whip heavy cream with a bit of sugar until soft peaks form.
Tombstone Decorations: You can make your own with sliceable candy or cookies. If you’re short on time, find edible decorations at the store that are themed for Halloween.
How Do You Make Perfect Layers Without a Mess?
Layering is key to making the best Graveyard Cups! Here are some tips for neat layers:
- Use clear cups to showcase the layers. A slightly wider base helps with stability.
- For the pudding layer, spoon it in gently and then smooth it with a small spatula or the back of the spoon.
- When adding cookie crumbs, tap the cup lightly on the counter to settle them and ensure even layers.
- Drizzle or dollop the whipped topping with a piping bag or a zip-top bag with a corner snipped off for a cleaner look.
Graveyard Chocolate Pudding Cups
Ingredients You’ll Need:
- 1 package (3.9 oz) instant chocolate pudding mix
- 2 cups cold milk
- 15 chocolate sandwich cookies (like Oreos), crushed finely for “dirt”
- 6 whole chocolate sandwich cookies (for tombstones)
- 1 cup whipped topping (like Cool Whip), plus extra for garnish
- Edible tombstone decorations or candy tombstones (optional)
- Assorted candy-coated chocolates (like M&Ms), for decoration
- Black decorating gel or edible marker (for decorating tombstones)
How Much Time Will You Need?
This fun recipe takes about 15 minutes of prep time to mix, layer, and decorate. You may want to refrigerate it for about 30 minutes before serving to chill everything well and let the flavors meld together. So, total time is around 45 minutes if you include chilling!
Step-by-Step Instructions:
1. Prepare the Pudding:
In a medium bowl, whisk together the instant chocolate pudding mix and the cold milk for about 2 minutes, or until it thickens up nicely. Once thickened, pop it in the fridge for about 5 minutes to fully set.
2. Make the “Dirt”:
Take the chocolate sandwich cookies and crush them finely so they look like dirt. You can place them in a plastic bag and crush with a rolling pin or use a food processor for quicker results!
3. Layer the Cups:
Grab your clear serving cups and spoon about 2 tablespoons of the crushed cookies into the bottom as the first layer. Then add a generous layer of chocolate pudding on top, smoothing it out nicely. Follow this with another thin layer of crushed cookies to create the “dirt” effect on top of the pudding.
4. Top It Off:
Pipe or spoon a dollop of whipped topping right on top for a fluffy effect. This will be the “graveyard soil!”
5. Create the Tombstones:
For the finishing touches, take the whole chocolate sandwich cookies and insert them vertically into the whipped topping to represent tombstones. Use black decorating gel or an edible marker to add crosses or the letters “RIP” on your cookies to make them extra spooky!
6. Final Decorations:
If you have edible tombstone candies, stand them up in the pudding too. To make it festive, scatter a few candy-coated chocolates around to resemble colorful candies scattered in a graveyard.
7. Serve & Enjoy:
Time to enjoy your Graveyard Chocolate Pudding Cups! Serve them immediately, or you can keep them in the fridge until you’re ready to wow your guests at the party!
These fun and delicious puddings are perfect for Halloween gatherings, and they’re sure to impress everyone with their playful design!

Can I Use Milk Alternatives in This Recipe?
Absolutely! You can substitute the cold milk with any plant-based milk, such as almond, soy, or oat milk. Just make sure it’s unsweetened to avoid altering the flavor of the pudding.
How Long Do These Pudding Cups Last?
These Graveyard Chocolate Pudding Cups can be stored in the fridge for up to 2 days. Just cover them with plastic wrap or a lid to keep them fresh. However, they are best enjoyed within the first day for optimal texture.
Can I Make These Pudding Cups Gluten-Free?
Yes! Use gluten-free chocolate sandwich cookies instead of regular ones. There are several brands available that offer gluten-free options, which will work perfectly for the “dirt” and tombstones in your cups.
How Can I Customize This Recipe?
You can easily customize these pudding cups by adding layers of crushed candy bars, switching to different flavored pudding, or using seasonal decorations like spooky sprinkles for Halloween or crunchy candy corn for autumn themes!


