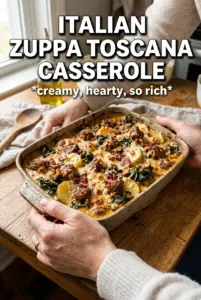
Golden cheddar, tender potatoes, and smoky kielbasa make this casserole the kind of dinner people keep circling back to. The edges get a little crisp, the center stays creamy, and every bite has that mix of salt, richness, and just enough onion and garlic to keep it from tasting heavy. It’s the sort of pan that disappears fast, especially when you bring it to the table bubbling hot.
What makes this version work is the way the sauce is built around sour cream and cream of chicken soup, then loosened with broth so it settles into the potatoes instead of sitting on top. Browning the kielbasa first matters too. That quick step gives you deeper flavor and keeps the sausage from tasting boiled under the cheese. Thin potato slices help the whole dish cook evenly without needing par-cooking or a long bake.
Below, I’ve added the small details that keep the potatoes tender, the sauce creamy, and the top nicely browned instead of dry. There’s also a few smart swaps if you need to work with what’s in the fridge.
The sauce stayed creamy all the way through and the potatoes were perfectly tender after the covered bake. Browning the kielbasa first gave it so much more flavor than I expected.
Save this kielbasa sausage cheesy potato casserole for nights when you want a bubbling, one-pan comfort dinner with creamy potatoes and a sharp cheddar finish.
The Trick to Keeping the Potatoes Tender, Not Dense
Thin slicing is the difference between a casserole that bakes evenly and one that leaves you with hard centers. Yukon golds are the right potato here because they stay creamy instead of falling apart, and they hold their shape long enough to give the dish some structure. If the slices are too thick, the cheese on top will brown before the potatoes are done.
The covered bake does the heavy lifting. Foil traps steam so the potatoes can soften before the top gets direct heat. If you uncover too early, the sauce tightens up before the middle is tender, and you end up with a browned top and undercooked layers underneath.
- Yukon gold potatoes — Their waxy, buttery texture works better than russets here. Russets can get fluffy, but they also break down faster and turn the casserole more starchy.
- Kielbasa — Browning it first adds flavor and keeps the slices from tasting flat. Turkey kielbasa works too, but it gives a leaner finish and a little less richness.
- Sharp cheddar — Use the sharpest cheddar you can find for the best flavor through all that creaminess. Pre-shredded cheese works in a pinch, but freshly shredded melts smoother.
- Sour cream — It brings tang and body to the sauce. Greek yogurt can stand in, but it will taste a little brighter and less round.
What Each Ingredient Is Actually Doing in This Recipe

- Primary ingredient (the star) — Quality matters most. Choose the best you can find.
- Cooking medium (oil, butter, or broth) — This carries flavors and prevents dryness.
- Seasonings (salt, pepper, spices, herbs) — Layer flavors so nothing overpowers. Build depth gradually.
- Aromatics (garlic, onion, herbs) — Cook with fat to bloom flavors. Become the foundation.
- Supporting ingredients — Complement the main ingredient without overpowering it.
- Sauce or liquid (if applicable) — Brings flavors together. Balance richness with acid.
- Acid (lemon, vinegar, wine, or other) — Brightens and prevents flat-tasting results.
- Final finish (garnish, glaze, or sauce) — Prevents one-dimensional taste and adds visual appeal.
What the Sauce Is Doing Before It Hits the Pan
The sauce needs to be whisked smooth before it goes anywhere near the potatoes. That keeps the sour cream and soup from clumping in pockets and helps the broth loosen everything into a pourable layer. This isn’t a thick gravy; it’s a creamy binder that should coat the potatoes and settle between the layers.
Garlic powder and onion powder do a different job than the fresh onion and garlic. The powders season the whole casserole evenly, while the fresh aromatics give you little bursts of flavor in the layers. If you skip the browning step or use only fresh garlic, the dish can taste one-note.
Building the Base
Start by browning the kielbasa in a skillet until the edges deepen and the slices pick up color. You are not cooking it through; you’re building flavor. Set it aside so it doesn’t keep releasing fat into the casserole, which can make the sauce greasy.
Layering for Even Cooking
Spread half the potatoes in the dish, then half the onion, garlic, kielbasa, sauce, and cheddar. Repeat with the rest. Try to keep the potato slices in a fairly even layer so the heat moves through at the same pace; if you mound them in the center, the middle will lag behind the edges.
Finishing Under Foil and Heat
Bake covered first, then uncover for the last stretch. The foil keeps the potatoes tender while the sauce loosens and the cheese melts through the layers. When you remove the foil, the top should turn bubbling and lightly bronzed, and a fork should slide into the potatoes without resistance.
Make it a little lighter
Use turkey kielbasa and reduced-fat sour cream for a less rich version. The casserole still comes out creamy, but the sauce will be a little looser and the finished dish won’t have quite the same savory depth.
Gluten-free version
Swap in a certified gluten-free cream of chicken soup and check your kielbasa label, since some brands use fillers with gluten. The texture stays the same, so this is an easy adjustment when you need it.
Extra cheesy top
Hold back a little cheddar for the final 10 minutes of baking if you want a thicker melted top. That gives you more of a cheesy crust, but it can also brown faster, so watch it once the foil comes off.
Make-ahead assembly
Assemble the casserole up to a day ahead, cover it tightly, and refrigerate it. Let it sit on the counter for 20 to 30 minutes before baking so the cold dish doesn’t slow down the potatoes too much.
Storage and Reheating
- Refrigerator: Store leftovers covered for up to 4 days. The sauce will thicken as it chills, which is normal.
- Freezer: It freezes, but the potatoes soften a bit after thawing. Freeze in portions for the best texture, tightly wrapped and sealed.
- Reheating: Reheat covered in a 350F oven until hot in the center. Add a splash of broth if it looks dry; microwaving straight from cold can make the potatoes go mealy around the edges.